Last updated on April 16th, 2026 at 11:53 am
So you finally got your first 3D printer—great decision.
But before you jump into printing everything you can find online, there are a few critical things you need to know. Most beginners make the same mistakes, and honestly, they can ruin prints, waste filament, and cause unnecessary frustration.
This guide walks you through 30 common 3D printing mistakes—from unboxing to slicing and printing—so you can avoid them right from the start.
Table of Contents
Before you even start
1. Not learning the basics beforehand
Before your 3D printer even shows up at your doorstep, take some time to understand the basics.
Learn how a 3D printer works and what the major parts, like the extruder or build plate do, so you’re not completely lost during setup.
Having slight knowledge of the slicer software, 3d modelling is also helpful.
There are tons of beginner-friendly tutorials on YouTube, and even free eBooks floating around.
A little knowledge now will save you hours of frustration later.
2. Rushing into assembly
When you unbox your 3D printer, don’t dive straight into assembly. First, lay out every single part — seriously, just spread them out on the table and check for any missing parts. It’s surprisingly common for a screw, bracket, or cable to be missing — or worse, broken.
Trust me, it’s worth five extra minutes.
3. Ignoring the manual and assembly videos
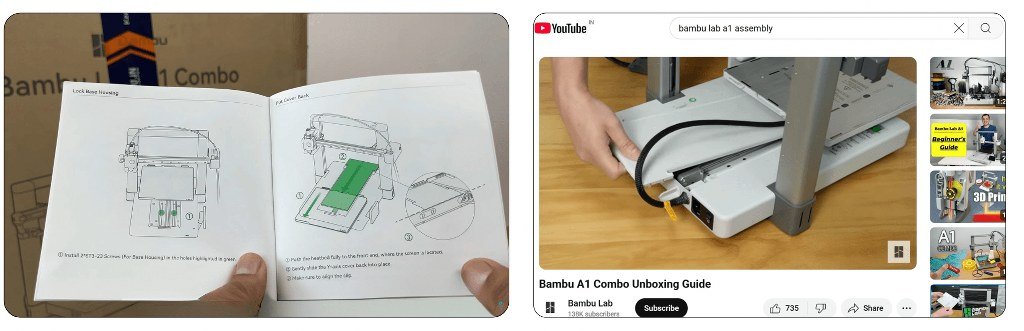
Before you start assembling your printer, take a few minutes to watch a proper assembly video of your exact printer model on YouTube.
It’ll show you little things the manual might skip, like cable routing or screw orientation.
And yes, the manual matters too.
Following both will save you from making mistakes that are annoying to undo later.
Setup Mistakes
4. Placing the printer on an unstable surface
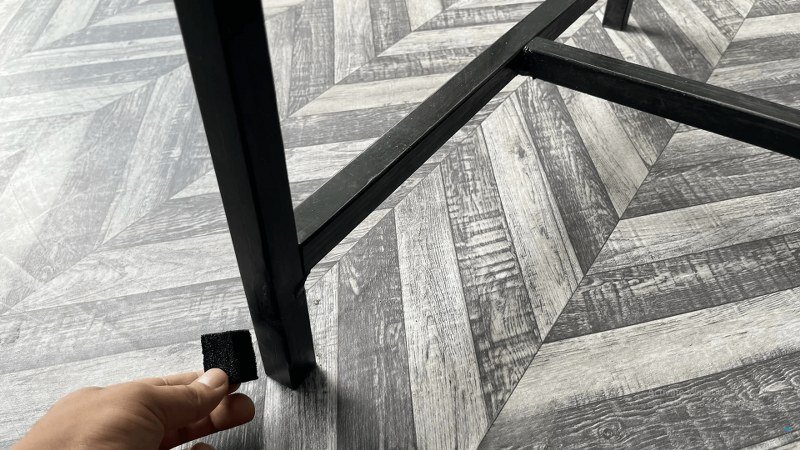
Once you’re done with the build, make sure your printer sits on a surface that’s completely flat and doesn’t wobble.
Even a slightly uneven table can produce a lot of unnecessary vibrations and noise. Sometimes it can also mess with your leveling and lead to poor first layers.
If you don’t have access to a better table, you can improve stability by adding rubber feet or placing foam pads underneath.
5. Not checking voltage settings
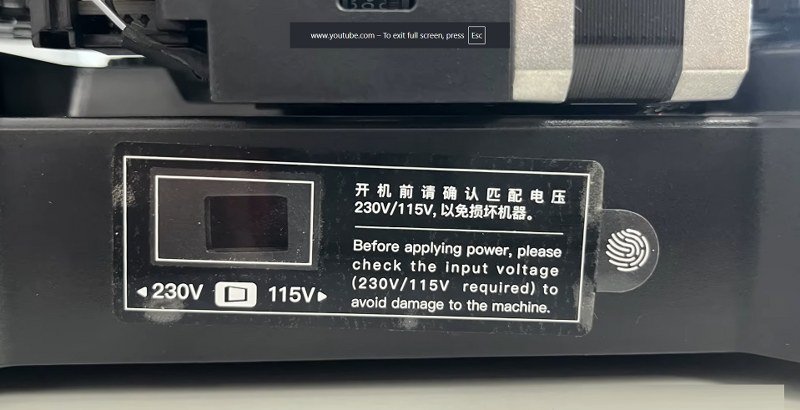
Before you switch on your printer for the first time, make sure it’s set to the correct voltage for your region.
Some printers, like the Ender 3 S1 Pro, have a little switch at the back that you need to flip manually. Getting this wrong can seriously affect the print quality.
That said, the most modern 3D printers, like the Bambu Lab A1, can detect this voltage difference automatically.
6. Don’t skip firmware updates
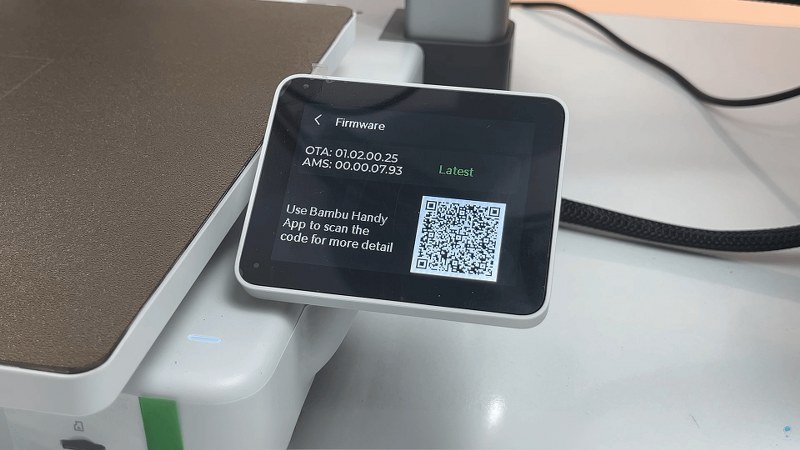
Some printers ship with outdated firmware — it’s more common than you’d think.
Updating it right away can fix hidden bugs, improve print quality, and sometimes even unlock features like better auto bed leveling or screen controls.
It only takes a few minutes, and it’s totally worth doing before your first real print.
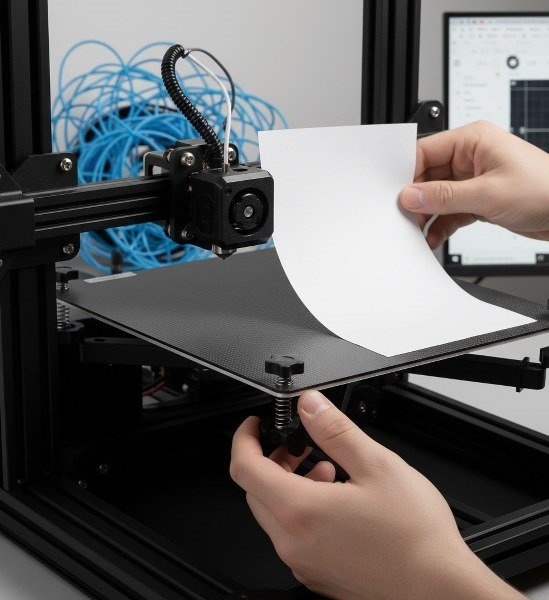
7. Touching the build plate surface
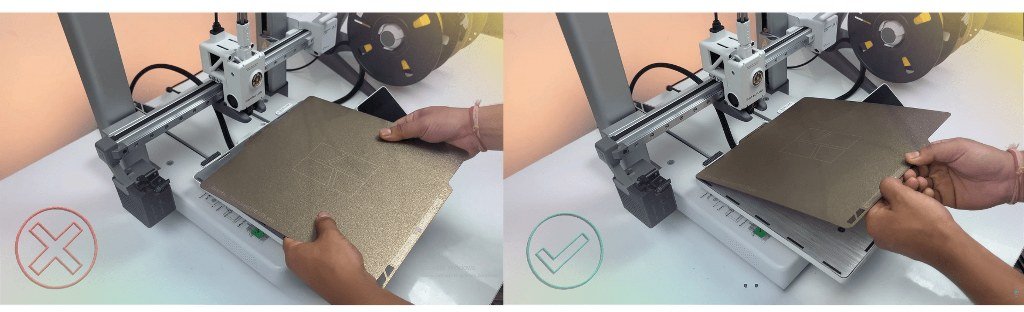
When placing or adjusting the build plate, avoid touching the print surface directly — always hold it from the edges.
Even clean hands leave behind oils and fingerprints, and that can mess with bed adhesion.
One smudge is all it takes for your first layer to lift or fail.
8. Move the axes manually before powering on
Before you turn on your printer, gently move the bed and extruder by hand. They should glide smoothly without resistance or grinding noises.
If something feels stuck, misaligned, or too tight, fix it now — not after the motor tries to force it and causes damage. It’s a quick way to catch mechanical issues early
9. Ignoring unusual sounds
Now, if at any point in time when the printer is running, you hear an unusual grinding or buzzing sound, turn the machine off immediately and check the axis movement manually. This usually indicates that one of the stepper motors is stalling.
It’s often caused by something being misaligned, over-tightened, or obstructed. And this can definitely damage the motor.
10. Poor printer placement
First, make sure there’s plenty of space around your printer — especially in the front and back — and don’t forget to account for cables and wiring. Why? Because during a print, the bed moves back and forth, and if it bumps into anything, it can ruin your print or strain the motors.
Secondly, never place your printer near flammable objects like curtains, paper stacks, or plastic bin, especially if it is a cheap one and can have ;wiring issues. A 3D printer is a machine that generates a lot of heat, and over time, parts can fail — so poor placement can quickly turn into a real safety hazard.
Finally, Avoid placing your 3D printer directly under a ceiling fan, as the uneven airflow can significantly impact print quality.
If there’s no other option, make sure to turn off the fan while printing- at least during the first layer.
Filament Mistakes
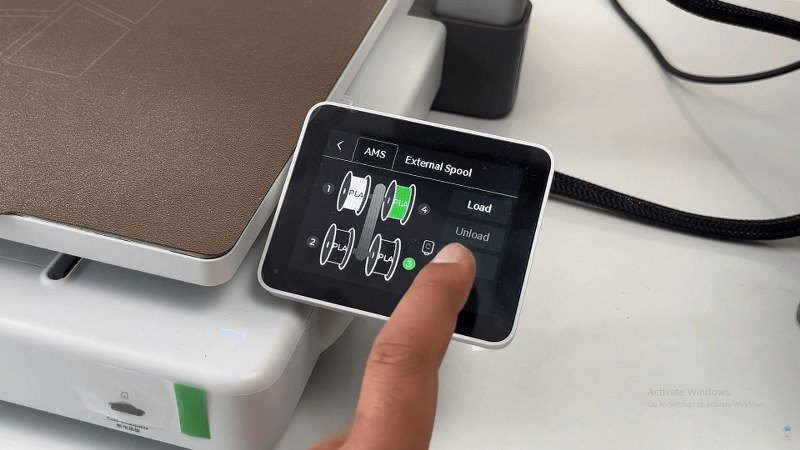
11. Wrong filament feed direction
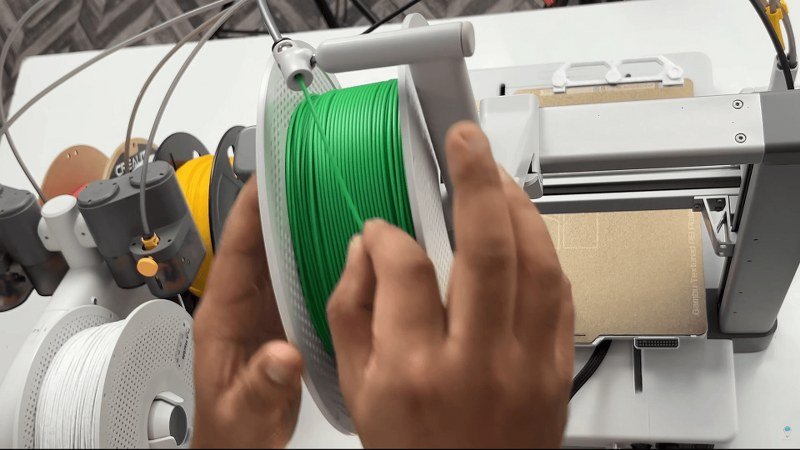
When you’re getting ready to mount the filament spool for the first time, take a second to check which direction the filament should enter the extruder — from above or from below.
For example, with the external spool on the A1, the filament should enter from the top.
However, if you’re using the AMS for multicolor prints, the correct direction is from the bottom.
If it feeds from the wrong angle — especially from the top when it shouldn’t — it can cause extra tension, tangles, and even lead to filament breakage.
12. Not securing the filament after use
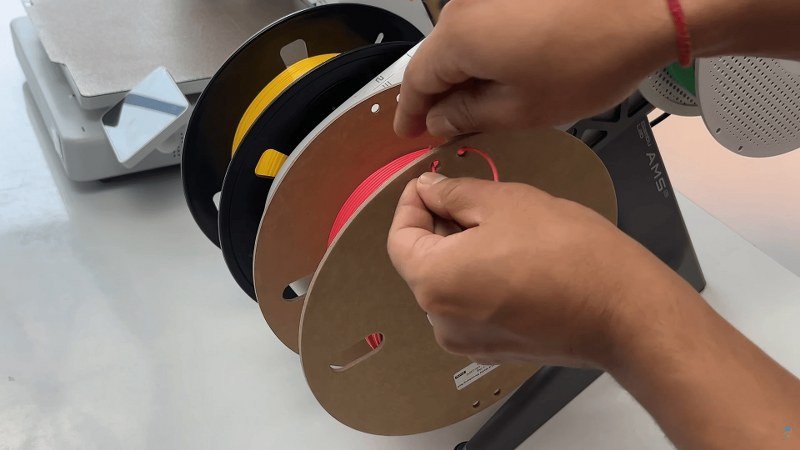
Whenever you’re done using a filament spool and tucking it away, make sure to insert the loose end or the tail of the filament into the hole or clip provided on the spool. If you don’t, the filament can slip under the other layers and get wedged.
And when you use it again, the extruder can pull too hard, creating tension, tangles, or even snapping the filament mid-print.
13. Using the wrong filament settings
Different filaments need different nozzle and bed temperatures to print properly and stick well. So before you hit “print,” make sure you’ve selected the correct filament type in your slicer — or directly on your printer if it supports that.
For example, on the Bambu Lab A1, when you’re inserting a filament for the first time, you can simply pick it from the list, and the printer will automatically set the right temperatures for that material.
However, once you start the print, those temperatures will be overridden by whatever is in your G-code — straight from the slicer.
That’s why it’s important to choose the correct filament profile before slicing and exporting your file.
Skipping this step and selecting the wrong filament type can lead to weak adhesion, warping, or stringy prints — especially if you’re switching between materials like PLA, PETG, or ABS.
Bed Leveling Mistakes
14. Ignoring bed leveling importance
Improper bed leveling is the number one reason for failed prints. It’s that important — and probably the most common issue faced by a beginner.
Luckily, there are tons of tutorials out there explaining common leveling mistakes and how to fix them — whether you’re using manual leveling, assisted leveling, or full-on automatic systems.
Guide to leveling a 3D printer bed
15. Over-relying on auto bed leveling
Auto bed leveling is awesome — no doubt. But it doesn’t mean your bed is magically perfect forever.
ABL compensates for minor unevenness, but it can’t fix things like a tilted X-axis, a warped bed, or a loose frame. You still need to manually level the bed once in a while, especially after assembly, moving the printer, or changing the build surface.
Not every printer is the same, so make sure to check how manual leveling works for your specific model.
16. Leveling the bed cold
Always level your bed after preheating — not while it’s cold. Why? Because the bed and metal parts expand slightly when heated, and that small change can throw off your leveling if you do it cold.
So before you level, preheat the bed to your usual printing temperature. You can preheat the nozzle as well for extra precision. Even before auto bed leveling begins, printers like the Bambu Lab A1 or Prusa MK4 automatically preheat the bed- and now you know why.
It might seem like a minor detail, but it makes a big difference for first-layer consistency.
An important point to note here: Make sure to unload the filament from the extruder before leveling, and manually extrude the remaining filament inside the nozzle. Then clean the nozzle so that no melted filament interferes with the leveling or throws off the Z-offset.
Printing Mistakes
15. Jumping straight to big prints — run calibration tests first
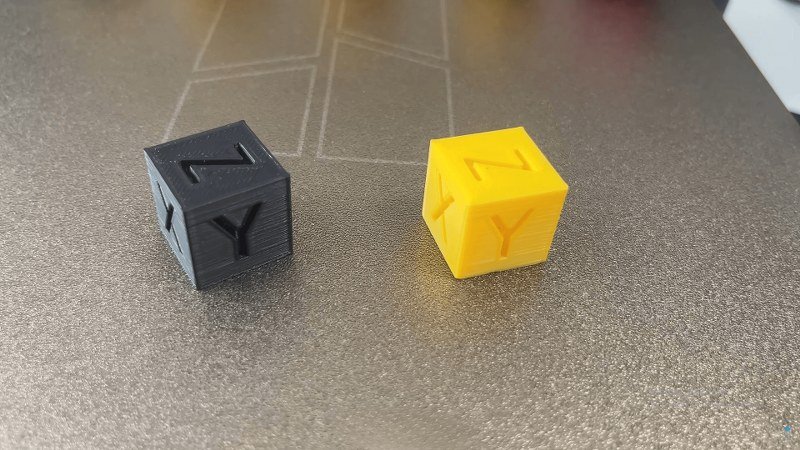
I think everyone will agree with me on this — the first 3D printed model for most beginners is a Benchy. And yes, you should definitely print one on your new 3D printer, and it should be at the top of your list.
But here’s the thing: that one Benchy doesn’t tell you everything. It’s a good idea to run 2–3 different calibration prints before going for those big prints.
For example:
An XYZ calibration cube, or a tolerance/clearance test print. You could even go for a “torture toaster” to really push your printer’s limits.
These little guys help you dial in everything: how much plastic comes out (flow rate), how far the filament pulls back (retraction), and how well it handles weird angles (overhangs).
These small prints reveal hidden problems that a large print would waste hours and filament on. You’re better off fixing those issues early — not 10 hours into a failed print.
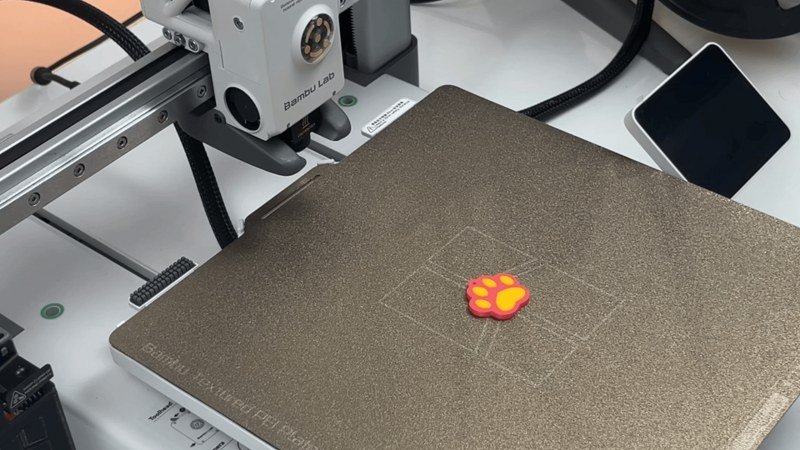
16. Always watch the first layer — every single time
The first layer is the foundation of your entire print — and most failures can be spotted right there. Whether it’s a big print or a small one, always stick around to watch the first layer go down.
If it’s not sticking, if it’s too squished or too high, you’ll know right away — and you can stop the print before wasting hours and filament. Leave it unattended too soon, and you might come back to a tangled mess of spaghetti or a nozzle dragging across the bed.
Trust me — watching that first layer saves you a lot of headaches.
Bonus tip: Even if your bed is leveled, sometimes the nozzle might still be a little too high or too low.
Use your printer’s live Z-offset adjustment during the first layer to dial it in. Almost every printer allows this now, and it’s the easiest way to rescue a print before it fails.
Unfortunately, the Bambu A1 doesn’t have this feature as of now.
17. Touching hot parts
This one might sound obvious, but it’s easy to forget—especially when you’re new, and something is not working.
Never touch the nozzle or heated bed while printing (or right after).
The nozzle can reach temperatures of around 200°C or even higher, and the bed can easily get above 60°C. Always give your printer enough time to cool down completely before handling these parts.
18. Multicolor prints are possible
Single-color prints are great, but multicolor prints look amazing—especially when it comes to decorative models or projects with intricate details. And do you know, you can do basic multicolor prints even if your printer doesn’t support it.
Here’s the trick: go into your slicer, find the option to pause the print at a specific layer, and set it at the height where you want a color change.
When your printer pauses, swap out the filament for the new color, and resume printing. The only downside is that you can’t print multiple colors on the same layer—but for simple color changes, it works great.
19. Removing prints too early
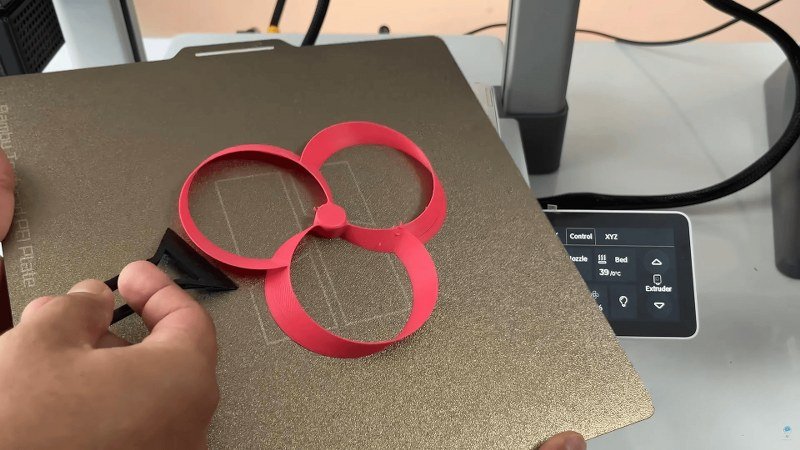
When your print finishes, resist the urge to pull it off the bed right away. Doing this can warp your part, misalign the plate, and even damage it. Let the build plate cool down completely first — as it cools, the print will naturally loosen from the surface, making removal easier and safer.
If your printer has a removable or flexible build plate, take it off before trying to remove the print. Now twist the plate, and it will come off.
If the print still won’t release easily, don’t force it with your hands — use a scraper.
Bonus tip: Avoid using a metal scraper as it can damage the build plate if you apply too much pressure. Use a plastic one instead… and guess what? You can 3D print as many as you want!
20. Leaving filament exposed
If you’re not using the filament, don’t just leave it sitting out in the open for days — especially in humid environments. Filament absorbs moisture from the air, and that can make it brittle, cause stringing, or even create tiny bubbles while printing.
That’s exactly why new filament always comes vacuum sealed with a silica gel packet.
So when you’re not using it, store it in a ziplock or an airtight bag with some silica gel inside. And if you suspect the filament has absorbed moisture, try increasing the nozzle temperature slightly — it might help, but drying it properly is always the better option. Read this guide on how to dry filament properly.
SLICER Mistakes
Your slicer is where all the important print parameters live. If you ignore them (or stick with every default), you’ll leave a ton of print quality on the table. Let’s run through a few big ones people skip:
23. Ignoring first-layer speed
As I mentioned before, the first layer is very important for a good print. If you’re struggling with adhesion, slow down the first layer speed — even as low as 10 mm/s if necessary.. As for the first layer infill, keep it as low as 20 mm/s.
A slower first layer gives the filament more time to squish and bond to the bed, making the entire print more reliable and helps you identify the adhesion issues as well.
24. Not experimenting with infill
If you look closely at the sliced model file, you’ll notice it’s not fully solid inside. Instead, you’ll see a pattern—this is the infill. Infill gives your model strength while saving filament and reducing print time.
When you’re just starting out, it’s easy to leave infill settings at default — usually 20% grid.
But that’s not always the best option. If you’re printing something decorative, you can go as low as 10% and it’ll still look great while saving filament.
On the other hand, if it’s a functional part, you can bump up the infill density or switch to stronger patterns like gyroid or cubic.
It’s worth trying a few variations just to see how they affect strength, print time, and how the part feels in hand.
25. Using the wrong layer height
A 3D printer builds objects one layer at a time—but exactly how thick each of these layers should be? That’s where the layer height setting comes into play.
Higher layer heights—around 0.28 mm, for instance—mean your printer stacks thicker layers, speeding up the print as there will be less number of layers for it to print. But there’s a catch: those layers become more noticeable, leaving your model with a slightly rougher appearance.
On the flip side, you can reduce layer height down to around 0.08 mm. Sure, the print will take a lot longer, but the payoff is worth it: smoother surfaces and finer details, ideal for miniatures or models where detail matters most.
But For most prints, stick with a 0.2 mm layer height — the default on every slicer for a reason. It gives a great balance between print quality and speed, making it ideal for everyday printing.
26. Skipping brim or adhesion aids
If your print is having a hard time sticking to the bed, adding a simple brim in your slicer can save it. A brim adds a few extra lines around the base of your model, giving it more surface area to grip the bed.
It peels off easily once the print is done and can seriously improve first-layer adhesion, especially for models with small contact points.
So if you’re seeing corners lift or prints detach, don’t hesitate — just turn on the brim.
27. Ignoring wall thickness settings
Before your printer fills in the inside of a model with infill, it builds the outer shell — and that shell is stronger than you might think. These outer lines are called walls or wall loops, and they’re the first line of defense when it comes to strength and durability.
Now the thickness of this wall plays a big role in how strong your part will turn out, and a quick way to increase it is by increasing the number of such walls or count.
If you’re printing something functional, like a bracket or a phone holder, increasing your wall count from 2 to 3 or 4 can make it way more durable — without having to go 50% or 60% infill.
Just make sure your wall thickness is a clean multiple of your nozzle size. For example, with a 0.4 mm nozzle, using 1.2 mm wall thickness means 3 lines or wall loops. In bambu studio, setting it to 3 will create two inner walls in orange color here and one outer wall in yellow. Each inner wall is 0.45mm wide and outer wall is 0.42 mm wide giving us a total wall thickness close to 1.2mm.
28. Not using supports when you should
A 3D printer builds models layer by layer, stacking melted plastic on top of the previous layer. But what happens when part of the model is hanging in mid-air, like this? Well, 3D printers can’t print in thin air. Anything with an overhang beyond roughly 45 degrees is usually pushing it.
That’s where support comes in.
Supports are temporary structures printed alongside your model to hold up overhanging parts during printing. Once the print is done, you can remove them. And if you don’t enable supports, chances are it’s going to sag or fail. Just enable them in your slicer and set the overhang angle threshold.
You can also choose different support types — like grid or tree — depending on what works best for your model.
29. Ignoring Z-hop setting
If you’re getting scratches on the top of your prints or hearing the nozzle drag across already-printed areas, this setting might be the fix.
Enabling Z-hop when retracted lifts the nozzle slightly whenever it moves across the print without extruding.That tiny lift helps prevent marks, collisions, and layer shifts — especially on taller or detailed prints.
However, Z-hop can sometimes lead to stringing, as the extra vertical movement and travel time may give the filament more chance to ooze. If that happens, try lowering the Z-hop height or fine-tuning your retraction settings
Design Mistakes
30. Printing complex models in one piece
Sometimes the best way to print a model… is to not print it all at once.
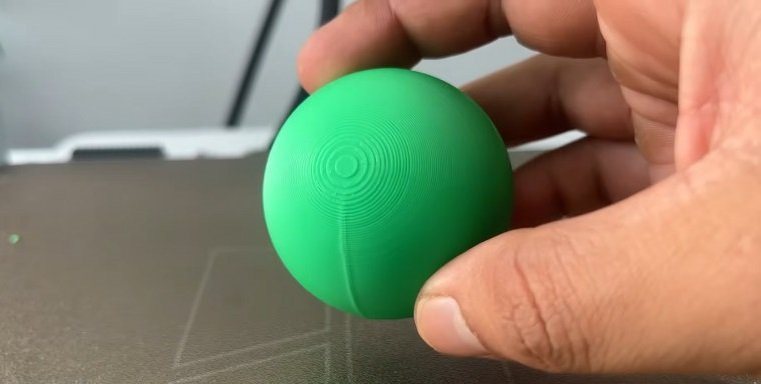
Take something like a sphere. If you try to print it as one solid piece, the bottom barely touches the bed, and it’ll probably need a brim and supports — and even then, the surface quality might not turn out great.
But if you cut the model into two halves, print them flat-side-down, and glue them together later, you’ll get a much cleaner result — and way fewer headaches. This trick works great for helmets, statues, or any complex shape that doesn’t want to sit nicely on the bed.
31. Incorrect orientation of holes
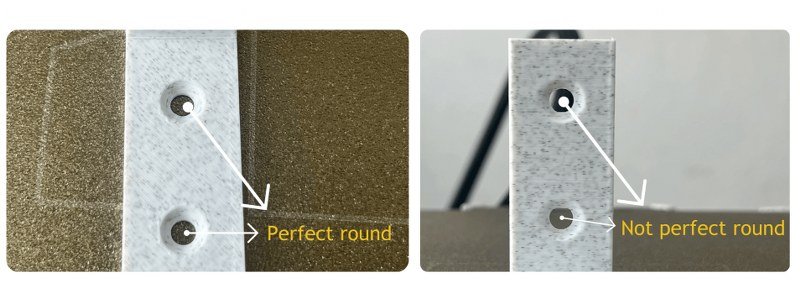
Here’s something most people don’t realize until it’s too late. If you print a circular hole vertically, it won’t come out perfectly round — it’ll usually be a little squished or rough due to how layers stack. To get cleaner results, design or orient your model so that circular holes print horizontally.
It’s a small change in design, but it makes a huge difference in how well things fit together later.
32. Design to minimize supports
Supports are helpful, but they’re not ideal — they use more filament, add cleanup time, and can mess up surface quality.
So when you’re designing a model, think about how to orient it to avoid supports as much as possible. Let’s say you’re designing a fence. If you model the pickets straight up, it’ll need tons of supports.
But if you rotate the whole thing and print it flat on its side, you can usually print it cleanly — no supports needed.
Always think ahead: “Can I design this in a way that prints better by default?” Most of the time, the answer is yes.
Maintenance & Upgrades
35. Letting debris accumulate
After each print, make sure to remove any excess filament, stringy remnants, or failed print pieces from the build area.
Over time, this leftover material can interfere with moving parts — especially the gears or belts — The stringy leftovers may even get blown onto an active print and are light enough to get sucked into the fans themselves, potentially clogging them or reducing airflow over time..
So next time, if you spot such pieces, pick them up and toss them in the bin.
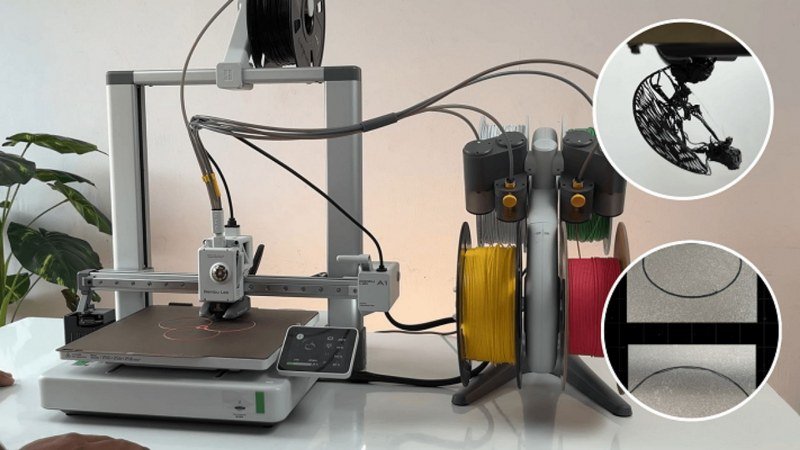
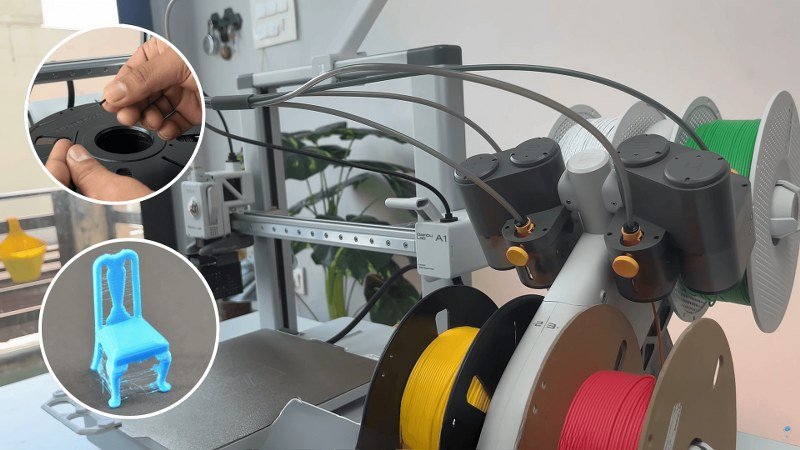
36. Upgrade the 3D printer with 3D printer itself
One of the best parts of owning a 3D printer is… well, you can upgrade it using the printer itself. You can find them online easily for your printer.
For example, I upgraded this Bambu Lab A1 with a snap-on trash tray that catches the little filament poops the printer cuts off during filament changes or during the setup process. Super handy, especially with the AMS.
I also added a PTFE Y-splitter, which lets me use the external spool holder alongside the AMS Lite system, and a printable handle for the heatbed, which makes it way easier to remove when it’s hot.