Last updated on January 6th, 2026 at 11:05 am
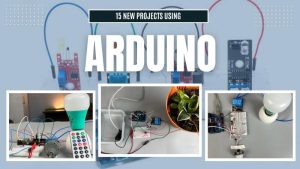
Are you looking to jump into the world of Arduino and explore fun, beginner-friendly projects? You’re in the right place! In this article, we’ll introduce 12 popular sensors and showcase 17 creative projects you can build around them. Whether you’re a hobbyist, student, or an aspiring engineer, these ideas will help you grasp fundamental concepts, practice coding skills, and gain hands-on experience with electronics.
Table of Contents
1. PIR Sensor
A Passive Infrared (PIR) sensor detects motion by measuring changes in infrared light within its field of view. It’s commonly used in security systems and automatic lighting because it can sense the presence of humans or animals without physical contact.
Project 1: Motion Activated Light
In this project, you’ll use a PIR sensor to detect movement and turn on an LED (or any other light source). When no motion is detected, the light remains off, helping to conserve energy.
Components Required
- Arduino board
- PIR sensor module
- Light Bulb
- 2 Channel relay module
- Jumper wires
- Breadboard
Circuit Diagram

Program
#define PIR_PIN 5     // Digital pin for PIR sensor
#define RELAY_PIN 12  // Digital pin for relay

unsigned long motionTimeout = 3000;  // Time in milliseconds to wait before turning off relay
unsigned long lastMotionTime = 0;

void setup() {
  // Initialize serial communication
  Serial.begin(9600);

  // Configure PIR sensor pin as input
  pinMode(PIR_PIN, INPUT);

  // Configure relay pin as output
  pinMode(RELAY_PIN, OUTPUT);
  digitalWrite(RELAY_PIN, HIGH);  // Ensure relay is off initially (reverse logic)

  Serial.println("PIR Sensor and Relay Control Initialized");
}

void loop() {
  // Read PIR sensor state
  int pirState = digitalRead(PIR_PIN);

  if (pirState == HIGH) {
    // Motion detected: Turn ON the relay and reset the timer
    digitalWrite(RELAY_PIN, LOW);  // Turn ON relay (reverse logic)
    lastMotionTime = millis();     // Update the last motion detection time
    Serial.println("Motion detected: Relay ON");
  } else {
    // No motion: Check if timeout has elapsed
    if (millis() - lastMotionTime > motionTimeout) {
      digitalWrite(RELAY_PIN, HIGH);  // Turn OFF relay (reverse logic)
      Serial.println("No motion: Relay OFF");
    }
  }

  // Small delay for stability
  delay(100);
}
2. Soil Moisture Sensor
A soil moisture sensor measures the water content in the soil. It’s perfect for gardening and agricultural projects, allowing you to monitor or automate plant watering.
Project 2: Automatic Plant Watering System
Keep your plants healthy by automatically watering them when the soil is too dry. The soil moisture sensor sends data to the Arduino, which triggers a water pump when moisture levels drop below a set threshold.
Components Required
- Arduino board
- Soil moisture sensor
- Water pump
- Tubing or piping for water flow
- 2-channel relay module
- Separate power supply for the pump(3V to 6V)
Circuit Diagram

Program
// Pin definitions
const int soilMoisturePin = A0;  // Soil moisture sensor analog pin
const int ledPin = 8;            // LED pin
const int pumpPin = 9;           // Pump pin
const int threshold = 1000;      // Moisture threshold (adjust based on testing)

void setup() {
  // Initialize components
  pinMode(ledPin, OUTPUT);
  pinMode(pumpPin, OUTPUT);
  Serial.begin(9600);

  Serial.println("Soil Moisture Sensor Initialized");
}

void loop() {
  // Read soil moisture sensor value
  int soilValue = analogRead(soilMoisturePin);
  Serial.print("Soil Moisture Value: ");
  Serial.println(soilValue);

  if (soilValue > threshold) {    // Dry soil condition
    digitalWrite(ledPin, HIGH);   // Turn on LED
    digitalWrite(pumpPin, HIGH);  // Turn on pump
    Serial.println("Status: DRY");
  } else {                       // Sufficient moisture
    digitalWrite(ledPin, LOW);   // Turn off LED
    digitalWrite(pumpPin, LOW);  // Turn off pump
    Serial.println("Status: WET");
  }

  delay(500);  // Wait before the next reading
}
3. Color Sensor (e.g., TCS3200)
A color sensor can detect the color of an object by measuring reflected light across different color filters (usually Red, Green, and Blue). This sensor is often used in sorting systems and color-based recognition projects.
Project 3: RGB Color Detector
Point the sensor at an object, and the Arduino outputs the RGB values to identify the color. This is a great way to learn about color theory and how sensors interpret light.
Components Required
- Arduino board
- Color sensor module (e.g., TCS3200)
- RGB LED
- Jumper wires
- Breadboard
Circuit Diagram

Program
#include <Wire.h>
#include "Adafruit_TCS34725.h"

// Pins for RGB LEDs
#define RED_LED_PIN 3
#define GREEN_LED_PIN 5
#define BLUE_LED_PIN 6

Adafruit_TCS34725 tcs = Adafruit_TCS34725(TCS34725_INTEGRATIONTIME_50MS, TCS34725_GAIN_4X);

void setup() {
  Serial.begin(9600);

  if (!tcs.begin()) {
    Serial.println("No TCS34725 found ... check your connections");
    while (1)
      ;
  }

  // Initialize LED pins as output
  pinMode(RED_LED_PIN, OUTPUT);
  pinMode(GREEN_LED_PIN, OUTPUT);
  pinMode(BLUE_LED_PIN, OUTPUT);

  // Turn off all LEDs initially
  digitalWrite(RED_LED_PIN, LOW);
  digitalWrite(GREEN_LED_PIN, LOW);
  digitalWrite(BLUE_LED_PIN, LOW);
}

void loop() {
  uint16_t r, g, b, c;
  tcs.getRawData(&r, &g, &b, &c);

  // Normalize RGB values using clear channel (luminance)
  float red = r / (float)c * 255.0;
  float green = g / (float)c * 255.0;
  float blue = b / (float)c * 255.0;

  // Ensure values stay in bounds
  red = constrain(red, 0, 255);
  green = constrain(green, 0, 255);
  blue = constrain(blue, 0, 255);

  Serial.print("R:");
  Serial.print((int)red);
  Serial.print(" G:");
  Serial.print((int)green);
  Serial.print(" B:");
  Serial.println((int)blue);

  // Calculate differences between RGB values
  float diffRG = abs(red - green);
  float diffRB = abs(red - blue);
  float diffGB = abs(green - blue);

  // Turn off LEDs if differences are within the range of 30
  if (diffRG <= 50 && diffRB <= 50 && diffGB <= 50) {
    digitalWrite(RED_LED_PIN, LOW);
    digitalWrite(GREEN_LED_PIN, LOW);
    digitalWrite(BLUE_LED_PIN, LOW);
  } else {
    // Determine the dominant color and turn on the corresponding LED
    if (red > green && red > blue) {
      digitalWrite(RED_LED_PIN, HIGH);
      digitalWrite(GREEN_LED_PIN, LOW);
      digitalWrite(BLUE_LED_PIN, LOW);
    } else if (green > red && green > blue) {
      digitalWrite(RED_LED_PIN, LOW);
      digitalWrite(GREEN_LED_PIN, HIGH);
      digitalWrite(BLUE_LED_PIN, LOW);
    } else if (blue > red && blue > green) {
      digitalWrite(RED_LED_PIN, LOW);
      digitalWrite(GREEN_LED_PIN, LOW);
      digitalWrite(BLUE_LED_PIN, HIGH);
    } else {
      // If no dominant color, turn off all LEDs
      digitalWrite(RED_LED_PIN, LOW);
      digitalWrite(GREEN_LED_PIN, LOW);
      digitalWrite(BLUE_LED_PIN, LOW);
    }
  }

  delay(100);
}
Project 4: Visual Color Detection
Using the same color sensor setup with the Processing software, we will visualize the detected color on the screen. Just remove all the LEDs.
First, download the Processing software from here.
Install the software, then upload the program given below to your Arduino board.
Note: Make sure the USB cable is connected to the proper port on your laptop while running the software. Also, keep your serial monitor/plotter off.
Arduino Program
#include <Wire.h>
#include "Adafruit_TCS34725.h"

// Pins for RGB LED
#define redpin 3
#define greenpin 5
#define bluepin 6
#define commonAnode true

byte gammatable[256];
Adafruit_TCS34725 tcs = Adafruit_TCS34725(TCS34725_INTEGRATIONTIME_50MS, TCS34725_GAIN_4X);

void setup() {
  Serial.begin(9600);

  if (!tcs.begin()) {
    Serial.println("No TCS34725 found ... check your connections");
    while (1)
      ;
  }

  // Gamma correction table
  for (int i = 0; i < 256; i++) {
    float x = i / 255.0;
    x = pow(x, 2.5);
    x *= 255.0;
    gammatable[i] = commonAnode ? 255 - x : x;
  }
}

void loop() {
  uint16_t r, g, b, c;
  tcs.getRawData(&r, &g, &b, &c);

  // Normalize RGB values using clear channel (luminance)
  float red = r / (float)c * 255.0;
  float green = g / (float)c * 255.0;
  float blue = b / (float)c * 255.0;

  // Ensure values stay in bounds
  red = constrain(red, 0, 255);
  green = constrain(green, 0, 255);
  blue = constrain(blue, 0, 255);

  Serial.print("R:\t");
  Serial.print((int)red);
  Serial.print("\tG:\t");
  Serial.print((int)green);
  Serial.print("\tB:\t");
  Serial.print((int)blue);
  Serial.print("\tC:\t");
  Serial.println(c);

  delay(100);
}
Next, paste this code inside this new software window and click on ‘Run’.
Processing Code
import processing.serial.*;

Serial myPort;  // Serial port for communication
float red = 0, green = 0, blue = 0, clear = 0;  // RGB and clear values from Arduino

void setup() {
  size(400, 400);  // Window size
  String portName = Serial.list()[0];  // Automatically select the first available port
  myPort = new Serial(this, portName, 9600);  // Open serial port
  myPort.clear();  // Clear old data in the buffer
  myPort.bufferUntil('\n');  // Wait for a full line of data
}

void draw() {
  background(255);  // White background

  // Detect color name and adjust displayed color
  String detectedColor = detectColor(red, green, blue, clear);

  if (detectedColor.equals("No Color Detected")) {
    // Draw a red "X" for No Color Detected
    fill(255, 0, 0);  // Red color
    stroke(255, 0, 0);
    strokeWeight(8);
    line(100, 100, 300, 300);  // Diagonal line 1
    line(100, 300, 300, 100);  // Diagonal line 2
    noStroke();
  } else {
    // Set fill color based on detected color
    if (detectedColor.equals("Black")) {
      fill(0);  // Black
    } else if (detectedColor.equals("White")) {
      fill(255);  // White
    } else {
      fill(red, green, blue);  // Use detected RGB values for other colors
    }

    noStroke();
    rect(50, 50, width - 100, height - 100);  // Draw rectangle
  }

  // Display detected color name and values
  fill(0);  // Black text
  textSize(20);
  textAlign(CENTER);
  text("Detected Color: " + detectedColor, width / 2, 30);
  text("R: " + int(red) + " G: " + int(green) + " B: " + int(blue) + " C: " + int(clear), width / 2, height - 20);
}

void serialEvent(Serial myPort) {
  String data = myPort.readStringUntil('\n');  // Read Serial data
  if (data != null) {
    data = trim(data);  // Remove whitespace
    String[] values = split(data, '\t');  // Split by tab characters
    if (values.length >= 8) {  // Ensure we have R, G, B, C values
      try {
        // Parse and update RGB and clear values
        red = float(values[1]);
        green = float(values[3]);
        blue = float(values[5]);
        clear = float(values[7]);
      } catch (Exception e) {
        println("Error parsing values: " + e.getMessage());
      }
    }
  }
}

String detectColor(float r, float g, float b, float c) {
  if (c < 400) return "Black";  // Low clear value indicates black
  if (c > 1600 && abs(r - g) < 50 && abs(g - b) < 50) return "White";  // High clear, similar RGB values
  if (c > 600 && c < 1200 && abs(r - g) < 30 && abs(g - b) < 30) return "No Color Detected";  // Mid-range clear, no distinct color
  if (r > g && r > b) return "Red";
  if (g > r && g > b) return "Green";
  if (b > r && b > g) return "Blue";
  return "Unknown";
}
4. IR Receiver
An Infrared (IR) receiver detects IR signals from a remote control. By decoding these signals, your Arduino can recognize specific button presses.
Project 5: Bulb and Motor Control Using Remote
In this project, you will control an LED bulb and DC motor using two buttons on your IR remote. This is a great project to learn about IR communication and how to decode remote control signals.
Components Required
- Arduino UNO
- IR receiver module
- IR remote
- 2 Channel Relay module
- LED bulb
- DC Motor
- Separate power supply for the motor
- Jumper wires
- Breadboard
Circuit Diagram

Program
Note: Make sure you download the correct IRremote library version i.e., 2.5 or previous.
#include <IRremote.h>

#define IR_RECEIVE_PIN 5  // Pin for IR receiver

// Define relay pins
#define RELAY1_PIN 11
#define RELAY2_PIN 12

IRrecv irrecv(IR_RECEIVE_PIN);
decode_results results;

// Define IR remote button codes (replace with actual values from your remote)
#define BUTTON_1 0xFF30CF  // Example hex code for button 1
#define BUTTON_2 0xFF18E7  // Example hex code for button 2

// Relay states
bool relay1State = false;
bool relay2State = false;

void setup() {
  // Initialize Serial Monitor
  Serial.begin(115200);

  // Initialize relay pins as outputs
  pinMode(RELAY1_PIN, OUTPUT);
  pinMode(RELAY2_PIN, OUTPUT);

  // Ensure relays are off initially
  digitalWrite(RELAY1_PIN, HIGH);
  digitalWrite(RELAY2_PIN, HIGH);

  // Initialize IR receiver
  Serial.println("Enabling IRin");
  irrecv.enableIRIn();

  Serial.println("Ready to receive IR signals");
}

void loop() {
  if (irrecv.decode(&results)) {
    Serial.print("Received code: ");
    Serial.println(results.value, HEX);

    // Check for button presses
    if (results.value == BUTTON_1) {
      digitalWrite(RELAY1_PIN, relay1State);
      Serial.print("Relay 1 state: ");
      Serial.println(relay1State ? "OFF" : "ON");
      relay1State = !relay1State;  // Toggle relay 1 state
    } else if (results.value == BUTTON_2) {
      digitalWrite(RELAY2_PIN, relay2State);
      Serial.print("Relay 2 state: ");
      Serial.println(relay2State ? "OFF" : "ON");
      relay2State = !relay2State;  // Toggle relay 2 state
      delay(2000);
      digitalWrite(RELAY2_PIN, LOW);
    }

    irrecv.resume();  // Receive the next value
  }
  delay(100);
}
5. Water Sensor
A water sensor (or rain sensor) can detect the presence of water by measuring the conductivity between two metal leads. It’s often used in rainfall detection or water leakage alarms.
Project 6: Rain Detection Alarm
Place the sensor outside, and it triggers a buzzer when it detects rain. This can serve as a simple alert system to protect your outdoor equipment or inform you when it starts to rain.
Components Required
- Arduino board
- Water sensor
- Buzzer
- LED
- 220-ohm resistor
- Jumper wires
Circuit Diagram

Program
const int waterSensorPin = A0;  // Water sensor output pin
const int ledPin = 8;           // LED pin
const int buzzerPin = 11;       // Buzzer pin
const int threshold = 300;      // Water detection threshold (adjust based on testing)

void setup() {
  pinMode(ledPin, OUTPUT);     // Set LED pin as output
  pinMode(buzzerPin, OUTPUT);  // Set Buzzer pin as output
  Serial.begin(9600);          // Initialize Serial Monitor
}

void loop() {
  int waterValue = analogRead(waterSensorPin);  // Read the water sensor value

  Serial.print("Water Sensor Value: ");
  Serial.println(waterValue);  // Print the sensor value for debugging

  if (waterValue > threshold) {     // If water is detected
    digitalWrite(ledPin, HIGH);     // Turn on LED
    digitalWrite(buzzerPin, HIGH);  // Turn on buzzer
    Serial.println("Water detected!");
  } else {
    digitalWrite(ledPin, LOW);     // Turn off LED
    digitalWrite(buzzerPin, LOW);  // Turn off buzzer
    Serial.println("No water detected.");
  }

  delay(500);  // Small delay for stability
}
6. HC-SR04 Ultrasonic Sensor
The HC-SR04 ultrasonic sensor measures distance by sending out ultrasonic pulses and timing how long they take to return. It’s widely used for obstacle avoidance and distance measurement.
Project 7: Distance measurement
Using this ultrasonic sensor we will measure the distance of an object from it and print the distance on a 0.91 inch OLED display.
Components Required
- Arduino board
- HC-SR04 ultrasonic sensor
- 0.91 inch(128*32 px) OLED display
- Jumper wires
Circuit Diagram

Program
#include <Wire.h>
#include <Adafruit_SSD1306.h>

// OLED display settings
#define SCREEN_WIDTH 128
#define SCREEN_HEIGHT 32
Adafruit_SSD1306 display(SCREEN_WIDTH, SCREEN_HEIGHT, &Wire, -1);

// HC-SR04 pins
#define TRIG_PIN 8
#define ECHO_PIN 9

void setup() {
  // Initialize Serial Monitor
  Serial.begin(9600);
  Serial.println("Initializing...");

  // Initialize OLED display
  if (!display.begin(SSD1306_SWITCHCAPVCC, 0x3C)) {
    Serial.println("SSD1306 allocation failed");
    for (;;)
      ;
  }
  display.clearDisplay();
  display.setTextSize(1);
  display.setTextColor(SSD1306_WHITE);
  display.setCursor(0, 0);
  display.println("HC-SR04 + OLED");
  display.setCursor(0, 16);
  display.println("Distance in cm");
  display.display();
  delay(2000);
  display.clearDisplay();

  // Initialize HC-SR04 pins
  pinMode(TRIG_PIN, OUTPUT);
  pinMode(ECHO_PIN, INPUT);
}

void loop() {
  long duration;
  float distance;

  // Send a 10us pulse to trigger pin
  digitalWrite(TRIG_PIN, LOW);
  delayMicroseconds(2);
  digitalWrite(TRIG_PIN, HIGH);
  delayMicroseconds(10);
  digitalWrite(TRIG_PIN, LOW);

  // Read echo pin and calculate duration
  duration = pulseIn(ECHO_PIN, HIGH);

  // Calculate distance in cm (speed of sound = 34300 cm/s)
  distance = duration * 0.034 / 2;

  // Display distance on Serial Monitor
  Serial.print("Distance: ");
  Serial.print(distance);
  Serial.println(" cm");

  //Display distance on OLED
  display.clearDisplay();
  //display.setCursor(0, 0);
  //display.setTextSize(1);
  //display.println("HC-SR04 Distance");
  display.setTextSize(4);
  display.setCursor(0, 0);
  display.print(distance);
  display.print(" cm");
  display.display();

  delay(1000);  // Wait for a short while before the next measurement
}
Project 8: Posture correction/Eye protection device
Mount the ultrasonic sensor behind your laptop. If you lean too far forward (reducing the measured distance), a buzzer reminder activates to keep your distance from the laptop screen.
Components Required
- Arduino board
- HC-SR04 ultrasonic sensor
- Buzzer
- Jumper wires
Circuit Diagram
Program
7. Sound Sensor
A sound sensor module typically includes a microphone and an amplifier circuit, allowing you to measure the intensity of sound waves. Perfect for projects reacting to claps, music, or ambient noise.
Project 9: Music Reactive LEDs
Let your LEDs dance to the rhythm of music! When the sound sensor detects variations in sound levels, the Arduino turns ON/OFF the LEDs.
Components Required
- Arduino UNO
- Sound sensor module
- LED x 3
- 220 ohm resistor x 3
- Jumper wires
Circuit Diagram

Program
const int soundSensor = 2;
const int redLed = 3;
const int greenLed = 5;
const int blueLed = 6;

void setup() {

  Serial.begin(9600);

  pinMode(redLed, OUTPUT);
  pinMode(greenLed, OUTPUT);
  pinMode(blueLed, OUTPUT);
}


void loop() {
  int soundValue = digitalRead(soundSensor);
  Serial.print("Sound Level:  ");
  Serial.println(soundValue);
  digitalWrite(redLed, soundValue);
  digitalWrite(greenLed, soundValue);
  digitalWrite(blueLed, soundValue);
  delay(10);
}
8. LDR Sensor (Light Dependent Resistor)
An LDR’s resistance changes based on the amount of light hitting it. In brighter conditions, its resistance decreases; in darker conditions, it increases. LDRs are key components in light-based automation.
Project 10: Automatic Street Light
Use an LDR to detect darkness and automatically turn on the LED bulb connected to a relay module. This project is commonly used for energy-saving lighting systems.
Components Required
- Arduino board
- LDR
- 2-channel relay module
- A.C bulb/ LED bulb
- 10k ohm Resistor (for voltage divider)
- Jumper wires
Circuit Diagram

Program
#define LDR_PIN A0    // Analog pin for LDR
#define RELAY_PIN 12  // Digital pin for relay

void setup() {
  // Initialize serial communication
  Serial.begin(9600);

  // Configure the relay pin as output
  pinMode(RELAY_PIN, OUTPUT);
  digitalWrite(RELAY_PIN, LOW);  // Ensure relay is off initially

  // Print a startup message
  Serial.println("LDR and Relay Control Initialized");
}

void loop() {
  // Read the LDR value
  int ldrValue = analogRead(LDR_PIN);

  // Print the LDR value to the Serial Monitor
  Serial.print("LDR Value: ");
  Serial.println(ldrValue);

  // Define a threshold for light level
  int threshold = 450;  // Adjust this value based on your environment

  // Control the relay based on LDR value
  if (ldrValue < threshold) {
    // If light level is low, turn ON the relay
    digitalWrite(RELAY_PIN, LOW);
    Serial.println("Relay ON (Low Light)");
  } else {
    // If light level is high, turn OFF the relay
    digitalWrite(RELAY_PIN, HIGH);
    Serial.println("Relay OFF (Bright Light)");
  }

  // Small delay for stability
  delay(500);
}
9. Joystick Module
A typical two-axis joystick module (often built with two potentiometers) can measure movement in the X and Y directions, as well as a push button press.
Project 11: Real-Time Ball Control on Screen
By connecting a joystick to an Arduino and using the Processing software, we will control a digital ball’s movement on a computer screen in real time. This teaches analog input reading and basic game development concepts.
Components Required
- Arduino UNO
- Joystick module
- USB cable
Circuit Diagram

Arduino Program
void setup() {
  Serial.begin(9600);        // Initialize serial communication
  pinMode(2, INPUT_PULLUP);  // Joystick button (SW)
}

void loop() {
  int xValue = analogRead(A0);       // Read X-axis value(connect it to X on Joystick)
  int yValue = analogRead(A1);       // Read Y-axis value
  int buttonState = digitalRead(2);  // Read button state (pressed or not)

  // Send data to Processing in a format: X,Y,Button
  Serial.print(xValue);
  Serial.print(",");
  Serial.print(yValue);
  Serial.print(",");
  Serial.println(buttonState);

  delay(10);  // Small delay for stability
}
Processing Code
Note: Make sure the USB cable is connected to the proper port on your laptop while running the software. Also, keep your serial monitor/plotter off.
import processing.serial.*;  // Import the Serial library

Serial myPort;  // The serial port
float circleX, circleY;  // Circle position
float speed = 5;  // Speed factor for movement

void setup() {
  size(600, 600);  // Set window size
  circleX = width / 2;  // Start circle at the center
  circleY = height / 2;

  // Connect to Arduino
  myPort = new Serial(this, Serial.list()[0], 9600);
  myPort.bufferUntil('\n');  // Read until newline
}

void draw() {
  background(0);  // Clear the screen
  fill(255, 0, 0);
  ellipse(circleX, circleY, 50, 50);  // Draw the circle
}

void serialEvent(Serial myPort) {
  String data = myPort.readStringUntil('\n');  // Read serial data
  data = trim(data);  // Remove extra whitespace
  if (data != null) {
    String[] values = split(data, ',');  // Split the data into X, Y, Button

    if (values.length == 3) {
      int xValue = int(values[0]);
      int yValue = int(values[1]);
      int buttonState = int(values[2]);

      if (buttonState == 0) {
        // Move the ball to the center when the button is pressed
        circleX = width / 2;
        circleY = height / 2;
        println("Button pressed: Ball moved to center");
      } else {
        // Map joystick values (0 to 1023) to movement speed
        float mappedX = map(xValue, 0, 1023, speed, -speed);
        float mappedY = map(yValue, 0, 1023, -speed, speed);

        // Update circle position
        circleX += mappedX;
        circleY += mappedY;

        // Keep circle within screen boundaries
        circleX = constrain(circleX, 25, width - 25);
        circleY = constrain(circleY, 25, height - 25);
      }
    }
  }
}
Project 12: Galaxy Fighter Game
Using the same setup and Arduino program, let’s create a simple 2D shooter. Move the spaceship using the joystick and fire lasers with the push button.
Processing code
import processing.serial.*;  // Import the Serial library

Serial myPort;  // Serial port for joystick
float playerX, playerY;  // Player position
float playerSize = 40;   // Size of the player's aircraft
boolean isGameOver = false; // Game state flag

ArrayList<Enemy> enemies;  // List of enemies
ArrayList<Bullet> bullets; // List of enemy bullets
ArrayList<PlayerBullet> playerBullets; // List of player bullets
int spawnTimer = 0;        // Timer for spawning enemies

void setup() {
  size(600, 600);  // Game screen size
  myPort = new Serial(this, Serial.list()[0], 9600);
  myPort.bufferUntil('\n');

  initializeGame();  // Initialize game variables
}

void draw() {
  if (isGameOver) {
    // Show "Game Over" screen
    background(0);
    fill(255, 0, 0);
    textAlign(CENTER, CENTER);
    textSize(50);
    text("Game Over", width / 2, height / 2);
    textSize(20);
    text("Press button to restart", width / 2, height / 2 + 40);
    return;
  }

  background(0);  // Black background

  // Draw player aircraft
  fill(0, 255, 0);
  noStroke();
  triangle(playerX, playerY, playerX - 20, playerY + 40, playerX + 20, playerY + 40);

  // Update and draw enemies
  for (int i = enemies.size() - 1; i >= 0; i--) {
    Enemy e = enemies.get(i);
    e.update();
    e.show();
    if (e.isOffScreen()) {
      enemies.remove(i);  // Remove enemies that leave the screen
    }
  }

  // Update and draw enemy bullets
  for (int i = bullets.size() - 1; i >= 0; i--) {
    Bullet b = bullets.get(i);
    b.update();
    b.show();
    if (b.isOffScreen()) {
      bullets.remove(i);  // Remove bullets that leave the screen
    } else if (b.hitsPlayer(playerX, playerY, playerSize)) {
      // Trigger Game Over if bullet hits the player
      isGameOver = true;
      break;  // Exit the loop
    }
  }

  // Update and draw player bullets
  for (int i = playerBullets.size() - 1; i >= 0; i--) {
    PlayerBullet pb = playerBullets.get(i);
    pb.update();
    pb.show();
    // Check if the bullet hits any enemy
    for (int j = enemies.size() - 1; j >= 0; j--) {
      if (pb.hitsEnemy(enemies.get(j))) {
        enemies.remove(j);  // Remove the enemy
        playerBullets.remove(i);  // Remove the player bullet
        break;
      }
    }
    if (pb.isOffScreen()) {
      playerBullets.remove(i);  // Remove player bullets that leave the screen
    }
  }

  // Spawn new enemies periodically
  spawnTimer++;
  if (spawnTimer > 60) {  // Spawn every 60 frames
    enemies.add(new Enemy());
    spawnTimer = 0;
  }
}

void serialEvent(Serial myPort) {
  String data = myPort.readStringUntil('\n');
  data = trim(data);
  if (data != null) {
    String[] values = split(data, ',');
    if (values.length == 3) {  // Ensure data includes X, Y, and button state
      // Update player position based on joystick input
      float xValue = map(float(values[0]), 0, 1023, 0, width);
      float yValue = map(float(values[1]), 0, 1023, height - 100, height);
      int buttonState = int(values[2]);  // Button state (0 = pressed, 1 = released)

      if (isGameOver && buttonState == 0) {
        // Restart the game if button is pressed during Game Over
        initializeGame();
        return;
      }

      if (!isGameOver) {
        playerX = constrain(xValue, 20, width - 20);  // Keep player on-screen
        playerY = constrain(yValue, height - 100, height - 20);

        // Shoot a bullet when the button is pressed
        if (buttonState == 0) {
          playerBullets.add(new PlayerBullet(playerX, playerY));
        }
      }
    }
  }
}

// Initialize or restart the game
void initializeGame() {
  // Reset player position
  playerX = width / 2;
  playerY = height - 60;

  // Clear all enemies and bullets
  enemies = new ArrayList<Enemy>();
  bullets = new ArrayList<Bullet>();
  playerBullets = new ArrayList<PlayerBullet>();

  // Reset game state
  spawnTimer = 0;
  isGameOver = false;
}

// Enemy Class
class Enemy {
  float x, y, size;
  float speed;  // Speed of the enemy

  Enemy() {
    x = random(20, width - 20);
    y = -40;
    size = 40;
    speed = 1;  // Slower vertical speed
  }

  void update() {
    y += speed;  // Move downward
    if (frameCount % 90 == 0) {  // Shoot bullets less frequently
      bullets.add(new Bullet(x, y + size / 2));
    }
  }

  void show() {
    fill(255, 0, 0);
    rectMode(CENTER);
    rect(x, y, size, size);
  }

  boolean isOffScreen() {
    return y > height;
  }
}

// Bullet Class (Enemy Bullets)
class Bullet {
  float x, y, size;

  Bullet(float startX, float startY) {
    x = startX;
    y = startY;
    size = 10;
  }

  void update() {
    y += 5;  // Move downward
  }

  void show() {
    fill(255, 255, 0);
    ellipse(x, y, size, size);
  }

  boolean isOffScreen() {
    return y > height;
  }

  boolean hitsPlayer(float px, float py, float pSize) {
    return dist(x, y, px, py) < (size + pSize) / 2;
  }
}

// PlayerBullet Class
class PlayerBullet {
  float x, y, size;

  PlayerBullet(float startX, float startY) {
    x = startX;
    y = startY;
    size = 8;
  }

  void update() {
    y -= 7;  // Move upward
  }

  void show() {
    fill(0, 0, 255);
    ellipse(x, y, size, size);
  }

  boolean isOffScreen() {
    return y < 0;
  }

  boolean hitsEnemy(Enemy e) {
    return dist(x, y, e.x, e.y) < (size + e.size) / 2;
  }
}
10. IR Obstacle Avoidance Sensor
IR obstacle avoidance sensors use infrared light to detect obstacles without physical contact. They’re common in robotics, especially for autonomous navigation.
Project 13: Burglar Alarm
Position the sensor near doors or windows. When an intruder approaches, the sensor detects an object within a certain range and triggers an alarm.
Components Required
- Arduino board
- IR obstacle avoidance sensor
- Buzzer
- LED
- 220-ohm resistor
- Jumper wires
Circuit Diagram

Program
// Pin definitions
const int irSensorPin = 2;  // IR sensor output pin
const int ledPin = 8;       // LED pin
const int buzzerPin = 11;   // Buzzer pin

void setup() {
  pinMode(irSensorPin, INPUT);  // IR sensor as input
  pinMode(ledPin, OUTPUT);      // LED as output
  pinMode(buzzerPin, OUTPUT);   // Buzzer as output

  digitalWrite(ledPin, LOW);     // Ensure LED is off initially
  digitalWrite(buzzerPin, LOW);  // Ensure buzzer is off initially
  Serial.begin(9600);            // Initialize serial communication
}

void loop() {
  int irValue = digitalRead(irSensorPin);  // Read the IR sensor value

  if (irValue == LOW) {             // Object detected
    digitalWrite(ledPin, HIGH);     // Turn on LED
    digitalWrite(buzzerPin, HIGH);  // Turn on buzzer
    Serial.println("Object detected!");
  } else {
    digitalWrite(ledPin, LOW);     // Turn off LED
    digitalWrite(buzzerPin, LOW);  // Turn off buzzer
    Serial.println("No object detected.");
  }

  delay(100);  // Small delay for stability
}
Project 14: White/Black Color Detection
This simple line detection project uses the IR sensor to differentiate between a white and black surface and print the detected color name on the 0.91-inch OLED display.
Components Required
- Arduino board
- IR obstacle avoidance sensor(with Analog pin)
- 0.91 inch OLED display
- Jumper wires
Circuit Diagram

Program
#include <Wire.h>
#include <Adafruit_GFX.h>
#include <Adafruit_SSD1306.h>

// Define the dimensions of the display
#define SCREEN_WIDTH 128
#define SCREEN_HEIGHT 32

// Initialize the display with the I2C address (usually 0x3C)
Adafruit_SSD1306 display(SCREEN_WIDTH, SCREEN_HEIGHT, &Wire, -1);

// Define the pin for the IR sensor
#define IR_SENSOR_PIN A0

void setup() {
  // Start the serial communication for debugging purposes (optional)
  Serial.begin(9600);

  // Initialize the display
  if(!display.begin(SSD1306_SWITCHCAPVCC, 0x3C)) {
    Serial.println(F("SSD1306 allocation failed"));
    for(;;);
  }

  // Clear the buffer
  display.clearDisplay();

  // Set text size and color
  display.setTextSize(2);
  display.setTextColor(SSD1306_WHITE);

  // Set the IR sensor pin as input
  pinMode(IR_SENSOR_PIN, INPUT);
}

void loop() {
  // Read the value from the IR sensor
  int sensorValue = analogRead(IR_SENSOR_PIN);

  // Clear the display buffer
  display.clearDisplay();
 Serial.println(sensorValue);
  // Check the sensor value
  if(sensorValue <= 350) {
    // When a black line is detected
    display.clearDisplay();
    display.setCursor(20, 0);
    display.print("You are ");
    display.setCursor(25, 18);
    display.print("\"BLACK\"");
  } else if(sensorValue >= 700) {
    display.clearDisplay();
    // When a white line is detected
    display.setCursor(20, 0);
    display.print("You are ");
    display.setCursor(25, 18);
    display.print("\"WHITE\"");
  }
  else {
   display.clearDisplay();
       display.setCursor(20, 0);
    display.print("Waiting ");
  }

  // Show the message on the display
  display.display();

  // Short delay to avoid rapid switching
  delay(100);
}
11. MPU6050 Sensor
The MPU6050 is a 6-axis motion tracking device combining a 3-axis accelerometer and a 3-axis gyroscope. It’s used in drones, game controllers, and gesture-based projects.
Project 15: Simple Accelerometer + Gyroscope Readings
Learn to read the raw accelerometer and gyroscope data. Display the readings on the OLED display. This project helps you understand the fundamentals of motion sensing.
Components Required
- Arduino board
- MPU6050 module
- 0.91 inch OLED display
- Jumper wires
Circuit Diagram

Program
#include <Wire.h>
#include <Adafruit_SSD1306.h>
#include <Adafruit_MPU6050.h>
#include <Adafruit_Sensor.h>

// OLED display settings
#define SCREEN_WIDTH 128
#define SCREEN_HEIGHT 32
Adafruit_SSD1306 display(SCREEN_WIDTH, SCREEN_HEIGHT, &Wire, -1);

// MPU6050 object
Adafruit_MPU6050 mpu;

void setup() {
  // Initialize Serial Monitor
  Serial.begin(9600);
  Serial.println("Initializing...");

  // Initialize OLED display
  if (!display.begin(SSD1306_SWITCHCAPVCC, 0x3C)) {
    Serial.println("SSD1306 allocation failed");
    for (;;)
      ;
  }
  display.clearDisplay();
  display.setTextSize(1);
  display.setTextColor(SSD1306_WHITE);
  display.setCursor(0, 0);
  display.println("MPU6050 + OLED");
  display.display();
  delay(2000);

  // Initialize MPU6050
  if (!mpu.begin()) {
    Serial.println("MPU6050 initialization failed!");
    display.clearDisplay();
    display.setCursor(0, 0);
    display.println("MPU6050 Error!");
    display.display();
    while (1)
      ;
  }
  Serial.println("MPU6050 ready");
  display.clearDisplay();
  display.setCursor(0, 0);
  display.println("MPU6050 Ready");
  display.display();
  delay(1000);
}

void loop() {
  // Get accelerometer and gyroscope data
  sensors_event_t accel, gyro, temp;
  mpu.getEvent(&accel, &gyro, &temp);

  // Display accelerometer and gyroscope data on Serial Monitor
  Serial.print("Accel X: ");
  Serial.print(accel.acceleration.x);
  Serial.print(" Y: ");
  Serial.print(accel.acceleration.y);
  Serial.print(" Z: ");
  Serial.println(accel.acceleration.z);

  Serial.print("Gyro X: ");
  Serial.print(gyro.gyro.x);
  Serial.print(" Y: ");
  Serial.print(gyro.gyro.y);
  Serial.print(" Z: ");
  Serial.println(gyro.gyro.z);

  // Display accelerometer and gyroscope data on OLED
  display.clearDisplay();
  display.setCursor(0, 0);
  display.print("Accel: ");
  display.print("X=");
  display.print(accel.acceleration.x);
  display.print(" Y=");
  display.print(accel.acceleration.y);
  display.print(" Z=");
  display.println(accel.acceleration.z);

  display.setCursor(0, 16);
  display.print("Gyro: ");
  display.print("X=");
  display.print(gyro.gyro.x);
  display.print(" Y=");
  display.print(gyro.gyro.y);
  display.print(" Z=");
  display.println(gyro.gyro.z);

  display.display();

  delay(500);  // Delay for stability
}
Project 16: Aircraft simulation on your Laptop window
Use the sensor data to control a simple aircraft-like object on your processing software window.
Remove the OLED connections and upload the program given below.
Arduino Program
#include <Adafruit_MPU6050.h>
#include <Adafruit_Sensor.h>
#include <Wire.h>

// Create MPU6050 object
Adafruit_MPU6050 mpu;

void setup() {
  Serial.begin(115200);

  // Initialize MPU6050
  if (!mpu.begin()) {
    Serial.println("Failed to find MPU6050 chip");
    while (1) {
      delay(10);
    }
  }
  Serial.println("MPU6050 Initialized!");

  // Set sensor ranges
  mpu.setAccelerometerRange(MPU6050_RANGE_8_G);  // Set accelerometer range to ±8G
  mpu.setGyroRange(MPU6050_RANGE_500_DEG);       // Set gyro range to ±500 deg/s
  mpu.setFilterBandwidth(MPU6050_BAND_21_HZ);    // Set filter bandwidth to 21 Hz

  delay(100);  // Allow settings to take effect
}

void loop() {
  // Create variables for accelerometer, gyroscope, and temperature data
  sensors_event_t accel, gyro, temp;

  // Get new sensor readings
  mpu.getEvent(&accel, &gyro, &temp);

  // Calculate pitch and roll from accelerometer data
  float pitch = atan2(accel.acceleration.y, sqrt(accel.acceleration.x * accel.acceleration.x + accel.acceleration.z * accel.acceleration.z)) * 180 / PI;
  float roll = atan2(-accel.acceleration.x, accel.acceleration.z) * 180 / PI;

  // Send pitch and roll data over Serial
  Serial.print(pitch);
  Serial.print(",");
  Serial.println(roll);

  delay(50);  // Send data every 50ms
}
Processing Code
import processing.serial.*;

Serial myPort;  // Serial port for communication
float pitch = 0; // Tilt along X-axis
float roll = 0;  // Tilt along Y-axis

void setup() {
  size(800, 800, P3D);  // 3D canvas
  myPort = new Serial(this, Serial.list()[0], 115200);  // Open serial port
  myPort.bufferUntil('\n');  // Wait for full data line
}

void draw() {
  background(135, 206, 235);  // Sky blue background
  lights();       // Enable lighting

  // Center the camera and apply rotations
  translate(width / 2, height / 2, -500);  // Center plane
  rotateX(radians(-pitch));               // Rotate for pitch
  rotateZ(radians(roll));                 // Rotate for roll

  // Draw plane body
  fill(200, 0, 0);  // Red for the body
  noStroke();
  pushMatrix();
  box(150, 30, 30);  // Main body
  popMatrix();

  // Draw wings
  fill(100, 100, 255);  // Blue for the wings
  pushMatrix();
  translate(0, 0, -60);
  box(200, 5, 20);  // Left wing
  popMatrix();

  pushMatrix();
  translate(0, 0, 60);
  box(200, 5, 20);  // Right wing
  popMatrix();

  // Draw tail
  fill(200, 0, 0);
  pushMatrix();
  translate(-60, -30, 0);
  box(20, 50, 10);  // Vertical tail fin
  popMatrix();

  pushMatrix();
  translate(-60, -15, 20);
  box(40, 5, 10);  // Horizontal tail fin right
  popMatrix();

  pushMatrix();
  translate(-60, -15, -20);
  box(40, 5, 10);  // Horizontal tail fin left
  popMatrix();
}

// Read pitch and roll data from Arduino
void serialEvent(Serial myPort) {
  String data = myPort.readStringUntil('\n');  // Read serial data
  data = trim(data);  // Remove whitespace
  if (data != null) {
    String[] values = split(data, ',');
    if (values.length == 2) {
      pitch = float(values[0]);  // Parse pitch
      roll = float(values[1]);   // Parse roll
    }
  }
}
12. BME280 Sensor
The BME280 is an environmental sensor capable of measuring temperature, humidity, and barometric pressure. It’s popular in weather stations and IoT projects for accurate climate data.
Project 17: Mini Weather Station
Monitor the temperature, humidity, and pressure in your room or outdoors. Display the data on an OLED screen.
Components Required
- Arduino board
- BME280 sensor module
- 0.91 inch OLED display
- Jumper wires
Circuit Diagram

Program
#include <Wire.h>
#include <Adafruit_Sensor.h>
#include <Adafruit_BME280.h>
#include <Adafruit_SSD1306.h>

#define SCREEN_WIDTH 128
#define SCREEN_HEIGHT 32

// Create objects for BME280 and OLED
Adafruit_BME280 bme;  // BME280 object
Adafruit_SSD1306 display(SCREEN_WIDTH, SCREEN_HEIGHT, &Wire, -1);

// Timing for data refresh
unsigned long delayTime = 2000;

void setup() {
  Serial.begin(9600);

  // Initialize OLED display
  if (!display.begin(SSD1306_SWITCHCAPVCC, 0x3C)) {  // 0x3C is the default I2C address
    Serial.println(F("SSD1306 allocation failed"));
    for (;;)
      ;
  }
  display.clearDisplay();
  display.setTextSize(1);
  display.setTextColor(SSD1306_WHITE);

  // Initialize BME280 sensor
  if (!bme.begin(0x76)) {  // 0x76 is the default I2C address for BME280
    Serial.println("Could not find a valid BME280 sensor, check wiring!");
    for (;;)
      ;
  }

  // Initial display message
  display.setCursor(0, 0);
  display.println("BME280 Sensor");
  display.println("Initializing...");
  display.display();
  delay(2000);
}

void loop() {
  // Clear the display
  display.clearDisplay();

  // Get sensor data
  float temperature = bme.readTemperature();
  float humidity = bme.readHumidity();
  float pressure = bme.readPressure() / 100.0F;  // Convert to hPa

  // Print data to Serial Monitor
  Serial.print("Temperature: ");
  Serial.print(temperature);
  Serial.println(" °C");

  Serial.print("Humidity: ");
  Serial.print(humidity);
  Serial.println(" %");

  Serial.print("Pressure: ");
  Serial.print(pressure);
  Serial.println(" hPa");
  Serial.println();

  // Display data on OLED
  // display.setCursor(0, 0);
  //display.println("BME280 Sensor Data");
  display.setCursor(0, 0);
  display.print("Temp: ");
  display.print(temperature);
  display.println(" C");

  display.setCursor(0, 10);
  display.print("Humidity: ");
  display.print(humidity);
  display.println(" %");

  display.setCursor(0, 20);
  display.print("Pressure: ");
  display.print(pressure);
  display.println(" hPa");

  display.display();

  // Wait for the next update
  delay(delayTime);
}
Conclusion
By exploring these 17 Arduino projects, you’ll gain a broad understanding of how different sensors work and how they can be applied in real-world scenarios. From simple motion detection to interactive games, each project challenges you to learn new skills in electronics, coding, and problem-solving.