Last updated on March 28th, 2024 at 12:02 pm
Hi, this top 100 Arduino Projects list is divided into 3 levels:
Level 1: For beginners who are just starting their Arduino journey.
Level 2: Intermediate projects for those who have mastered all the basics of Arduino and Electronics.
Level 3: For advanced-level hobbyists and engineers who have experience in 3D designing, CAD, Electronics, and Microcontrollers.
Let’s start with the list of Arduino projects for beginners first.
Table of Contents
Arduino Projects for beginners
Touch Dimmer circuit using Arduino
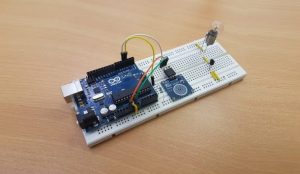
Description: In this project, the brightness of a small bulb is controlled using a touch sensor. The longer the touch time, the brighter the bulb glows. So the brightness of the bulb is adjusted in accordance with the touch time.
Components required:
- Arduino Board x 1
- Touch Sensor
- 2N2222 NPN Transistor
- 1 Kohm Resistor
- Small Bulb
- Power Supply
- Breadboard for connections
- Connecting Wires
For more details on this project, click here: Touch dimmer circuit
Precise Motor speed measurement
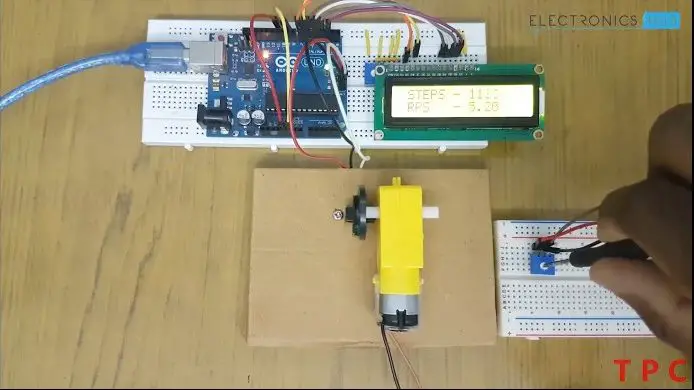
Description: Our goal here is to measure the speed of a 5V geared motor. This is an innovative project that allows you to measure the speed of rotating objects at home using an Arduino Uno and a speed sensor.
The speed sensor detects the speed of the rotation of the motor(changed using a 10K pot) and displays the corresponding value onto the LCD screen.
Components required:
- Arduino Uno
- LM393 Speed Sensor Module
- 5V geared motor with encoder wheel
- PCB and breadboard
- Cables and connectors
- 16×2 LCD
- 10K POT
For more details on this project, click here: DC motor speed measurement
Gas Detector Arduino project
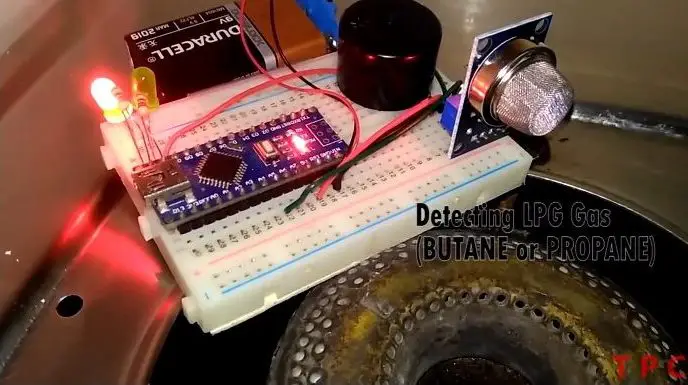
Description: Keep your hose and neighborhood safe from blowing up with this simple and economical project that alerts the user if there is any gas leakage in household premises.
The gas sensor in the circuit detects quickly senses the butane gas which triggers an alarm in the circuit along with the message signal sent to the owner over the internet.
Components required:
- Arduino Nano
- MQ2 gas sensor
- 220 OHM resistors 2 nos
- Red and Green LED
- 9V battery and clip
- Buzzer
- Breadboard
- Cable and Connectors
For more details on this project, click here– Gas detector project using Arduino
Security System using Ultrasonic Sensor
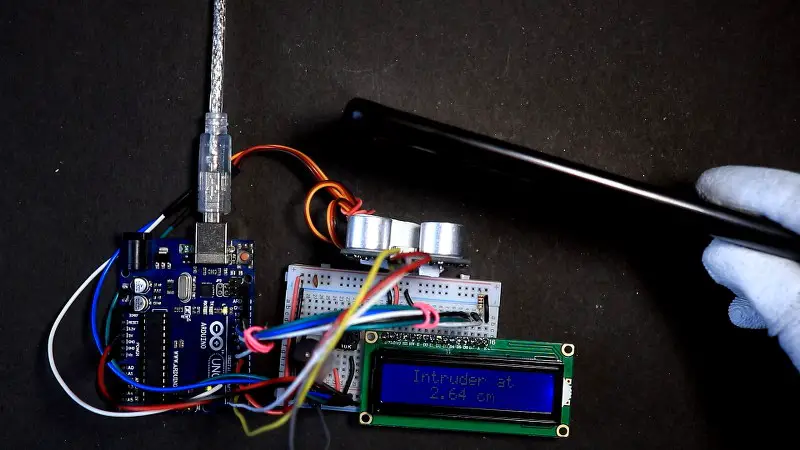
Description: In this project, an ultrasonic sensor is tied to a servo motor. The servo motor rotates continuously between 0 and 180 degrees, performing the function of a radar.
When an object comes in the range of the sensor, the sensor tracks it and raises an alarm. The corresponding distance of the object from the sensor gets displayed on the LCD screen.
Components required:
- Ultrasonic sensor
- Arduino Uno board
- LCD Screen
- 10K Potentiometer
- Servo motor
- Resistor (220 ohms)
- Breadboard
For more details on this project, click here: Security System using Ultrasonic Sensor
Water flow and volume measurement
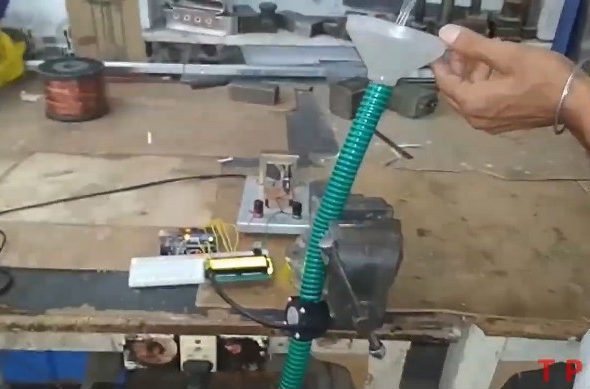
Description: This project demonstrates a smart way to monitor the flow of water. The water flow sensor detects the rate of flow of water and keeps track of the total amount of water that has flowed through it. You can check the values on the LCD screen.
For more details on this project, click here: Water flow/volume measurement
Soil Moisture Monitoring Arduino project
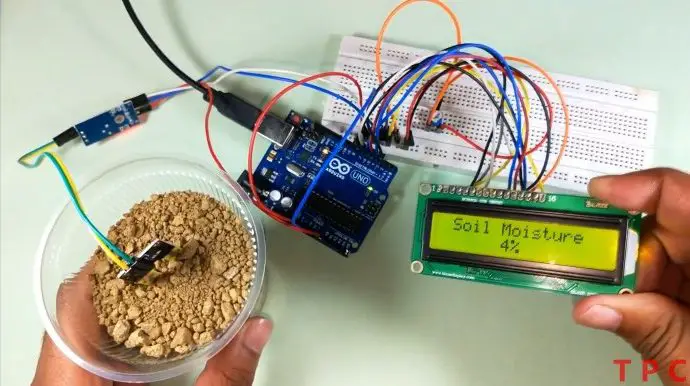
Description: Now you don’t need to worry about killing your plants anymore. With a soil moisture monitor, you can monitor the volumetric content of water in the soil. The sensor detects the moisture level and displays it onto the LCD screen so that you could know how much water you need to give to your plants.
Components required:
- Arduino Uno
- Moisture Sensor
- Breadboard for connections
- Connecting wires
For more details on this project, click here: Arduino Soil Moisture Sensor
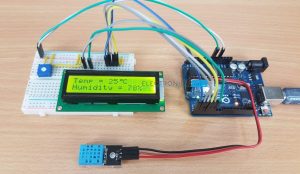
Humidity and Temperature measurement
Description: To measure the humidity and temperature of surrounding using a Humidity sensor with Arduino and then prints the value on an LCD display.
Components required:
- Arduino Board
- LDR(Light dependent resistors) X 4
- Connecting Wires
- Linear Potentiometer X 4
- Base Shield For Arduino
- Cardboard
- Foamboard
- Stick
- Servo Motor
For more details on this project, click here: Humidity Sensor Module
Color detection using TCS-3200 and LCD display

Description: This project allows you to detect the color of something without even looking at it. When we place a colored sheet in front of the sensor, it detects the color and flashes it on the 16×2 LCD.
This project can come in handy for blind or color blind people or save your relationship when she asks you to pick up the perfect shade of Lipstick.
Components required:
- Arduino Uno
- 16*2 LCD
- TCS-3200 / TCS-230 Color Sensor
- 10k Variable Resistor
- 220ohm resistor
- Breadboard
- Different Color Paper
- Some Jumper wire
For more details on this project, click here– Color detection using TCS-3200
Arduino Rain Water Alarm
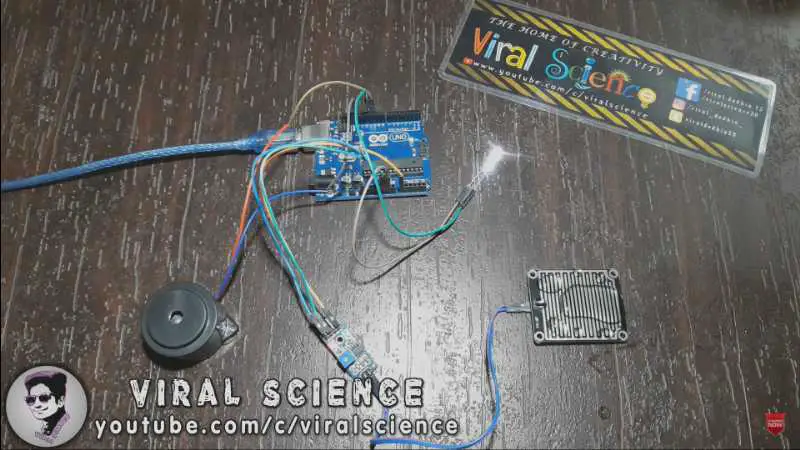
Description: To detect the water droplets by Blinking LED and a buzzer.
Components required:
- Arduino Uno
- Rain Sensor
- Buzzer
- LED
For more details on this project, click here: Liquid Sensor Module
IR Sensor-based Motion Sensing-Alarm
Description: To build a motion-sensing alarm with Arduino and IR sensors.
Components required:
- Arduino UNO
- Motor Driver L293D
- Geared DC Motors
- IR Sensor Module x 2
- Power Supply
- Connecting Wires
For more details on this project, click here: IR Sensor-based Motion Sensor Alarm
Door Alarm using Ultrasonic Sensor
Description: To build a Door Alarm using Ultrasonic Sensor with Arduino
Components required:
- Arduino Board
- Buzzer
- HC-SR04 Ultrasonic Sensor
- Breadboard for connection
- Connecting Wires
For more details on this project, click here: Arduino Door Alarm
Distance Measurement using Ultrasonic Sensor and Arduino.
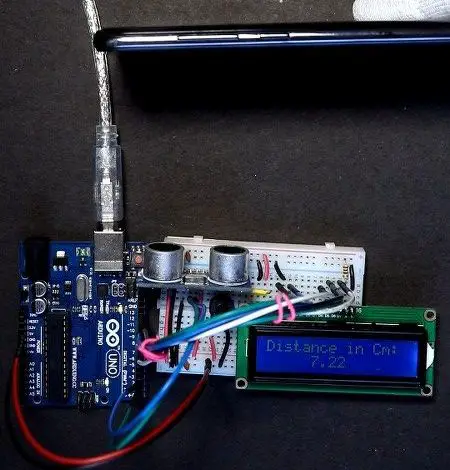
Description: Sometimes it becomes necessary to get the precise distance of an object. And hence, this project measures the distance of an object placed in front of the ultrasonic sensor and displays it on an LCD screen.
For more details on this project, click here: Measuring Distance using HC-SR04 Sensor
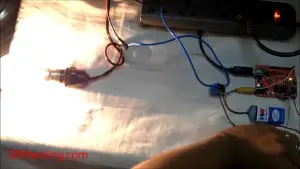
Using LDR to control the ON/OFF status of a bulb.
Description: To control the state of a bulb using LDR and Relay with Arduino.
As soon as the intensity of light decreases below a certain value, the status of the bulb changes from OFF to ON.
Components required:
- Arduino Uno
- LDR
- SPDT Relay
- Connecting Wires
For more details on this project, click here: LDR-Arduino
Intruder Alarm Project using Arduino and Ultrasonic Sensor
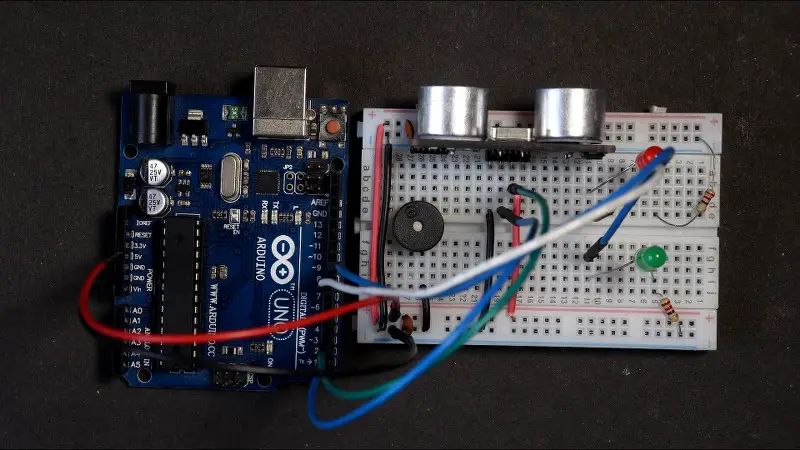
Description: Keeping your private things safe from intruders can be a challenging job. But with this Intruder Alarm project, it is easy to keep your accessories safe. The project is based on an Ultrasonic sensor.
The circuit makes a sound via a buzzer when an object comes near the sensor. The distance to which the sensor will respond can be easily adjusted in the program.
Components required:
- Ultrasonic Sensor
- LEDs x2
- Resistors (220 ohms) x2
- Buzzer
- Breadboard
- Arduino Uno Board
For more details on this project, click here: Intruder Alarm Project
DIY Music Reactive LED Lights

Description: This project is based on a sound sensor. It senses the vibration of the sound and Arduino gives corresponding signals to the LED strip.
For more details, click here: Simple Music visualizer using Arduino
Servo Motor Control With Joystick
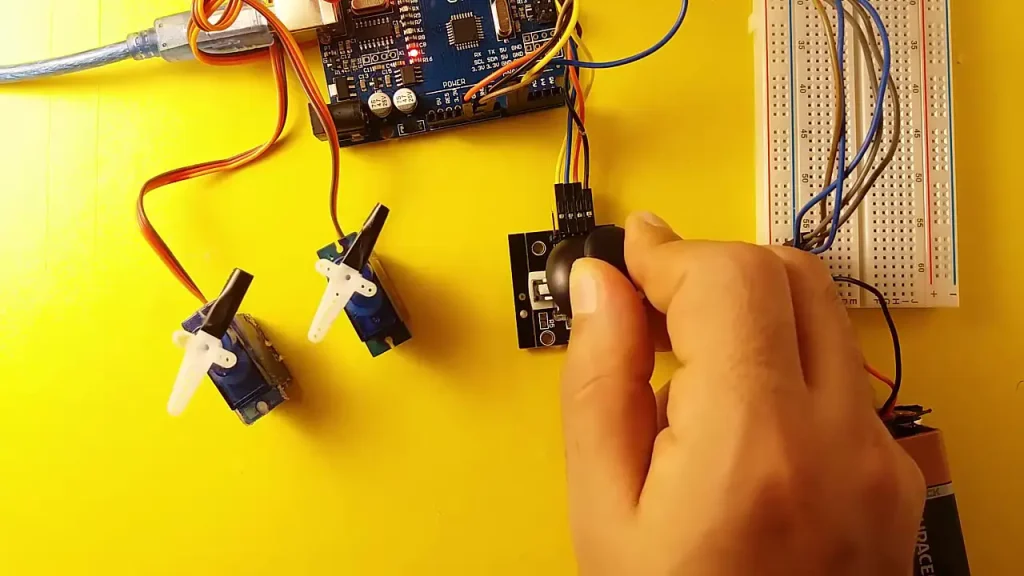
Description: By the end of this project you will be able to make various control mechanisms using Servo Motor and Joystick.
Servo Motor is one of the most commonly used motors in applications like RC planes, elevators, and grippers, etc. This makes it necessary for beginners to know how to use a Servo Motor. Vast applications of Servo Motor can be found here.
So after the end of the project, you will know :
A. How to use Servo Motor
B. How to Send signals from the joystick to Arduino in order to control Servo Motor
Components required:
- Servo Motor
- Arduino Uno
- Connecting Wires
- Two Joystick
- Breadboard
- Battery
For more details on this project, click here: Servo Motor control using Arduino
Automated street light project using LDR
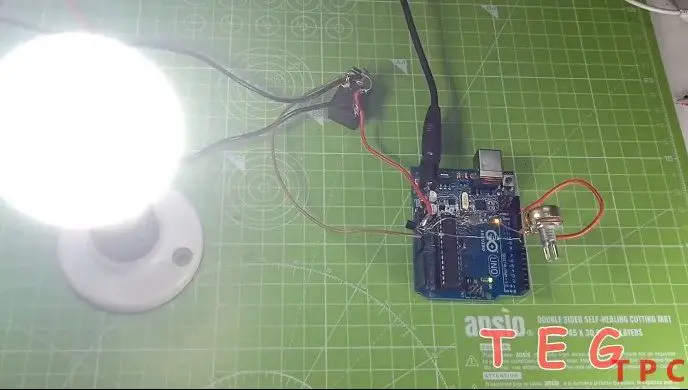
Description: With this project, you can automate your street lights and save yourself the trouble of stepping out at night. LDR sensor detects the absence and presence of light. When the sun goes down it sends a signal to reset the relay and complete the circuit.
Components required:
- Arduino
- LDR sensor
- 1K resistor
- 1N4007 Diode
- BC547 Transistor
- SPDT relay
- 10K POT
- Bulb
- Bulb holder
- Connecting Wires
For more details on this project, click here: Automated Street light project
Alcohol detector using MQ-2 with Arduino and LCD

Description: With this project you can make your handy alcohol detector at home and save yourself when your drunk friend insists on driving, claiming that he is not drunk.
An alcohol detector detects the presence of alcohol present in its surrounding atmosphere and sends a signal to flash a warning message on the 16×2 LCD and set out the alarming buzzer. Congratulations! Now you are a traffic cop (almost)!
Components required:
- Arduino Nano
- 16×2 LCD screen
- PCB
- MQ-2 sensor
- Female Header pin
- 10K POT
- Buzzer
- 9V battery
- Connecting wires
For more details on this project, click here: Alcohol detector using MQ-2
Water quality monitoring
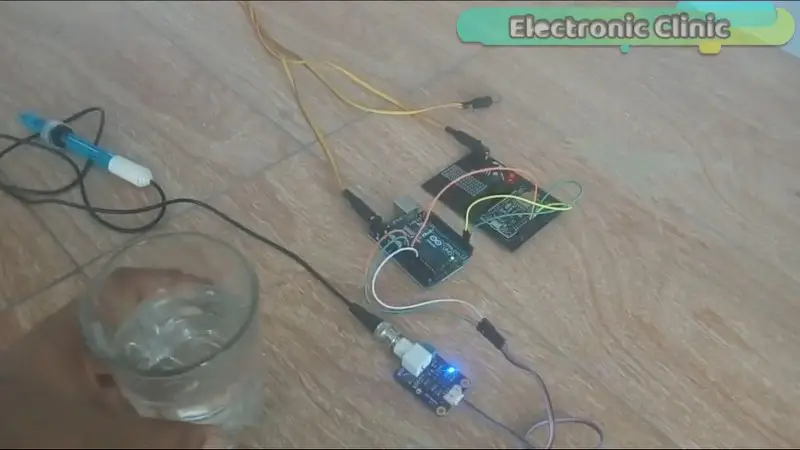
Description: This project regularly monitors and tracks the pH value of the water and fitness of water. The range of pH between 7.2 and 7.8 is considered fit for drinking purposes. The pH value of water is periodically updated to the owner over the internet.
Components required:
- Arduino
- pH sensor
- pH meter
- Wi-Fi module
- Connecting wires
- Transistor
- Capacitors
- LED
- Resistors
For more details on this project, click here
Car Parking System
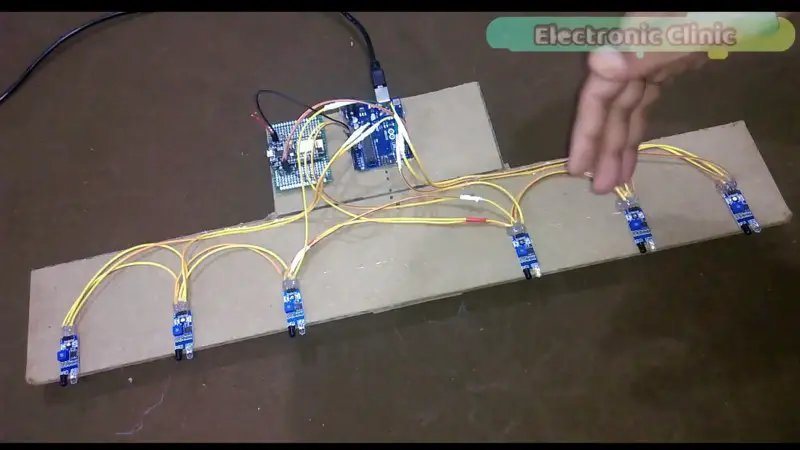
Description: This project demonstrates the use of an IR sensor to regularly monitor free space in the car parking area. As soon as a vehicle comes within or leaves the proximity of an IR sensor, the information is sent via the internet to the authority and hence the vacant and filled parking slots can be known at any time.
Components required:
- Arduino
- IR sensor
- Wi-Fi module
- Power Supply
- Connecting Wires
For more details on this project, click here
Distance status using LEDs
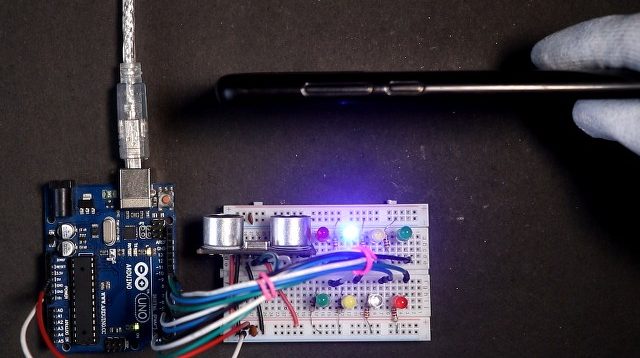
Description: A glowing LED always lights up your creative space. So, this project is a combined implementation of an ultrasonic sensor and LEDs. There is a total of 8 LEDs.
The LEDs blink according to the distance of an object from the Ultrasonic Sensor. Thus indicating how far the object is from the sensor.
Components required:
- Ultrasonic Sensor
- LEDs x8
- Resistors (220 ohms) x8
- Breadboard
- Arduino Uno board
For more details on this project, click here: Distance status using LEDs
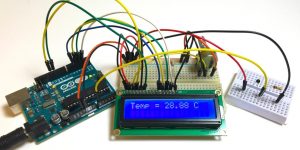
Thermister based Thermometer using Arduino with 16X2 LCD
Description: To measure the temperature value of surroundings and then print it on an LCD display using Arduino and a Thermistor
A thermistor is a type of variable resistor which changes its resistance in accordance with the temperature of its surroundings. So yes you can it kind of works like an LDR(Light Dependent Resistor) with one difference. Whereas LDR changes its resistance according to the intensity of light, a Thermistor’s resistance depends on the temperature of surroundings.
So By the end of the project, you will know :
A. Basics of a Thermistor and how to use it with Arduino.
B. How to use an LCD to print the required measured value. You can also check this post on “How to interface an LCD with Arduino and multiple sensors”.
Components required:
- Thermister
- Arduino Uno
- Connecting Wires
- LCD Display
- Breadboard
- Potentiometer
- Resistors
For more details on this project, click here: Arduino Temperature Sensor
Controlling DC motor speed using light intensity

Description: This project is based on LDR Sensor. As the intensity of the light falling on LDR’s surface increases, the speed of the DC Motor decreases.
For more details on this project, click here: DC motor speed control using LDR with Arduino
Dice using LEDs
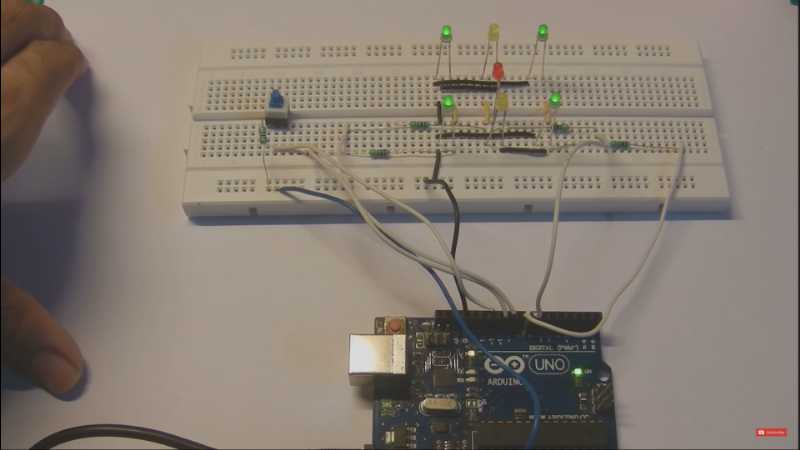
Description: To make an electronic dice using 6 LEDs, some resistors, and Arduino.
Foundation for this project is entirely the Coding Part whereas Circuit Connections and hardware part is easy. Dice number is indicated by the number of LEDs that glow out of six when the button is pressed.
Components required:
- Arduino UNO
- 6 LED’s
- Pushbutton
- 1k and 10k Resistors
- Breadboard for connections
- Connecting Wires
- Breadboard.
For more details on this project, click here: Electronic Dice using Arduino
Ultrasonic sensor LED Project
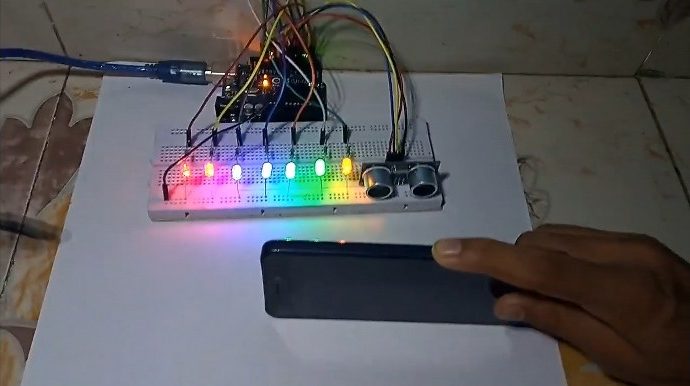
Description: This is my personal favorite among all other Arduino-Ultrasonic sensor Projects. This project allows you to detect the distance of an object or person from you. The ultrasonic sensor sends an ultrasonic signal with bounces back to it from the surface of the object.
Based on the time taken by the signal it calculates the distance of the object from the sensor. Multicolor LEDs demonstrate the distance of a person or object. So now you can make sure that your ex and kidnappers don’t sneak up on you from behind.
Components required:
- Arduino Uno
- Ultrasonic sensor Hc-sr04
- 7 x LEDs
- 7 x 220ohm resistor
- Breadboard
- jumper wire
For more details on this project, click here: Ultrasonic sensor LEDs project
Arduino Projects Intermediate-level
All-in-one Robot
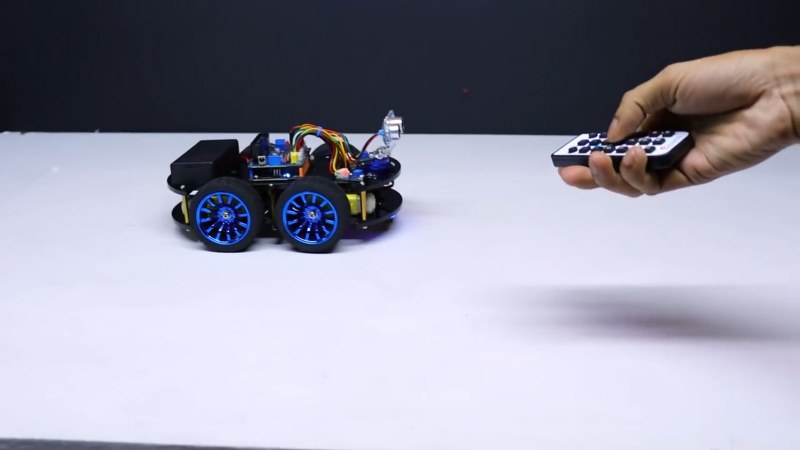
Description: This project has made to the number 1 position in the list of TOP 10 Arduino Projects for a reason. As the name specifies, this project demonstrates a robot that can be controlled in various ways.
With the brain being Arduino, this project can be controlled using Bluetooth or IR remote. Hand follow mode, Draw line mode, Obstacle avoidance mode, and Path follow mode are some of the other interesting ways to control the robot.
Components required:
- Arduino
- Chassis
- Wheels
- Motors
- Motor driver
- IR remote and IR sensor
- Ultrasonic sensor
- Bluetooth module
- Battery
- Connecting wires
- Screws
For more details, click here
Arduino Against Piano Tiles
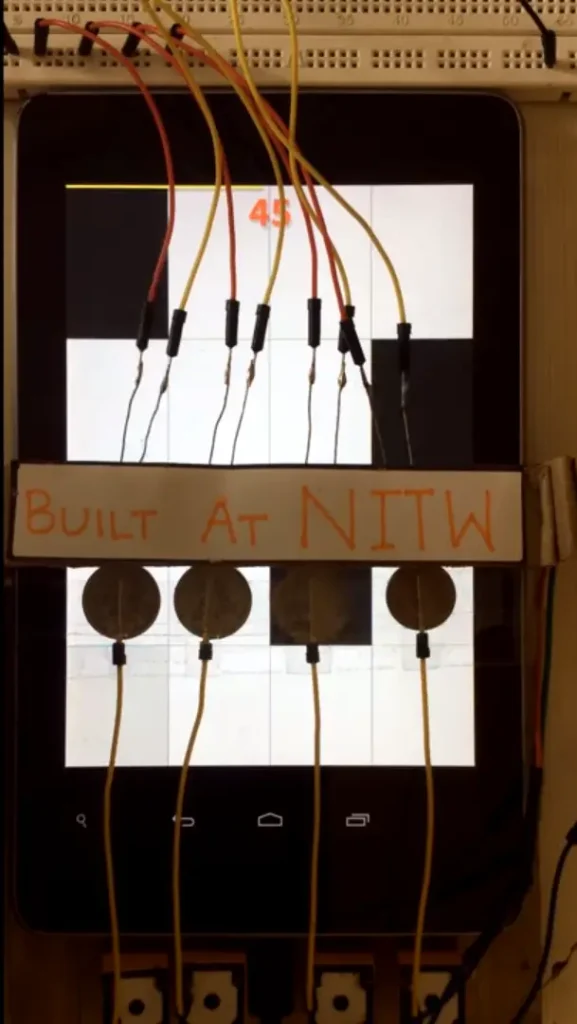
Description: To build a Robot that plays Piano Tiles, using LDR and Relay with Arduino UNO.
Yes, this circuit plays piano tiles on its own! Better than any human on earth. Sensors(LDR) attached to the screen senses the black tiles during gameplay and sends this info to the analog pin of Arduino in terms of Analog voltage. Arduino then activates the corresponding Relay, so that the coin connected in series with the relay’s switch can hit the tile to score!
Components required:
- Arduino Board
- LDR(Light dependent resistors) X 4
- Connecting Wires
- SPDT Relay X 4
- Coins X 4
- Breadboard
Project Link: Arduino Playing Piano Tiles
Food spoilage detector
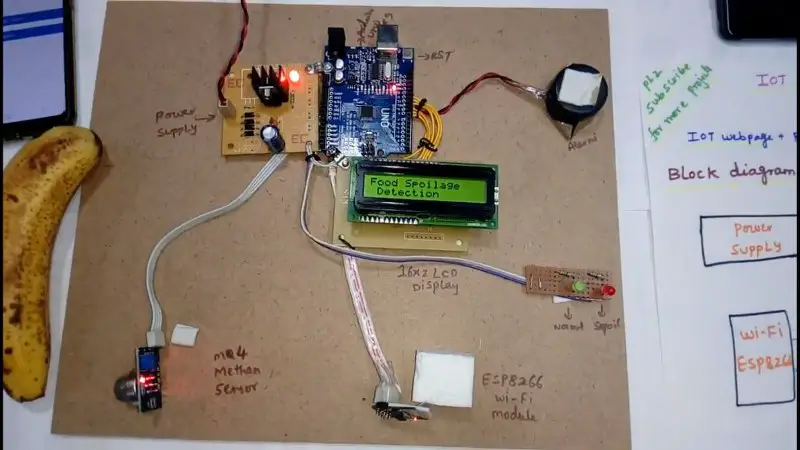
Description: This project regularly tracks and monitors the quality of food in our household. The gas sensors sense the smell of spoiled food and relay a message to the Arduino. Arduino flashes the message on the LCD display that the food is spoiled. Along with this, the owner also receives a message for the same.
Components required:
- Arduino Uno
- Wi-Fi module
- Gas sensor
- LCD display
- Power supply
- Alarm
- Connecting wires
For more details on this project, click here
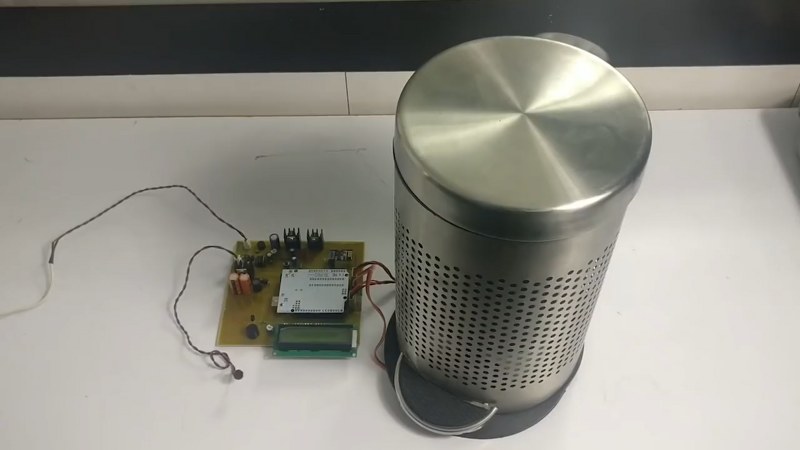
Smart Dustbin
Description: This is an innovative project that operates efficiently to provide a solution to disposing of garbage problems using IoT and mic sensor circuit.
The ultrasonic sensor continuously monitors the garbage level in the bin. When the bin is full, the circuit raises an alarm and alerts the user, so that the user can be empty and reuse the bin again.
Components required:
- Arduino Uno
- Ultrasonic sensor
- Mic sensor
- Wi-Fi module
- Capacitors
- Resistors
- Transistors
- PCB and breadboard
- Cables and connectors
- LED
- Transformer/Adapter
For more details, click here
Line Follower Robot
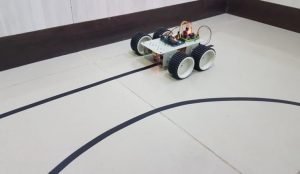
Description: To make an Autonomous Robot using Arduino, L298N, and IR sensor which follows a black line over the white surface using Arduino, L298N, and IR sensor.
You must be familiar with this Robot or must have seen it somewhere. A-Line Follower Robot is quite popular among beginners as well as experts. Basic Line follower among beginners and fastest line follower among experts. This project is considered a stepping stone in building a good understanding of Arduino.
You will get to know about IR Sensors which is quite popular and useful and how to use it to make a Line following Robot.
So after the end of the project, you will know :
A. Basics of an IR sensor and how to use it with Arduino.
B. How to use IR sensor’s output to set required logic on Arduino pins in order to control driving motors
Components required:
- L293D Motor Driver IC
- Arduino Uno
- IR Sensor Module x 2
- Geared Motors x 2
- Robot Chassis
- 12 Volt Battery
- Connecting Wires
For more details on this project, click here: Line Following Robot
Home automation project using Arduino
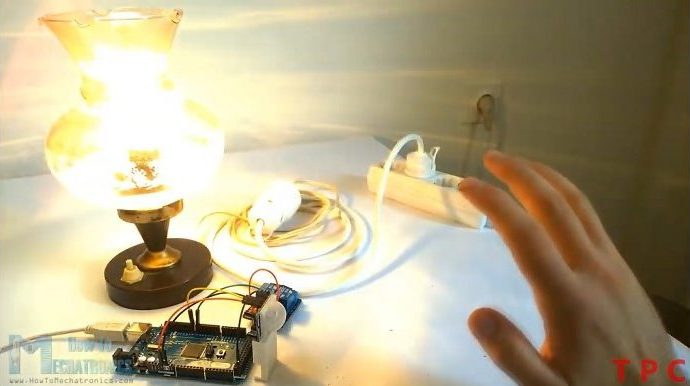
If you find flipping the light switch to be a pesky task then you can automate your house with the application of this project. You can make this project with the help of an Arduino and a PIR sensor.
A PIR sensor works on the principle of thermal imaging so when it senses the presence of a human or animal body in its vicinity, it automatically sends a signal to turn the device on or off. Other than home automation, you can implement this idea to enhance your home security. Although you may need to call the cops yourself.
Description: At the end of the project you will be able to control your home appliances like led, fan, bulb, etc. from the command written in Arduino IDE. You can adjust the ON and OFF times of these appliances.
One of the most popular modules i.e 2 channel relay module is used in this project which is used widely to control high voltage devices using low voltage signals. So in this project, you will learn how to use a 2 channel relay module with Arduino and PIR Sensor module.
Components required:
- A.C Appliances like a Bulb.
- Arduino Uno
- Connecting Wires
- 2-Channel Relay Board
- Breadboard
- Battery
For more details on this project, click here: Home Automation Using Arduino
Attendance system
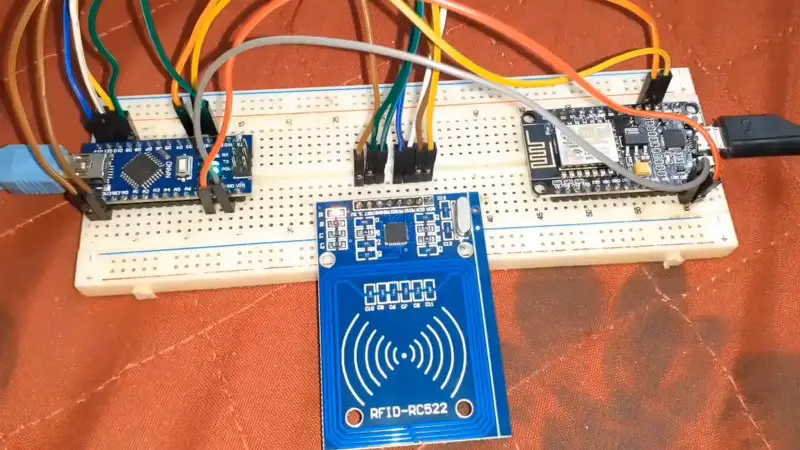
Description: This project demonstrates a smart way for the attendance system. The RFID scanner scans the RFID cards and logs the data to a cloud platform with the help of the Wi-Fi module hence recording the attendance of the student to whom the card belongs. You can check the recorded attendance on the internet at any time.
Components required:
- Arduino
- Wi-Fi module
- RFID scanner
- Breadboard
- Connecting wires
- RFID cards
For more details on this project, click here
Counter for winding machine
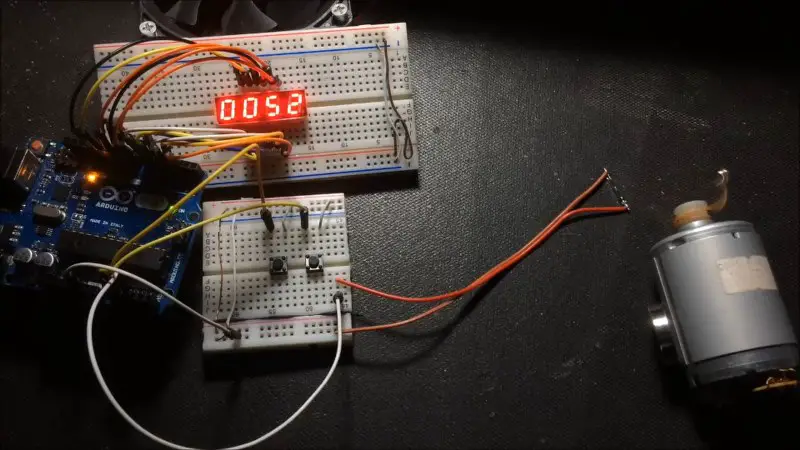
Description: The armature or field windings in motors and generators are done using machines and it is done at a very fast speed.
As the number of turns required in a particular machine depends on the specifications of that machine, it is essential to keep a track of the number of windings that had been done so this is a really helpful project that keeps the track of the number of windings done.
Components required:
- Arduino
- Counter
- Connecting Wires
- Buttons
- Breadboard
- Motor
For more details, click here
LCD-keypad Math Game
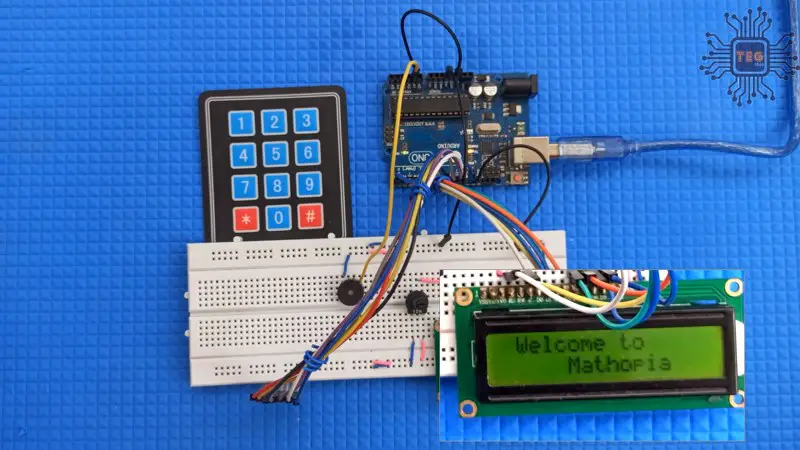
Description: An exciting project that tests your brain’s focus and accuracy using a game. The user has to perform some calculations in a specified time that appears on the LCD screen using a keypad.
The calculations involved become trickier each time the user gives the correct answer. In case of a wrong answer, the program gets reset and the high score of the user gets displayed on the screen.
Components required:
- Arduino
- Keypad
- LCD
- Buzzer
- Potentiometer
For more details, click here
Temperature Controlled Fan
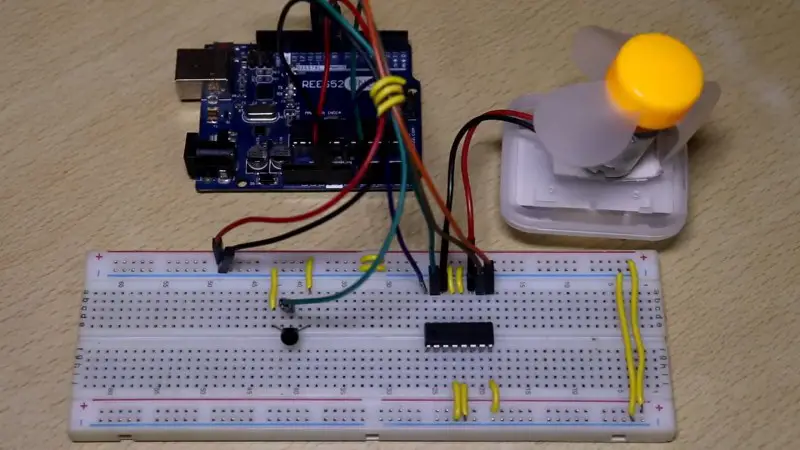
Description: It’s the simplest home automation project in which the speed of a fan is controlled according to the rise in temperature.
The temperature values for a given range are mapped to corresponding PWM values. When the temperature of the room exceeds a predefined temperature, the motor receives logic 1 and the fan starts running. It automatically stops as the temperature falls below the predefined temperature.
Components required:
- Arduino
- LM35 temperature sensor
- DC motor
- Motor driver
- Breadboard
- Connecting Wires
For more details, click here
Alarm Clock using Arduino UNO
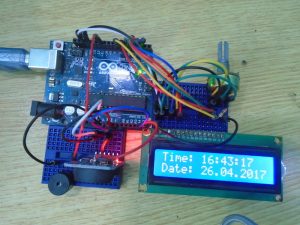
Description: To make an Arduino-based Alarm Clock using DS3231 RTC Module and LCD display.
In this project, you will be using a DS3231 RTC(Real Time Clock) Module with Arduino. A DS3231 Module works through I2C communication, thus making it easier to use with Arduino. A buzzer is used in this project to indicate Alarm time but you can use a speaker also.
So after the end of this project, you will know :
A. Basics of a DS3231 RTC Module and how to use it with Arduino.
Components required:
- Arduino UNO
- DS3231 RTC Module
- 16 X 2 LCD display
- Buzzer
- 220-ohm Resistor
- 10k potentiometer
- Connecting wires
- Breadboard.
For more details on this project, click here: Alarm Clock Using Arduino
Mobile Phone controlled manual robot:
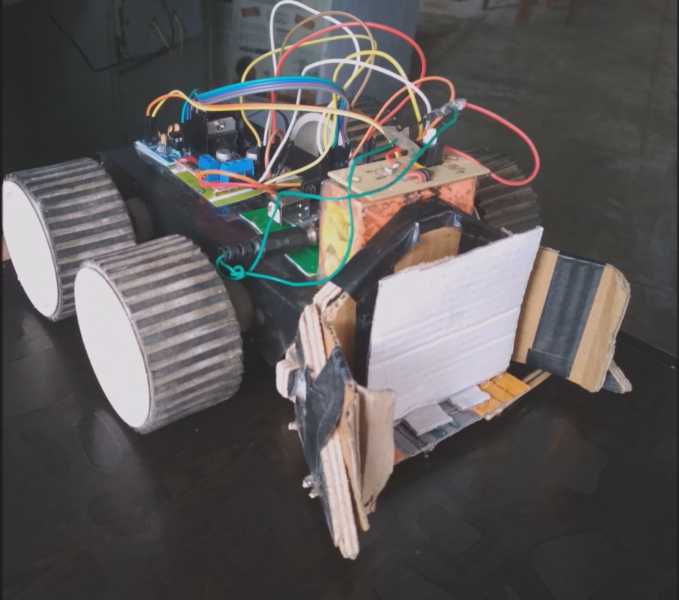
Description: To make a robot that can be controlled using a Mobile phone by just dialing a number and then using the mobile keypad to move the robot. One can control this robot from any part of the world.
To achieve this, you are going to use a DTMF(Dual Tone Multiple Frequency) Module which is used to simply decode the keypad tones of a Mobile phone. You need two cell-phone for this project. One to dial the number and control the Robot and another one to receive the call which remains on to the robot.
You can program Arduino to use any keypad keys you want to control the Robot.
Components required:
- Arduino UNO
- Manual robot
- 4 motors
- DTMF MODULE
- L298N Motor driver
- 12 Volt Battery
- Switch
- Headphone Jack
- Two Cell Phones
- Connecting wires
What is a DTMF Module?
DTMF module stands for dual-tone multiple frequencies. Each number in our mobile phone dial pad is a mixture of two-tone frequencies (higher and lower) and DTMF receives this tone frequency as input and decodes it into an equivalent binary form. DTMF has a wide application in home automation. When a dial pad button is pressed, DTMF receives a particular tone frequency and then decodes it into a binary number which is further processed by Arduino to perform a specific task.
To know more about DTMF MODULE click here.
The tone of each key consists of two different frequency and is used universally:
|
DECIMAL VALUE
|
BINARY VALUE
|
KEYPAD SYMBOL
|
|
0
|
0000
|
D
|
|
1
|
0001
|
1
|
|
2
|
0010
|
2
|
|
3
|
0011
|
3
|
|
4
|
0100
|
4
|
|
5
|
0101
|
5
|
|
6
|
0110
|
6
|
|
7
|
0111
|
7
|
|
8
|
1000
|
8
|
|
9
|
1001
|
9
|
|
10
|
1010
|
0
|
|
11
|
1011
|
*
|
|
12
|
1100
|
#
|
|
13
|
1101
|
A
|
|
14
|
1110
|
B
|
|
15
|
1111
|
C
|
Binary equivalent of decoded tone frequency on 4 output pins of DTMF Module:
| digit | D3 | D2 | D1 | D0 |
| 1 | 0 | 0 | 0 | 1 |
| 2 | 0 | 0 | 1 | 0 |
| 3 | 0 | 0 | 1 | 1 |
| 4 | 0 | 1 | 0 | 0 |
| 5 | 0 | 1 | 0 | 1 |
| 6 | 0 | 1 | 1 | 0 |
| 7 | 0 | 1 | 1 | 1 |
| 8 | 1 | 0 | 0 | 0 |
| 9 | 1 | 0 | 0 | 1 |
| 0 | 1 | 0 | 1 | 0 |
| * | 1 | 0 | 1 | 1 |
| # | 1 | 1 | 0 | 0 |
So by the end of this project, you will know :
A. Basics of a DTMF Module and how to use it with Arduino.
B. How to use L2938N(Motor Driver).
For more details on this project, click here: Mobile Phone Controlled Car
Health Monitor
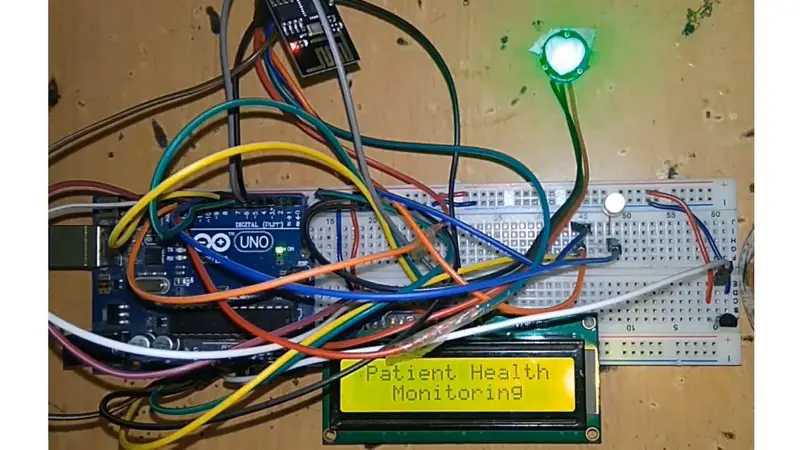
Description: It’s a simple and economical project to monitor a person’s health from a remote place. The temperature sensor senses the temperature of the human body while the pulse sensor measures the contraction and relaxation of the blood capillaries. Both these data are uploaded and stored on the cloud. A doctor can easily access this data from anywhere.
Components required:
- Arduino
- Wi-Fi module
- Pulse sensor
- Temperature sensor
- LCD display
- Resistors
- Breadboard
- Connecting wires
- LED
For more details on this project, click here
Servo motor control with distance
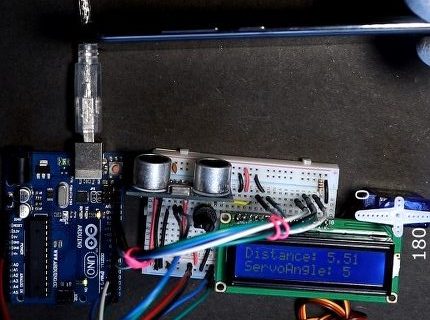
Description: A servo motor is also known for its rotation with great precision. And what would be better than giving that precise distance/rotation using an ultrasonic sensor?
This project uses a servo motor and an LCD screen with an ultrasonic sensor. The distance of the object from the sensor is mapped with the rotation of the motor between 0 and 180 degrees.
So, when the object is at a distance of 30cm, the servo angle is 30 degrees and when the object is at a distance of 90 cm, the servo angle is 90 degrees, and so on.
Components required:
- Ultrasonic sensor
- Arduino Uno board
- Servo motor
- LCD Screen
- 10K potentiometer
- Resistor (220 ohms)
- Breadboard
For more details on this project, click here: Distance-based Servo motor angle control
Basic LED Cube (4x4x4)
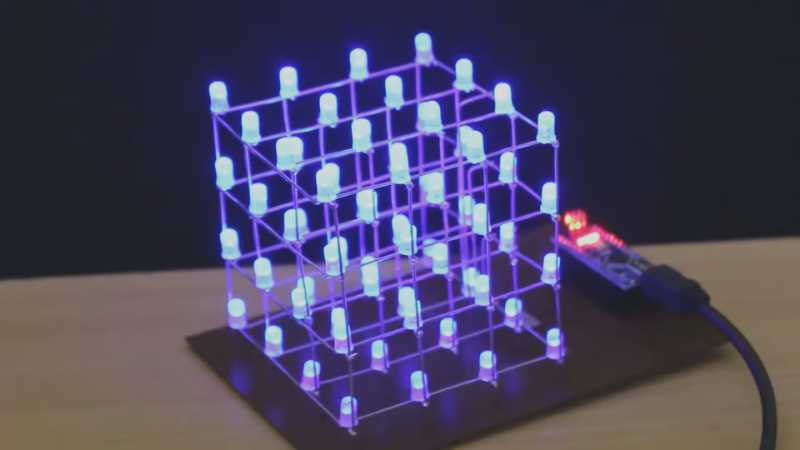
Description: This is one of the coolest projects you can make using the Arduino. It may seem complicated at first but believe me, this project is very simple. You just have to make all connections properly and ensure that each and every LED work. Then just burn the given code to your board and you are good to GO!
Components required:
- Blue LED x64
- Arduino Board
- 100-ohm Resistor x4
- Connecting Wires
- PCB Board
For more details on this project, click here: LED CUBE (4X4X4)
Multiple sensors with LCD
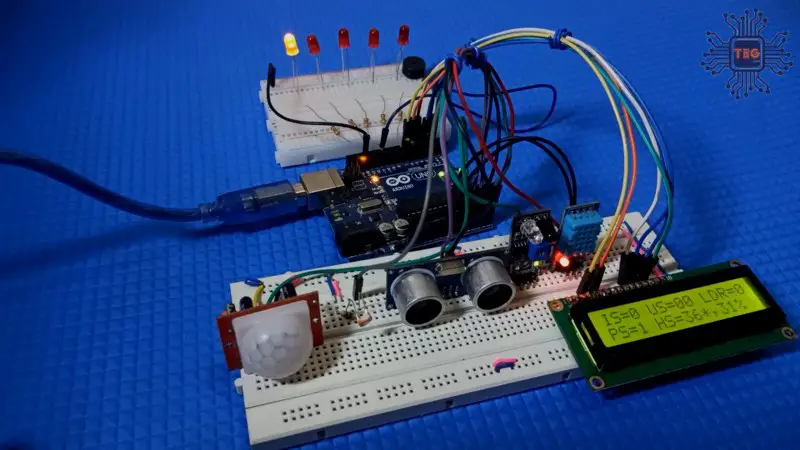
Description: Sensors are the primary sources to gather crucial information from the surroundings. But imagine a situation in which there is more than one information source to keep track of.
Well, this project can help you in this situation. In this project, six different sensors are used that gathers corresponding information and with the help of Arduino, the values are displayed on the LCD screen.
Components required:
- Arduino
- PIR Sensor
- LDR
- Gas sensor
- Ultrasonic sensor
- IR sensor
- Humidity/temperature sensor
- LCD display
- LED
- Resistor
- Buzzer
For more details, click here
Wall Following Robot
Description: As the name implies a Wall Following Robot is designed in a manner so that it always moves along a wall without hitting it or leaving its path. This project will also teach you about Motor drivers (used to drive motors using Logic) and Ultrasonic sensors. Minimum two Ultrasonic Sensors are necessary to make a Wall Following Robot.
So By the end of the project, you will know how to use:
A. L293D(Motor Driver)
B. HC-SR04 (Ultrasonic Sensor)
Components required:
- D.C Motors
- Arduino Uno
- Connecting Wires
- L293D or L298N (Motor H-Bridge)
- Breadboard
- Ultrasonic Sensor
- Battery
For more details on this project, click here: Wall-Following Robot
Arduino sunflower:
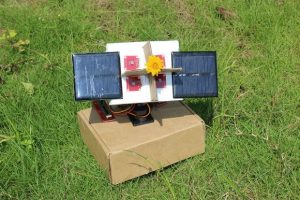
Description: To build an Arduino-Servo-controlled mechanism that follows the sun as it moves in the horizon.
Solar Panels can be attached to the front so that maximum sunlight get absorbed by them at any instant. Since Arduino-Sunflower acts like a real Sunflower in presence of sunlight, it is called an electronic Sundancer!
This project was posted by Elecrow on Instructables.com
Components required:
- Arduino Board
- LDR(Light dependent resistors) X 4
- Connecting Wires
- Linear Potentiometer X 4
- Base Shield For Arduino
- Cardboard
- Foamboard
- Stick
- Servo Motor
Project Source: Arduino Sunflower
Weighing scale Arduino project
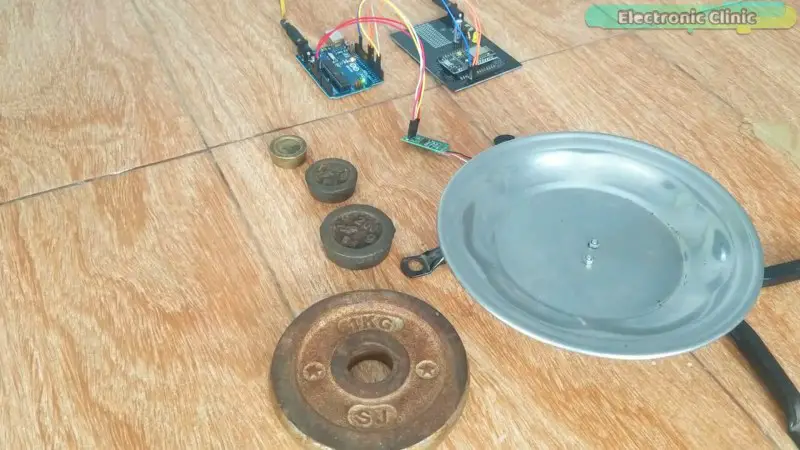
Description: Using this project, we can measure and monitor weights from any part of the world. The load cell (strain gauge) used here is of 5 kg. A to D converter converts the physical weight to corresponding digital signals and sends it to the owner with the aid of Arduino.
Components required:
- Arduino Uno
- Load cell (Strain gauge)
- Wi-Fi module
- Transistor
- Resistors
- Capacitors
- Analog to digital converter
For more details, click here
Arduino Based Smart Blind Stick
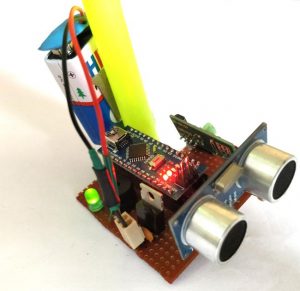
Description: To make a circuit using an Ultrasonic sensor and Arduino which indicates the object in front by producing a beep sound.
This circuit can act as a smart blind stick if fitted onto a stick. The frequency of the beep sound increases as the stick comes closer and closer to the obstacle. Also, Circuit has an LDR to sense the light intensity and an RF remote to locate Stick remotely.
The ultrasonic sensor is the heart of this Arduino-based Alarm stick. It senses the distance from the obstacle and sends this data to Arduino. Arduino further processes this data and thus determines the frequency with which the buzzer produces sound.
Components required:
- Arduino Board
- Ultrasonic Sensor HC-SR04
- Buzzer and LED
- Voltage Regulator L7805
- LDR
- 433 MHz transmitter and receiver
- Perf Board
- Push-button
- Battery(9 Volt)
For more details on this project, click here: Smart Blind Stick
Arduino Gesture Control Robot

Description: Experience the telekinetic power of Darth Vader with an innovative project that allows you to control your robot just with the help of hand gestures. That’s right! NO hassle of wire and controlling switches! Just a regular manual robot with an Arduino.
Components required:
- Arduino Nano(2x)
- RF Nano (optional) (2x
- NRF24L01+ RF Module (2x)
- L298N Motor Driver
- ADXL335 Module
- TT Gear Motor (4x)
- Rubber Wheels (4x)
- Male and Female Header Pin
- 18650 li-ion battery (2x) – (from old laptop battery)
- 18650 battery holder
- Screw Terminal
- Custom PCB
- 5mm Acrylic Sheet – (Offline Store)
For more details on this project, click here:
Arduino Projects Advance level
Path Memorizing Robot car using Arduino
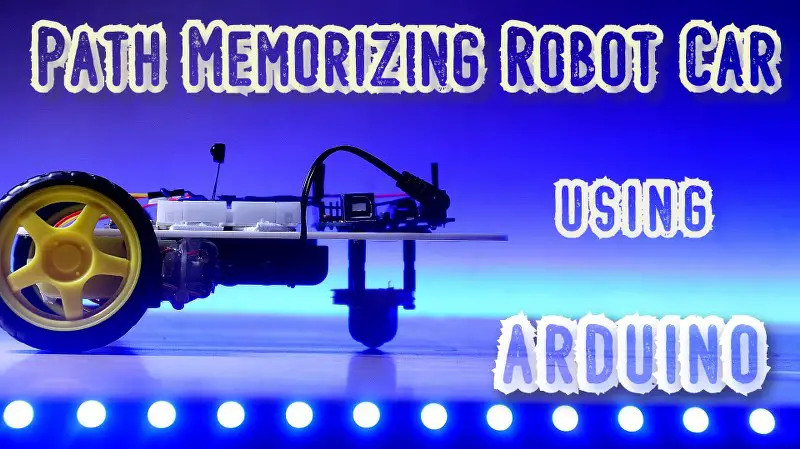
Description: A simple path memorizing robot car repeats the action or path that is stored in its memory. This project is divided into three parts:
(a) A wireless IR remote control Car using Arduino
(b) Turning it into a path memorizing robot without using any extra components and
(c) Using Arduino’s inbuilt EEPROM to store that path forever to its memory.
Components required:
To build this robot car you will need:
- One Arduino Uno
- An IR Remote and IR receiver
- Two geared DC Motors
- Motor driver module
- 9V Power supply.
- Robot wheels
- Robot chassis
- Breadboard
- Wires
For more details on this project, click here
Arduino Project- Self Balancing Robot
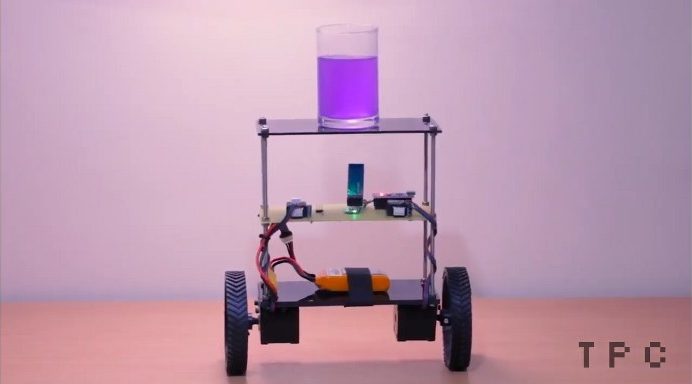
Description: This Arduino-based self-balancing robot works similarly to a gyroscopic stabilizer. It senses its orientation with respect to ground and adjusts itself to stay steady. If your juice still gets spilled then it’s probably your fault.
Components required:
- Arduino
- Stepper Motor
- A4988 Driver
- 10x2cm Wheels
- 12V Li-Po battery
- M5 rods and nuts
- HC-05 Module
- GY-521 Module
For more details on this project, click here
Arduino 3D Wire Bending Machine
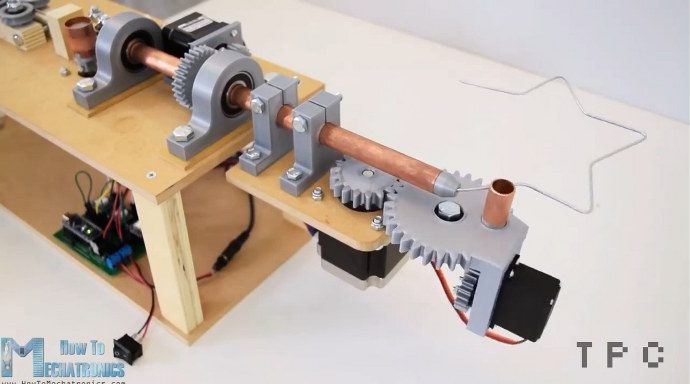
Description: This cool 3d wire bending machine is the best solution for all of your mechanical wire bending applications like a helical spring. This machine can easily create a 3D design out of a straight wire so that you don’t have to do it yourself manually.
Components required:
- Arduino Nano
- Stepper Motor – NEMA 17
- Stepper Motor – NEMA 23
- DRV8825 Stepper Driver
- Power Jack
- 12V 2A Adapter
- Micro Limit Switch
For more details on this project, click here
DIY Arduino based Winding Machine
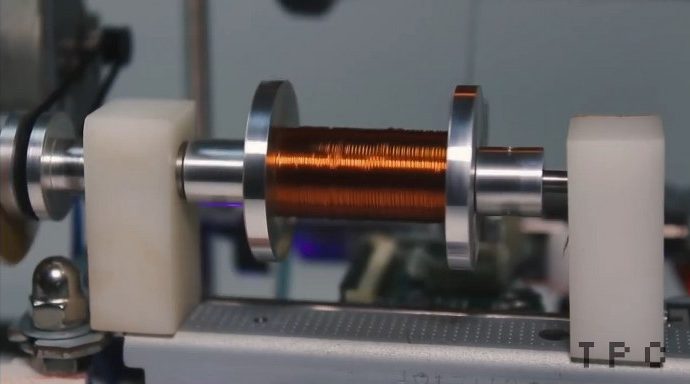
Description: This handy machine is a dream tool for electrical and electronics engineers. The arduino-based winding machine allows you to make the exact number of wounds as required in a matter of seconds. Or you can make mini rolls out of the large one as per your requirement. Remember, our transformer doesn’t need to blow up just because we messed up the winding counting.
For more details on this project, click here:
DIY Arduino camera Slider (V1)
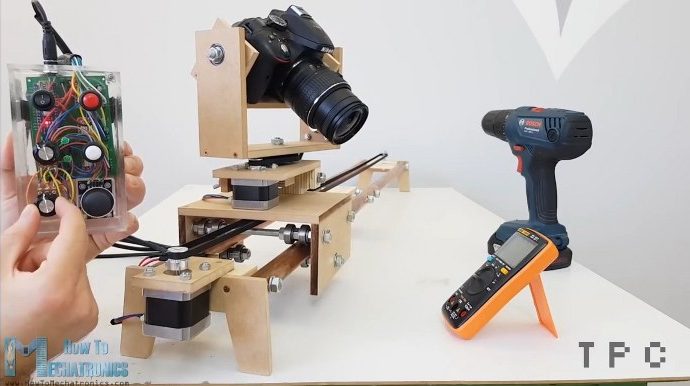
Description: Without a doubt, photography is one of the best hobbies in the world but it gets trickier when we move towards videography. A steady hand moment is a must to capture a top-notch cinematic experience. We can make it simple with the Arduino camera slider project and control the camera moments with a controlling device.
Components required:
- Arduino
- Stepper Motor NEMA17
- A4988 stepper driver
- 12V 2A Adapter
- Joystick
- Power Jack
For more details on this project, click here
Arduino based Camera Slider(V2)
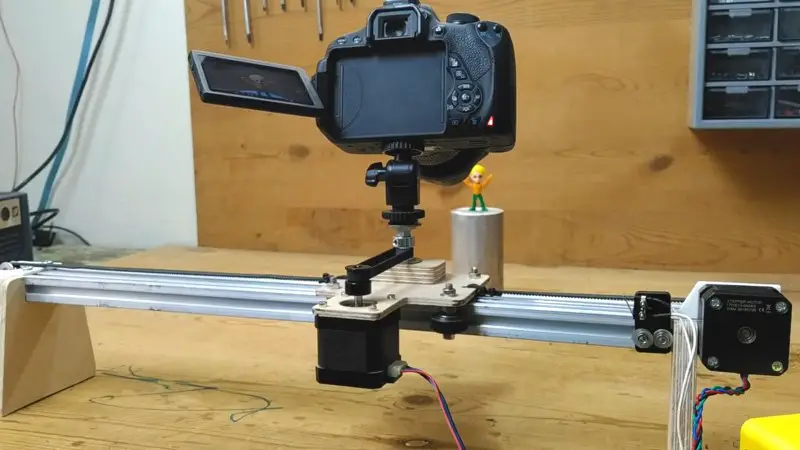
Description: An economical project that gives you cinematic shots for your videos without actually purchasing costlier accessories.
It is driven by an Arduino, in which the movements of the slider are divided into X-Y coordinates. The initial and final positions of the camera are taken from the user and with the aid of the stepper motor the movements are performed smoothly.
Components required:
- Arduino
- Stepper motor
- Motor driver
- Rotary encoder
- OLED display
- Pulley
For more details, click here
Arduino Controlled Robotic Arm
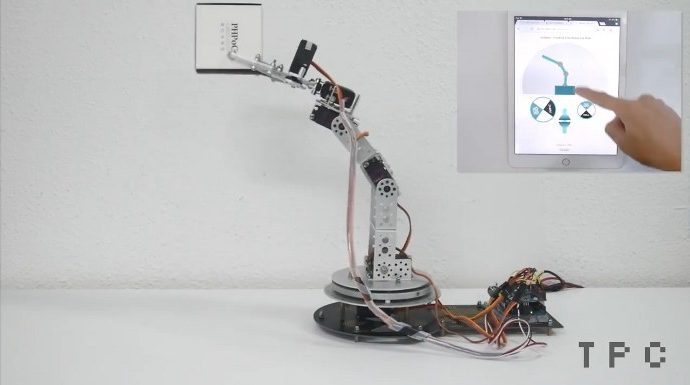
Description: We understand that none of us want to touch a lot of things by ourselves or just wish to stay comfy on our work desk and let the bag of chips come to us. Arduino Control Robo Arm allows you to do all of that.
The robotic arm movements can be controlled via your mobile. Tablet or Laptop. It can do 360-degree rotation and pick things up. Mount it on top of your bot and enjoy the service.
For more details on this project, click here
Arduino Data glass for multimeter

Description: Arduino data glass for multimeter should be a must-have tool for all electricians out there. Working on live wires is always risky and can be life-threatening. And everyone knows that we are good only as long as we are not dry and crispy.
With this cool-looking safety gadget, we don’t need to check for readings on a multimeter. Instead, the reading will flash right in front of our eyes as we proceed.
Components required:
- Arduino pro-Micro
- Bluetooth 4.0
- OLED display
- Li-Po battery
- Charger circuit
- Mirror Lens and reflector (check out the video for size requirements)
For more details on this project, click here
Arduino Nerf turret
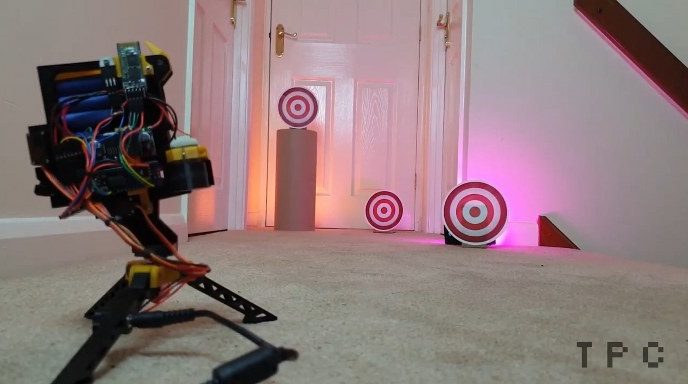
Description: Shooting nerf turret is fun indeed. But, If you enjoy hiding in the shadows and wish to hit your opponents with precision then come on board. Arduino nerf turret is a robot that you can control remotely and shoot nerfs while demonstrating your e-gaming skills.
For more details on this project, click here
32 Function Button Box for Gaming
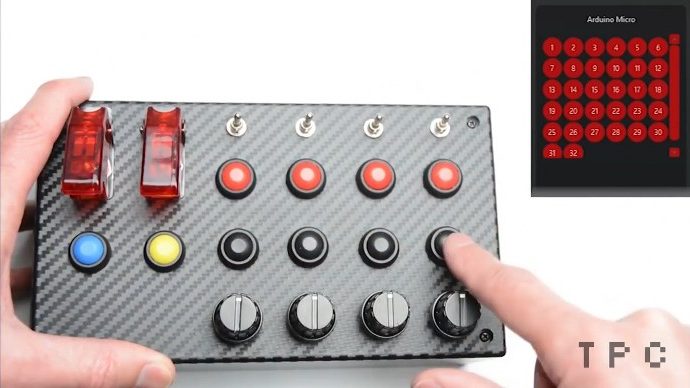
Description: It’s always fun to have more function buttons button for most games, especially games like Tekken where the number of combinations with a limited number of buttons can be overwhelming.
But the problem is that these controllers are hard to get and expensive as well. With this project, you can build yourself your own 32 function button box for gaming and enjoy your games like a pro gamer.
Components required:
- Arduino pro micro
- Switch Covers
- Momentary toggle, Way toggle, Start button, 3-way toggle, Push-button.
- Encoders
- Encoder knobs
- Soldering tools
For more details on this project, click here
Retro Nixie Clock
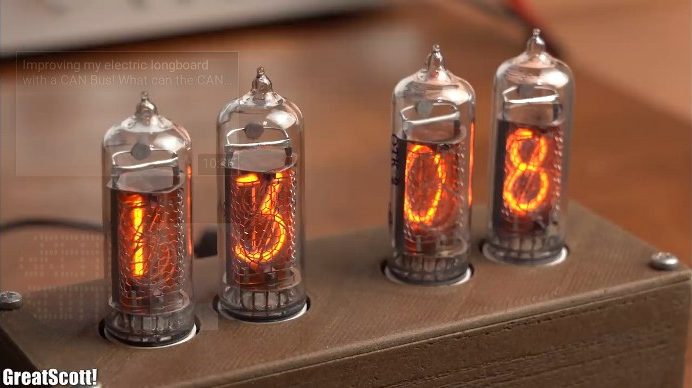
Description: Let’s get back to the 80s with this awesome Retro Nixie Clock project. This doesn’t only make a beautiful git but also a beautiful décor to your room.
A regular clock is boring to look at but you will want to check the time on this little buddy all the time.
Components required:
- Arduino pro mini
- 4x IN-14 Nixie tube
- 4x K155ID1 Nixie tube driver
- LM7805 5V regulator
- DS1307 RTC
- SMD capacitors (1206 10uF, 100nF)
- Male + Female Header
- 4x 10KΩ Resistor
- 170V DC supply
- DC Input jack
For more details on this project, click here
Self-Parking Car
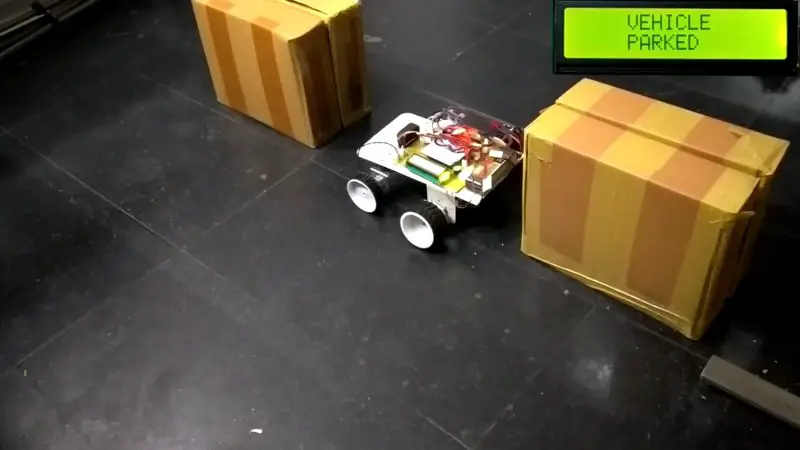
Description: Nowadays parking a car has become one of the challenging situations rather than arriving at the destination. In the parking lot, it becomes difficult to find a vacant space to park your car.
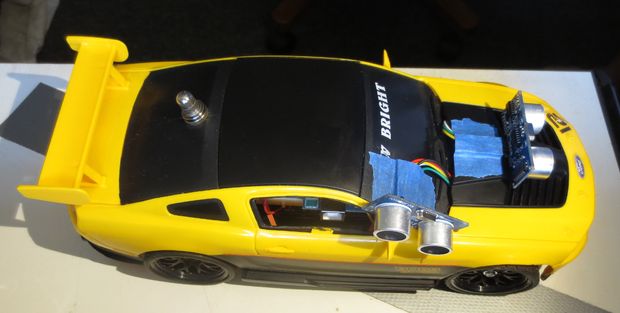
This innovative project helps you out in this situation. The self-parking car, using ultrasonic sensors finds a vacant space in an area and precisely parks that car without any human aid.
Components required:
- Arduino
- Robot Chassis
- Ultrasonic sensor
- Capacitors
- Diodes
- Resistors
- Power supply
- Motors
- Transistor
- Led
- Switch
- Breadboard
- Connecting Wires
- LCD screen
For more details, click here
Laser Engraver with RGB
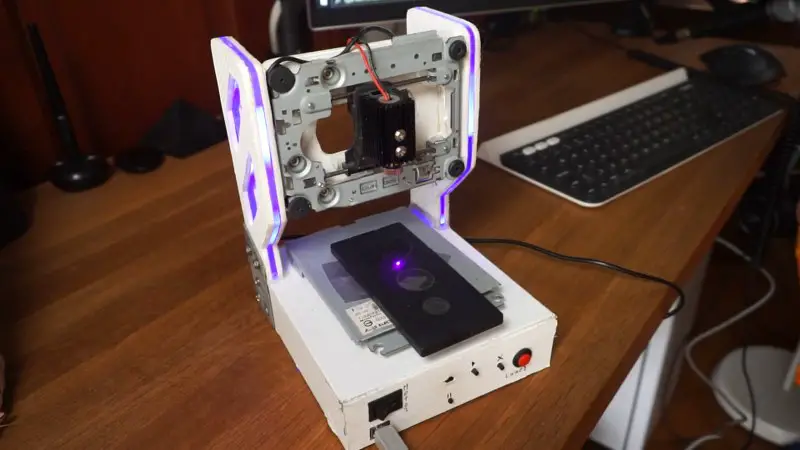
Description: A cool project which can engrave a name or any image on an object placed below it. Made using two old DVD writers, the movement is controlled in two directions only i.e. horizontal and vertical.
The outer frame supports the entire structure. RGB lights are added to the frame to make the laser engraver more attractive.
Components required:
- Arduino
- DVD writers
- CNC shield
- RGB controllers
- Motor driver
- Laser module
- Laser safety glasses
For more details, click here
Freeform Arduino
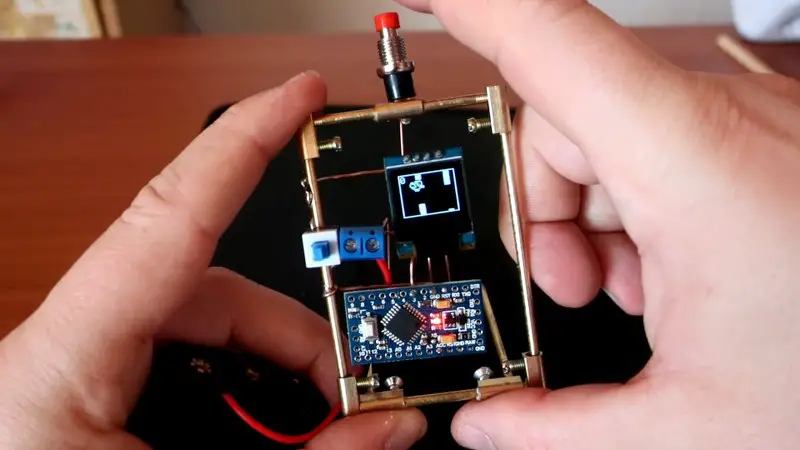
Description: These are also known as freeform circuits or 3D circuits or naked circuits. The interesting part of the project is the miniature model in the form of a cube. All the components are soldered in a three-dimensional way which gives the project a delightful look.
One push button is provided on the top to play games or to control the stopwatch.
Components required:
- Arduino pro mini
- OLED Screen
- Push-button
- Resistors
- Switch
- Battery
For more details, click here
Flute Controlled Robot
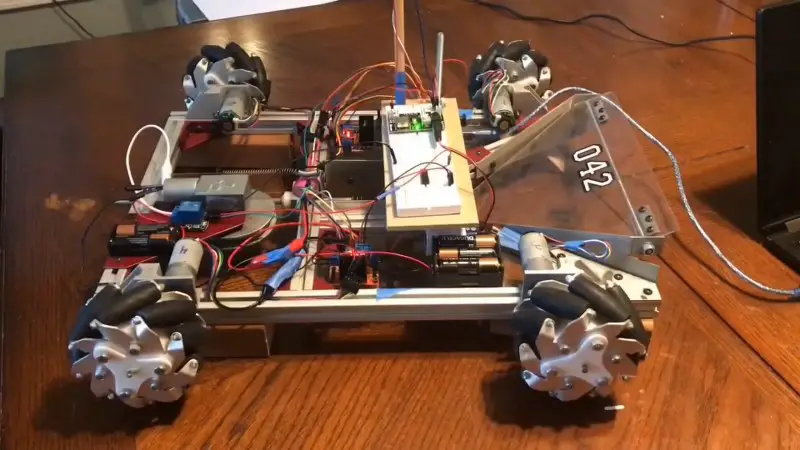
Description: Another innovative project in which the robot moves according to the frequency of a musical instrument. Using an analog microphone and fast Fourier transform the robot detects signal frequencies and maps them onto different movements.
The robot also has a high torque launcher which activates when it receives a particular frequency.
Components required:
- Arduino
- Analog microphone
- Motors
- Motor driver
- Relay
- Power source
For more details, click here
Tech Arm
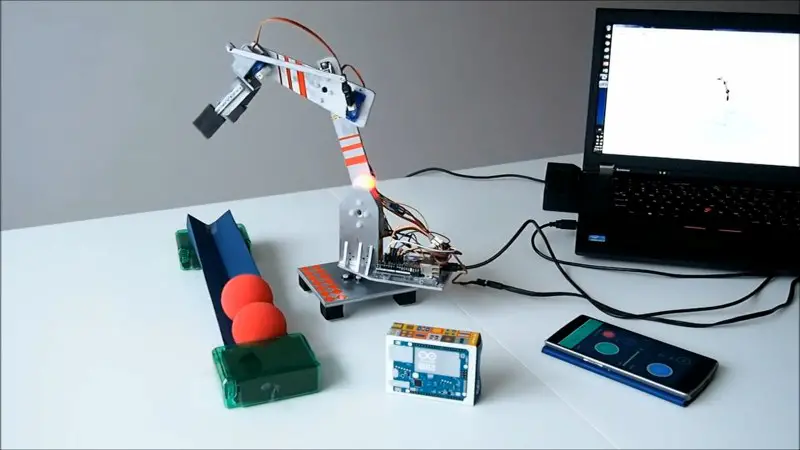
Description: This project demonstrates a robotic arm with universally accessible control. The project is suitable for places where human reach is difficult or not possible. With the record and repeat mode, the same task can be performed over and over again with the same efficiency and speed.
Components required:
- Arduino
- Wi-Fi module
- Servo motors
- Motor driver
- Connecting wires
- Holding clamp
- Indication LED
For more details on this project, click here
LPG detector and auto exhaust
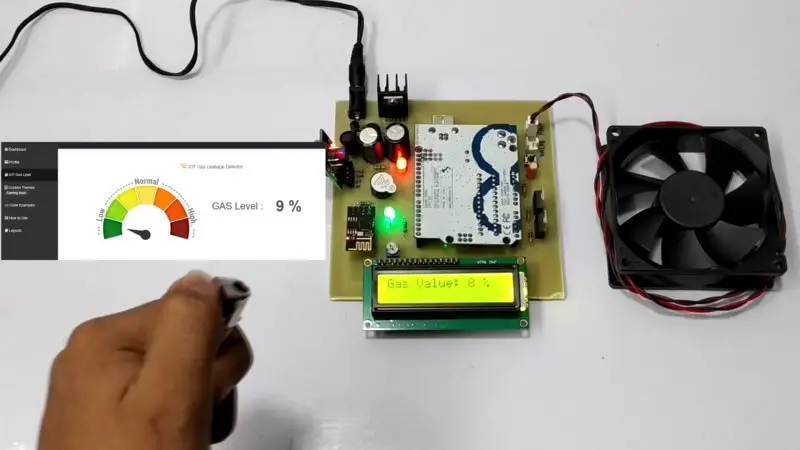
Description: This project demonstrates a smart way to tackle the gas leakage problem. The gas sensor quickly senses any leakage of gas and according to the level of gas as low, normal, or high and takes corresponding steps simultaneously by notifying the owner and turning ON the exhaust fan. The exhaust fan turns OFF automatically as the gas level falls down.
Components required:
- Arduino
- Wi-Fi module
- LCD display
- DC fan
- PCB
- Capacitors
- Resistors
- Adapter
- LED
- Connecting wires
- Buzzer
- Transistors
For more details on this project, click here
Arduino Mini CNC Plotter Machine From Dvd Drives
Description: To make a simple CNC Plotter Machine using 2 DVD drives, 2 Mini Servo, and Arduino.
This project was originally posted by Ardumotive_com on Instructables.com and is an updated version of this CNC Plotter.
Components required:
- Arduino Board
- Breadboard for connections
- L293D ICs Motor driver x 2
- Mini Servo Motor x 2
- DVD/CD Drives x 2
- ATmega328p (with Arduino Bootloader)
- 28 pin DIP IC Socket
- 16MHz Crystal Oscillator
- 2x 22pF and 1x 100nF capacitors
- 110K resistor
- USB to Serial adapter
- Prototyping PCB Circuit Board Stripboard
- 2pins Screw Terminal Connector x 4 (or 2x 4 pins Screw Terminal Connector)
Project Source: Arduino Mini CNC Plotter Machine
Bubblesteen Bubble Machine
Description: To build a mechanism using Servo motors and Arduino that automatically creates the soap bubble after a certain time period.
Two servo motors are required to build this project in order to get perfect arm movement.
Components required:
- Arduino Duemilanove
- Duemilanove Motor Shield
- Connecting Wires
- D.C Motor(3v-12v)
This Instructable is posted by belliedroot and the link to this Instructable is given below:
Project Source: Bubblesteen Bubble Machine
Somatosensory Quadrocopter Module
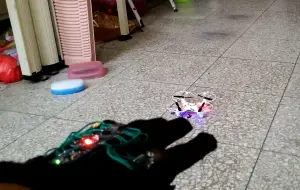
Description: To control a Quadcopter using hand movements. Actually, the Arduino nano attached to the glove is controlling the quadcopter’s remote control which ultimately controls the quadcopter.
This project was posted on Instructables by NFU_Dream_Maker. Link to this instructable is given at the bottom of this project.
Components required:
- 4 Servo Motors
- Arduino Nano and Arduino Mega
- Connecting Wires
- Quadcopter its Remote controller
- MPU6050
- NRF24l01 x 2
- MP2307
- TP4056
- 2mm iron shaft x 4
Project Source: Somatosensory Quadrocopter Module
Secret Knock Detecting Lock
Description: This “Secret Knock Detecting Lock” opens the lock when a secret knock is given on the door. One can change the knock pattern according to his/her need by just pressing the programming button and recording the knock. Up to 20 knock patterns can be stored in this version of the code.
This project was posted on Instructables by Grathio: Secret Knock Detecting Lock
Rubik’s Cube Solver
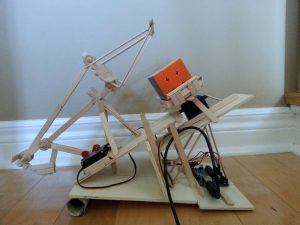
Description: This robot, made of 2 Servo Motor and Arduino can solve Rubik’s cube within 20 minutes. You can do some adjustments in code and mechanism to decrease this time.
This project was posted on Instructables.com by matt2uy.
Components required:
- 2 Servos
- Arduino Uno
- Connecting Wires
- wooden skewers
- thin plywood
- wooden wheel
- Resistors
Software:
– Arduino IDE – (Algorithms in C++)
– Python 2.7+ and Tkinter – (GUI)
– Pyserial
Project Link: Rubik’s Cube Solver
Time Machine Glove
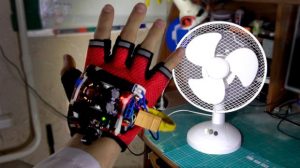
Description: To make a glove using Arduino that can control time! Well, this glove does not stop time in reality but makes it appear though. It makes the speed of the objects to appear slow to our eyes.
Mad Gyver demonstrated his “TIme Machine Glove” by freezing a fan, drill, and T.V screen in this video.
Components required:
- Arduino Board
- DC-DC Boost Converter
- Accelerometer
- Potentiometer
- Lithium Battery
- Connecting Wires
- 10k and 100-ohm Resistor.
- LED 100 Watt (white)
- Mosfet
- Glove
Project Source: Time Machine Glove Using Arduino
Ball And Plate PID Control
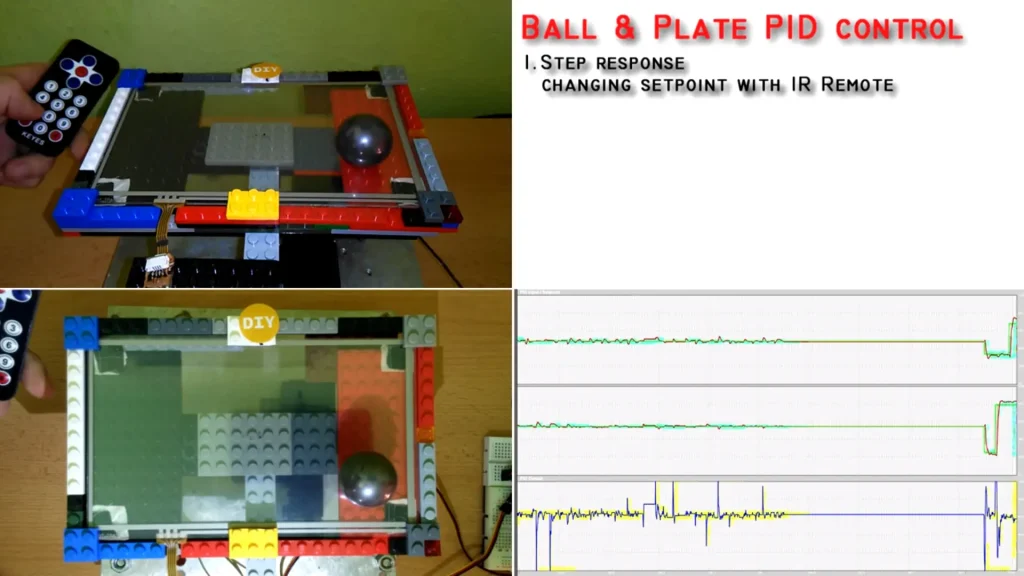
Description: To make a Ball-Plate PID control using Arduino.
Watch this video to see this “Ball And Plate PID Control” project in action.
This project was posted on Instructables by DavidH334.
Components required:
- Arduino Board
- Digital Servo Motors (HS-422 ECO) x 2
- Wire Resistive Touchscreen (7″) x 4
- Real-Time Module DS1307
- Wii Nunchuck kit
- IR remote kit
- Breadboard
- Connecting Wires
Project link: Ball & Plate Arduino PID Control
Tree Climbing Robot
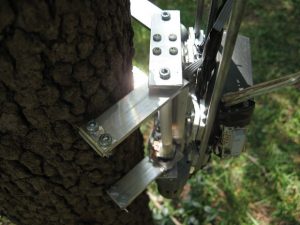
Description: Yes this robot can climb trees! and that’s why this project is one of the most popular projects on Instructables.
Watch this video to see Tree_Climbing_Robot in action!
This project was posted on Instructables by ben_k. Link to this instructable is given at the bottom.
Project Source: Tree Climbing Robot
Air Guitar Using Arduino
Description: Now you don’t need a real guitar to play music! This Air guitar is a perfect replacement for an actual guitar or maybe not if you only knew how to play this air guitar!
This Arduino based Air guitar is made by team Jell
Watch this video to see “Air-Guitar ” in action!
Components required:
- Arduino Board
- Accelerometer
- Ultrasonic Sensor
- Connecting Wires
- Potentiometer( between 1kohm-1Mohm)
- LED’S
- 3.5 mm female jack
- Battery(9v)
- 8) Resistors (10k), capacitor(10uF)
Project Link: Air Guitar Using Arduino
LED Cube (8x8x8) Using Arduino
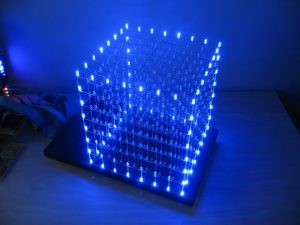
Description: This is one of the coolest projects you can make using Arduino whether you are a beginner or expert. It may seem complicated at first but believe me, this project is very simple. You just have to make all connections properly and ensure that each and every LED is working. Then just burn the given code to your board and you are good to GO!
Components required:
- Blue LED x512
- Arduino Board
- 100-ohm Resistor x64
- Connecting Wires
- PCB Board
- 3x status LEDs
- 3x resistors for the status LEDs
- 74HC574 x 8 ICs
- PN2222 transistors x 8
Project Source: LED CUBE (8X8X8)
Micro Servo Robot With Memory
Description: The robot made of Servo Motors(on left) imitates the action or movements of the structure on the Right. This robot can also store the movement of the controlling mechanism(on right) and then repeat these movements in loops using Servo-Robot.
Components required:
- Arduino Board
- Micro Servo(180 degrees) x 4
- Niamh Battery 4.8V
- 22k Potentiometer x 4
- Connecting Wires
- Buttons and Switch
- Zip Ties and Glue
- Metal, Plastic, and Wood
Project Source: Micro Servo Robot
Playing Music Through Floppy Drives
Description: Now you can use your floppy drives to play music! This project is made by MrSolidSnake745. In the above video, Star Wars: Imperial March is played on 8 floppy drives. This project is a direct result of the older version: Imperial March on three floppy drives.
Components required:
- Floppy Drives
- Arduino Uno
- Connecting Wires
- Power Supply
- Breadboard
- CAT5 UTP Cable
You can find complete details to know how to make this project on Instructables. This Instructable is posted by Analogue-Chick and the link to that project is given below.
Project Source: How to Make Musical Floppy Drives
Coke Piano and Launchpad made with Arduino
Description: These Coke are not for sale! You can play any song in a loop using these Coke cans.
As stated by Lucas Zanella:
“The hardware (the protoboard with the Arduino and components) is made of lots of transistors for ‘body signal’ amplification, so the coke when touched activates the corresponding transistor (BC548B NPN). These cokes are plugged in directly to the transistor’s base using a wire. Arduino then reads the data and sends it via serial to the python script.”
Project Link: Coke Piano and Launchpad using Arduino
Source Code can be found here: Source Code: Coke Piano
Wireless Arduino Powered Chess
Description: In this project, two chessboards communicate with each other wirelessly. If one player moves his pawn on one chessboard, the corresponding pawn on another chessboard will make the same move!
Project Source: Wireless Arduino Powered Chess
Wall-E Robot Using Arduino
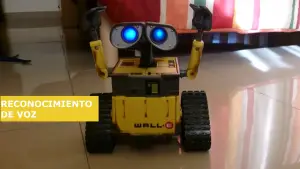
Description: To make a Wall-E look-alike robot using Arduino which can perform several actions like following your finger using voice recognition.
Watch this video to see “Wall-E” in action!
Components required:
- Infrared Proximity Sensor
- Servomotor
- Continuous Rotation Servomotor
- Connecting Wires
- VR Module
- LED’S
- Arduino UNO
- Battery
Project Link: Wall-E Robot Using Arduino
