Last updated on September 17th, 2026 at 11:12 am
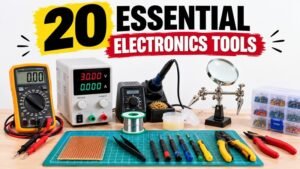
If you’re starting your electronics journey, you don’t need to buy every tool you see online. You o nly need a few essential tools to get started, and we’ll show you exactly what to buy and in which order.
We’ve divided the list into three sections: the tools you should buy first, the ones you can add as you progress, and the tools you probably won’t need until you start working on more complex projects.
Note: This is our recommendation based on what we think makes the most sense for someone starting out. You don’t need to follow this list exactly. Use it as a guide and get the tools that make sense for you.
PART 1: The ESSENTIALS- Start Here
1. Breadboard
The first tool every beginner should have is a breadboard.
It lets you build electronic circuits without any soldering. You simply insert components like resistors, LEDs, sensors, or even your ESP32 or Arduino, connect them using jumper wires, and your circuit is ready to test.

The biggest advantage is that nothing is permanent. If you make a mistake—which you definitely will while learning—you can simply pull the component out, reconnect it correctly, and you’re good to go. No soldering, no damaged PCBs, and no wasted components.
That’s why breadboards are the go-to choice for prototyping. You can quickly build a circuit, test it, make changes, and once you’re happy with the design, you can move it to a perfboard or a custom PCB.
Breadboards come in different sizes. You’ll find mini breadboards, half-size breadboards, and full-size breadboards. For most beginners, we’d recommend buying a full-size breadboard. It gives you plenty of space to build circuits, and you won’t outgrow it anytime soon.
One more thing we’d recommend is buying a good-quality breadboard. Very cheap breadboards often have loose contacts that don’t hold components properly, leading to poor electrical connections and frustrating troubleshooting.
2. Jumper Wires / Hookup Wires
You use jumper wires to connect different components on your breadboard. Whether you’re connecting an LED, a sensor, your ESP32, or an Arduino, chances are you’ll be using jumper wires.
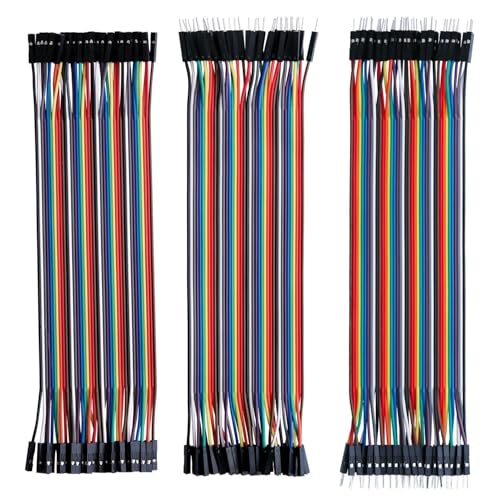
You’ll generally come across three types:
- Male-to-Male
- Male-to-Female
- Female-to-Female
Instead of buying them separately, we’d recommend getting a kit that includes all three. They’re inexpensive, and sooner or later, you’ll end up using each type.
You can also get a box of pre-cut wires that comes in different sizes. These can make your circuits look cleaner and make it easier to spot wiring errors.
3. Breadboard Power Supply
Once you’ve built your circuit on the breadboard, the next step is to power it.
The simplest option is a 9V battery, also known as a transistor battery. It’s been a staple in hobby electronics for decades and works well for powering small circuits and projects.
Another option is to use AA battery holders. You can get single-, two-, three-, or four-cell holders, giving you different fixed voltages depending on the number of cells you use, such as 1.5V, 3V, 4.5V, and 6V.
Batteries are fine for getting started. They work, but they don’t last very long, and replacing them again and again can quickly become expensive.
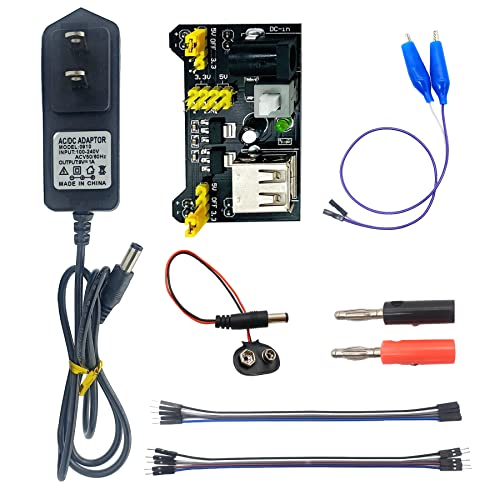
A much better option is to use a breadboard power supply module along with a 9V or 12V DC adapter.
The module plugs directly into your breadboard and converts the input voltage from the adapter into a stable 3.3V or 5V supply, which is what most beginner electronic circuits require. Depending on your circuit, you can easily select either 3.3V or 5V using the jumpers on the module.
4. Component Kit

As you learn electronics, you’ll be building dozens of small circuits—blinking LEDs, reading sensors, controlling buzzers, using transistors, and much more. Having a component kit on your desk means you can simply pick the parts you need and start building instead of waiting for every single component to be delivered.
We’d recommend buying a kit that has a good variety of useful components rather than one with thousands of pieces. A smaller kit with components you’ll actually use is much more valuable than a huge kit filled with parts you’ll probably never need.
And don’t worry if you eventually run out of a few components. You can always buy those separately as your projects become more advanced.
5. Multimeter

If there’s one tool we’d never recommend skipping, it’s a multimeter. It’s one of the most important tools in electronics because it lets you measure and troubleshoot your circuits instead of simply guessing what’s wrong.
With a multimeter, you can measure voltage, current, and resistance, check whether two points are electrically connected using continuity mode, and even test components like diodes. Some multimeters can also measure capacitance, frequency, temperature, and much more.
You don’t need an expensive multimeter to get started. Even a basic digital multimeter is more than enough for learning electronics and building beginner projects.
But please don’t buy the cheapest multimeter you can find, especially those ultra-cheap yellow multimeters. They’re often less accurate, have poor-quality test probes, and may lack the internal safety fuses needed to protect you if you accidentally turn the dial to the wrong setting.
If your budget allows, an auto-ranging multimeter with an auto-power-off feature can make taking measurements quicker and more convenient, especially when you’re just starting out.
6. Basic Hand Tools
Next, let’s talk about some basic hand tools that are really useful.
The first one is a wire cutter. Whether you’re trimming resistor leads, cutting hookup wires, or shortening header pins, a good flush cutter gives you a clean cut and makes your work much easier.
The second tool is a wire stripper. Whenever you need to remove the insulation from a wire, it does the job quickly without damaging the conductor inside.
You can either go for a simple wire stripper, which can cost less than a dollar, or get a self-adjusting wire stripper that works with different wire sizes. The latter can save time and give you much cleaner and more professional-looking connections.
The next tool we’d recommend is a screwdriver set.
You might not think of screwdrivers as electronics tools, but you’ll be surprised how often you’ll need them.
Whether you’re opening electronic devices, tightening terminal blocks, assembling enclosures, mounting development boards, or working with sensors and modules, having the right screwdriver makes the job much easier.
It’s a simple tool, but one that you’ll probably use just as often as your wire cutters.
And finally, tweezers. They may not seem important at first, but once you start working with small components, tight breadboard layouts, or SMD parts, you’ll quickly realize how useful they are. They’re also great for picking up tiny screws and placing components precisely where you want them.
7. Multifunction / Component Tester
Now let’s look at one tool that many beginners don’t know about, but is surprisingly useful: a multifunction component tester.

As you start working with more electronic components, there will be times when you don’t know exactly what a component is, whether it’s working properly, or even which pin is which. This little device can help with all of that.
Simply insert the component into the tester, press a button, and within a few seconds it can identify components like resistors, capacitors, inductors, diodes, transistors, MOSFETs, and much more.
Depending on the component being tested, it can also display useful information such as resistance, capacitance, transistor gain, ESR, and pin configuration.
Is this a tool that every beginner absolutely needs? No. You can definitely learn electronics without it.
But considering how affordable these testers have become, they can save you a lot of time and remove a lot of guesswork, especially when you’re working with loose components or salvaging parts from old circuit boards.
8. Microcontroller Board
One thing we’d definitely recommend buying is a microcontroller board.
You might not use it when you’re just starting out, and that’s completely fine. But if you keep building electronics projects, sooner or later you’ll want to add some intelligence or automation to your circuits.
Think of a microcontroller as the brain of your electronic projects that you can program to perform different tasks. It allows you to read inputs from sensors, process data, and control outputs like LEDs, motors, displays, relays, and much more.
There are plenty of excellent development boards available today. You’ve probably heard of Arduino, ESP32, and the Raspberry Pi Pico. Each one has its own strengths, and honestly, any of them is a great place to start. The good news is that you can get most of these for under $10.
So don’t spend too much time worrying about which board is the absolute best.
Part 2: The Workshop: Build and Repair
Now let’s move on to some tools you don’t necessarily need when you’re just starting out, but as you build more permanent projects, you’ll eventually want them on your workbench.
1. Bench Power Supply
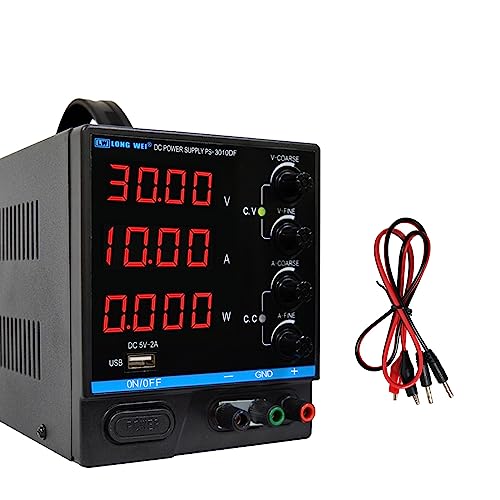
A breadboard power supply or a battery are great ways to start with basic projects. But as you gain more experience, you’ll find that while prototyping, you need an easy way to adjust the voltage and see how your circuit behaves. That’s where a bench power supply comes in.
But that’s only half the story.
One of its biggest advantages is current limiting.
Let’s say you’ve accidentally made a wiring mistake or there’s a short circuit in your project. If you’re using a regular power adapter, it will try to supply as much current as it can, which can damage your components.
A bench power supply lets you set a maximum current limit. If your circuit tries to draw more than that, the power supply automatically limits the current, helping protect your components while you troubleshoot the problem.
You don’t need a fancy bench power supply. A decent adjustable one with basic safety features is more than enough to get started.
We’d also recommend getting one with a digital display, so you can clearly see both the output voltage and the current your circuit is drawing.
The one we have costs around $40 and can supply up to 30V and 10A, with adjustable constant-voltage and constant-current modes. That’s already more than enough for most hobby electronics projects.
2. Soldering Essentials
If there’s one skill that every electronics enthusiast should learn, it’s soldering. Once you know how to solder properly, you can build permanent circuits, repair electronics, replace faulty components, and even design your own hardware.
If you’re buying your first soldering iron, we’d highly recommend getting a temperature-controlled soldering station instead of the cheapest fixed-temperature iron you can find.

With a temperature-controlled iron, you can adjust the temperature depending on the component you’re soldering. This gives you much better results and reduces the risk of damaging sensitive components.
You’ll also notice that soldering irons come with different tip shapes. For most electronics work, a chisel tip is the best all-round choice. It transfers heat more efficiently than a very fine conical tip and makes soldering much easier, especially for beginners.
A good soldering iron might cost a little more, but it’s a tool you’ll probably use for many years. So it’s worth investing in a decent one right from the beginning.
Solder Wire & Flux
A soldering iron alone isn’t enough. You’ll also need solder wire.
Solder creates the electrical and mechanical connection between components and the PCB. It melts when heated by the soldering iron and then solidifies to form a strong joint.
You’ll mainly come across two types of solder wire: leaded and lead-free.
Leaded solder melts at a lower temperature and is generally easier to work with, which is why many hobbyists prefer it. Lead-free solder, on the other hand, is more environmentally friendly, costs more, and is commonly used in commercial electronics.
When buying solder wire, pay attention to the diameter. For general electronics work, something around 0.8 mm to 1.0 mm (0.031 to 0.039 inches) is a good choice. Anything thicker can make it harder to control the amount of solder going into small joints.
Another thing to look for is flux-core solder. Most good-quality solder wire already has flux inside it, which helps the solder flow smoothly and gives you properly wetted, reliable joints.
Flux helps remove oxidation from metal surfaces and improves solder flow. You’ll find it especially useful when working with old components, large connectors, or trying to fix a poor solder joint.
We have flux in paste form, but it also comes in liquid, gel, and even flux pens.
3. Desoldering Tools
No matter how careful you are, everyone makes mistakes while soldering.
You might solder the wrong component, accidentally bridge two pins together, or simply need to replace a faulty part. That’s where desoldering tools come in.
The first one is a desoldering pump. Once the solder is melted, you simply press the pump, and it quickly sucks up the molten solder, making it easy to remove through-hole components.
The second is a desoldering wick, also known as solder wick. It’s a braided copper strip that absorbs molten solder, making it perfect for cleaning up solder pads, removing excess solder, or fixing solder bridges.
Always apply a little flux before using the wick. It helps the solder flow into the copper braid more easily, making the desoldering process faster and more effective.
We like keeping both on our workbench because each one has its own purpose. A desoldering pump is great for removing larger amounts of solder, while a wick is ideal for cleaning up pads, removing small amounts of excess solder, and giving your work a neat finish.
4. Helping Hands / PCB Holder
Another tool that can make soldering much easier is a Helping Hands or a PCB Holder.
When you’re soldering, one hand is holding the soldering iron and the other is holding the solder wire. That doesn’t leave you with a free hand to hold the circuit board.
That’s exactly why these tools exist.
A Helping Hands tool uses adjustable arms with small clips to hold your PCB or components in place. Many models also include a magnifying glass, which can be useful when working with small components.
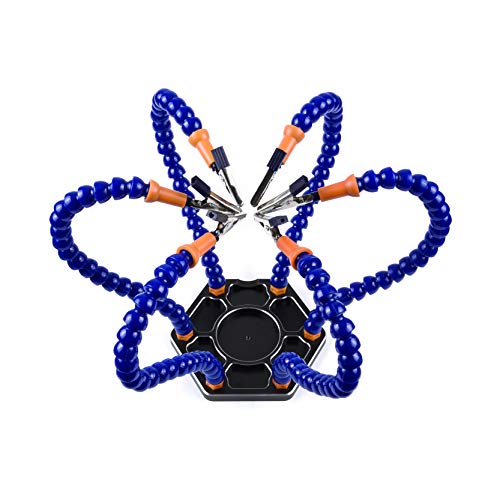
A PCB Holder, on the other hand, is specifically designed to securely grip the circuit board and keep it stable while you solder. You can also rotate the PCB, which makes it easier to access different parts of the board.

PCB holders are generally more expensive than basic Helping Hands tools, so if you’re just getting started, a basic Helping Hands tool is perfectly fine.
5. Perfboard
Remember the breadboard we started with?
A breadboard is perfect for testing and experimenting with your circuits. But once you’re happy with the design, the next step is to make it permanent.
That’s where a perfboard comes in.

A perfboard is a board with a grid of holes, usually spaced 0.1 inches (2.54 mm) apart. This allows you to solder your components together using point-to-point wiring. Unlike a breadboard, the components won’t come loose when you move the circuit around.
Perfboards are inexpensive, available in different sizes, and are perfect for prototypes, DIY projects, and one-off builds. In fact, before designing a custom PCB, many hobbyists first build their final circuit on a perfboard to make sure everything works as expected.
6. Electronics Mat

While working on electronics projects, you’ll be doing all kinds of things—soldering, cutting wires, assembling circuits, and handling small components. So having a proper work surface is very helpful.
You can get one like this for less than $10. It’s made from silicone, so it’s heat-resistant and durable, while also helping protect your desk from scratches, solder, and accidental spills.
It also has multiple compartments where you can keep components, screws, and tools organized. Some sections are magnetic, which is really handy for keeping small screws and other metal parts from getting lost.
You don’t absolutely need a mat when you’re starting out, but once you start spending more time at your workbench, it’s definitely worth having one.
Part 3: The Engineer’s Lab: Measure & Analyze
The following tools aren’t something you need right away, but as you get more serious about electronics, they can take your workbench to the next level.
1. Digital Oscilloscope
The next tool is a digital oscilloscope.
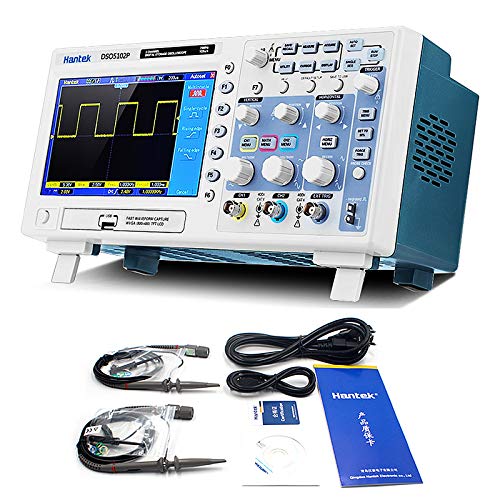
An oscilloscope is one of those tools you might not need on day one, but once you start working on more serious electronics, it becomes incredibly useful.
Unlike a multimeter, which gives you a number like voltage or resistance, an oscilloscope lets you actually see what a signal is doing over time.
You can see whether a signal is steady, changing, noisy, oscillating, or behaving completely differently from what you expected.
For example, if a circuit isn’t working properly, a multimeter might tell you that there’s 3.3V at a particular point. That’s useful, but it doesn’t tell you whether that 3.3V is actually stable or if there’s noise or some unusual voltage drop happening. An oscilloscope can show you that waveform directly.
You’ll mainly use it for things like checking clocks, PWM signals, communication signals, audio signals, power-supply ripple, and troubleshooting circuits.
Many beginners think oscilloscopes are expensive, but that’s no longer necessarily true. These days, you can get compact handheld oscilloscopes as well as entry-level digital oscilloscopes at fairly reasonable prices.
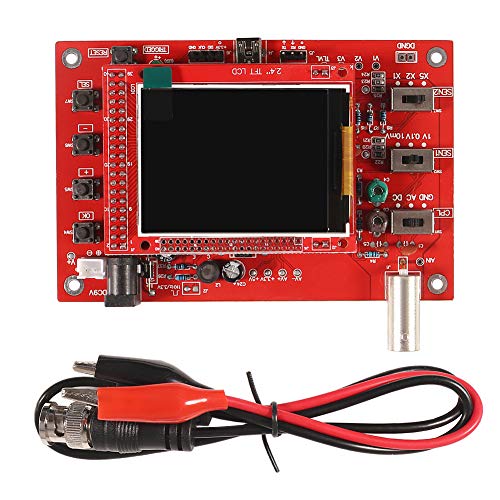
For example, the DSO138 costs around $20. While it has its limitations, you can still use it to visualize waveforms, check signal frequencies, and troubleshoot basic circuits.
For most beginners, a 2-channel digital oscilloscope with around 50–100 MHz bandwidth is more than enough. Also pay attention to the sample rate, triggering, and probe quality—these can matter more than simply chasing the highest specifications.
2. Function Generator
Another really useful tool to have on your workbench is a signal generator.

A signal generator lets you create different electrical signals, such as sine, square, and triangle waves, with a specific frequency and amplitude.
For example, if you’re working on an audio amplifier, you can generate a 1 kHz sine wave and feed it into the amplifier to see how the circuit responds.
You don’t need an expensive signal generator that costs hundreds of dollars. There are plenty of compact and affordable options available online that are more than sufficient for hobby projects.
This particular one is a small DDS signal generator. It can generate several different waveforms, with the main DDS output covering frequencies from 1 Hz up to about 65 kHz. It also has a separate high-speed square-wave output that can go up to 8 MHz.
You can adjust the frequency, amplitude, and offset, and the LCD makes it easy to see your settings.
And here’s the fun part: this particular one is based on an ATmega16 microcontroller, and you can actually buy it as a kit and assemble it yourself. It costs around $30 to $35.
But there’s an even cheaper option. You can get a basic function generator based on the XR2206 IC for around $5. It’s much simpler, but it’s a great low-cost option if you just want to experiment with different waveforms.
3. Storage Organizer
The final recommendation isn’t an electronic tool at all—it’s a storage organizer.


When you’re just starting out, you probably own a handful of resistors, LEDs, and a few sensors. But as you build more projects, that collection grows surprisingly fast.
Before you know it, you’ll have hundreds of resistors, capacitors, transistors, ICs, connectors, screws, jumper wires, and modules scattered across your workbench.
That’s why we’d highly recommend investing in a good storage organizer.
Not only does it keep your workspace clean, but it also saves a tremendous amount of time. Instead of spending ten minutes searching for a 10k resistor or an NPN transistor, you’ll know exactly where everything is.
There are plenty of options available, from small compartment boxes for components to multi-drawer storage cabinets for larger collections. If you’re just starting out, a few compartment organizers are more than enough.
And if you happen to have a 3D printer, you can even print your own. There are thousands of different organizer designs available online, so you can choose one that fits your workspace and the components you have.
