
Last updated on January 6th, 2026 at 11:04 am
If you are a beginner, building IoT projects can be a bit difficult. But with the help of Arduino IoT Cloud and an ESP32 board, it’s easier than ever. In this guide, I have included 8 amazing ESP32 IoT projects that are simple as well as practical.
Before you start, make sure you know how to set up the Arduino IoT cloud with an ESP32 board.
You can watch the working of all these projects here:
Table of Contents
8 ESP32 IoT Projects For Beginners
1. Parking status update with push notification
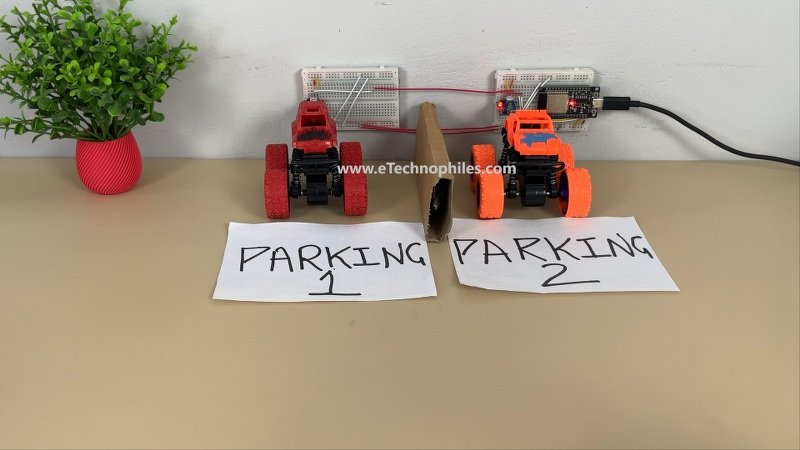
You will get a push notification whenever there’s an empty parking slot. You can view the parking status in real time as well- which one is empty and which one is occupied which gets updated in real time.
To build this project, I used:
- ESP32 board
- Two IR sensors
- 2 x Breadboard
- Jumper wires
Connections:
- IR Sensor 1: Data pin to Pin 13
- IR Sensor 2: Data pin to Pin 14
- Vcc pin of both sensors to Vin pin of ESP32
2. Rear panel sensor with real-time distance update
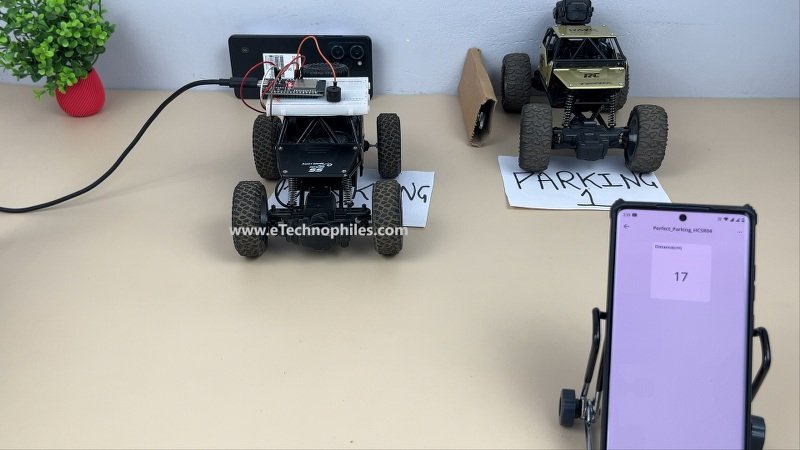
Made using an HCSR04 ultrasonic sensor placed at the back of a car, this project is an affordable prototype for a Real panel sensor. You can view the real-time distance of the car from the wall behind, and as you get closer to the wall, the buzzer starts producing sound, which increases with a decrease in distance.
I used the following components for this project:
- ESP32 board
- HCSR04 Ultrasonic sensor
- Breadboard
- Jumper Wires
Connections:
- Ultrasonic Sensor-
- TrigPin to Pin 25
- EchoPin to Pin 33
- Vcc to Vin pin
- Ground to ground of ESP32
- Buzzer to pin 26
3. LED status control
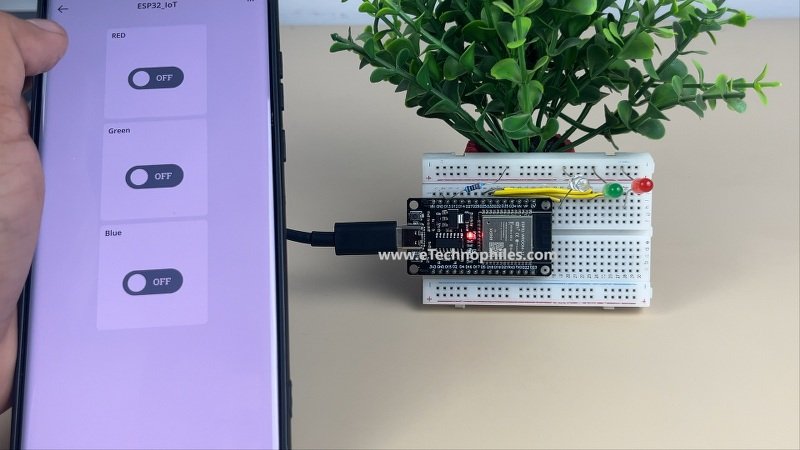
This is the simplest IoT project in this list. Three LEDs are connected to the ESP2, but you can connect more(you have to modify the code as well). Each LED can be controlled independently using the button on the dashboard.
To build this project, I used:
- ESP32 board
- LEDs x 3
- Resistor 220 ohm
- Breadboard
- Jumper wires
Connections:
- Red LED: to Pin 25
- Green LED: to Pin 33
- Blue LED: to Pin 32
- One end of the resistor to Cathode pins of all three LEDs
- Other end of the resistor to Gnd of ESP32
4. Bidirectional DC motor control
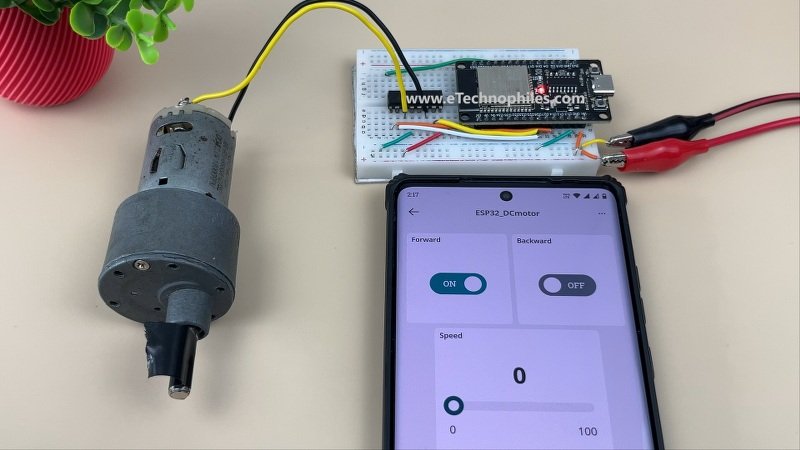
In terms of complexity and programming, this IoT project is the most difficult on this list. At the same time, it is very useful as well. Imagine controlling a DC motor from any part of the world in both directions. Cool right!
To power the motor through the motor driver, you need an external power supply.
I used the following components for this project:
- ESP32 board
- L293D motor driver
- DC motor
- External power supply
- Breadboard
- Jumper Wires
Connections:
L293D-
- IN1 to Pin 27
- IN2 to Pin 26
- EN1 to Pin 14
- O/P1 to one terminal of DC motor
- O/P2 to one terminal of DC motor
- Vss(for powering the IC) to 3.3 V
- Vcc(for powering DC motor) to power supply
- GND pins of L293D, ESP32 and Power supply connected together
5. Smart home project
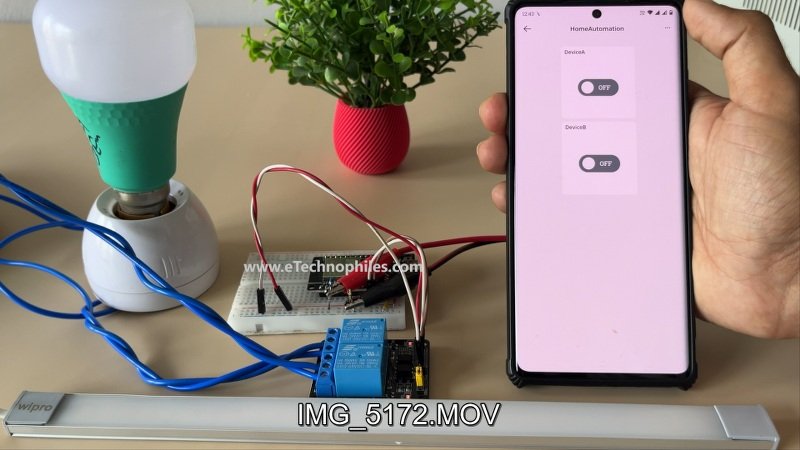
Control the status of your appliances directly from your phone through the internet. I have connected two devices in this project but you can connect as many as you want(you will need a relay module with more channels). Easily turn your devices ON/OFF with ease.
I used these parts to make this project:
- ESP32 board
- 2 Channel Relay module
- 2 Bulbs
- External power supply for the relay
- Electric wires and AC supply for the bulbs
- Breadboard
- Jumper Wires
Connections:
- Relay Channel 1-
- IN1 to pin 14
- COM to one terminal of the bulb1
- NO to AC mains
- Other end of the bulb1 to AC mains
- Relay Channel 2-
- IN2 to pin 27
- COM to one terminal of the bulb2
- NO to AC mains
- Other end of the bulb2 to AC mains
- The relay module is powered externally(5V).
6. Servo motor control
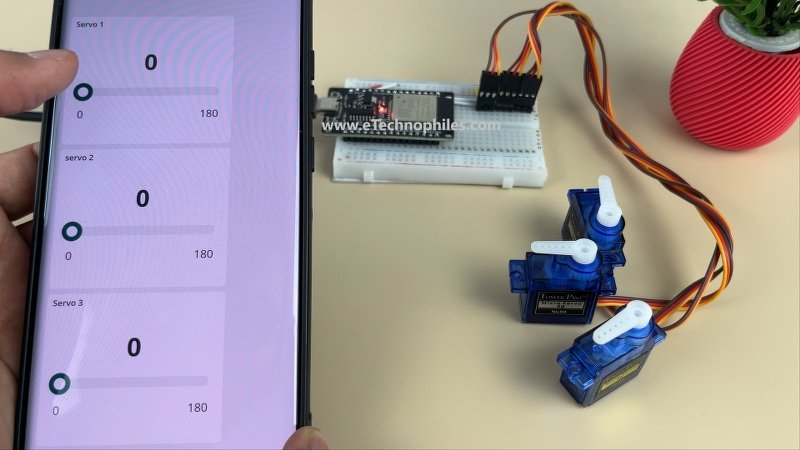
Easily control servo motors using the Arduino IoT cloud app. I have connected three, but you can connect more- limited only by the number of pins available on ESP32.
Here’s what I have used:
- ESP32
- Servo motor x 3
- External supply for motors(6 V)
- Breadboard and jumper wires
Connections:
- Servo 1 to pin 13
- Servo 2 to pin 27
- Servo 3 to pin 32
- Vcc to +ve of external power supply(6V)
- GND to -ve of external power supply(6V)
- GND of ESP32 and power supply connected together
7. Tiny weather station
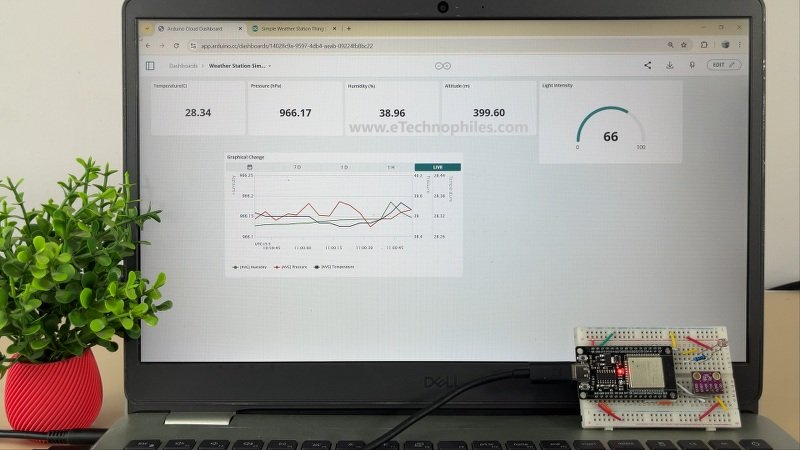
By making this simple IoT project, you can monitor the weather parameters such as temperature, moisture, humidity, altitude, and sun intensity in real time. It is a perfect project for plant monitoring and weather updates. You need two sensors for this: BME280 and a light-dependent sensor.
You need:
- ESP32
- BME280/BMP280
- LDR
Connections:
- LDR (Light Dependent Resistor) to Pin 34 through 1K ohm resistor.
- BME280:
- SDA to Pin 21
- SCL to Pin 22
8. Plant monitoring and watering system
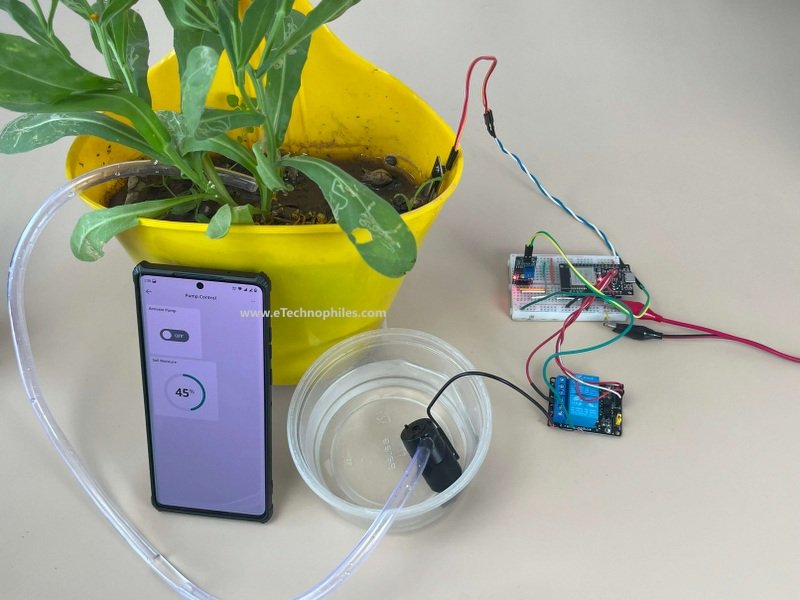
Now your plants will never miss those essential drops of water! All you have to do is open the app, check the soil moisture value, and decide whether to water the plant or not. Just hit the on-screen button to start the pump. Turn it off when moisture reaches the desired value.
To build this project, I used:
- ESP32 board
- 2 channel relay module
- External power supply for relay
- Soil moisture sensor
- Water pump
- Jumper wires
Connections:
- Soil Moisture Sensor: Data pin to Pin 34
- Relay1
- IN1 to pin 13
- COM to one terminal of the pump
- NO to +ve of the supply
- Other end of the pump to GND
- ESP and relay ground are connected together
I hope you like these simple IoT projects made using ESP32 and the Arduino IoT cloud. If you have any questions or need assistance, feel free to leave a comment.