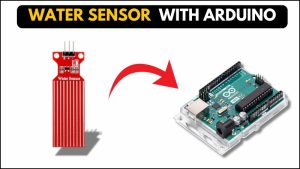
A water level sensor is widely used in various applications, including water level detection, leakage detection, and automatic irrigation systems. It detects the presence of water and provides an output signal that can be processed by a microcontroller.
In this tutorial, we will explore how a water level sensor works and how to interface it with an Arduino to create a rain detection alarm.
Table of Contents
What is a Water level sensor?

A water level sensor detects the presence or level of water by measuring changes in conductivity. It typically consists of a set of exposed conductive traces that act as probes. When water bridges the gaps between the traces, the sensor produces an electrical signal indicating water presence or level.
Water level sensor pinout

A typical 3-pin water level sensor module consists of the following pins:
- VCC – Power supply (3.3V to 5V)
- D0 (Digital Output) – Outputs HIGH (1) when water is detected, LOW (0) when dry
- GND – Ground
Key specifications
| Parameter | Specification |
|---|---|
| Working Voltage | 5V |
| Working Current | <20mA |
| Interface | Analog |
| Output Voltage Signal | 0V – 4.2V |
| Working Temperature | 10°C ~ 30°C |
| Power Consumption | Low |
| Sensitivity | High |
| Arduino Compatibility | Yes |
Construction

The water sensor consists of two main parts:
Probe (Detection Area)
The detection area consists of parallel conductive traces. When water bridges the traces, it completes an electrical circuit, allowing the sensor to detect water presence.
Electronic Module
The electronic module includes a transistor-based circuit that processes the signal from the probe and provides a digital output (HIGH or LOW). Unlike some sensor modules that use a potentiometer to adjust sensitivity, this version relies on a transistor for signal amplification and switching.
How does a water level sensor work?
The water sensor operates by using its exposed conductive traces to detect water presence. When water comes in contact with the traces, it bridges the gaps, allowing a small current to flow.
- HIGH (1) Output → Water detected
- LOW (0) Output → No water detected
The Arduino reads the digital signal and can trigger actions like sounding an alarm, controlling a pump, or displaying a warning on an LCD. trigger actions like sounding an alarm, controlling a pump, or displaying the water level on an LCD.
Water level sensor with Arduino- Rain detection alarm project
Now, let’s build this project rain detection alarm system.
Components required
- Arduino UNO
- Water Sensor Module (3-pin)
- Buzzer
- LED (Any color)
- 220KΩ Resistor
- Jumper Wires
- Breadboard
Circuit diagram


Program
const int waterSensorPin = A0;  // Water sensor output pin
const int ledPin = 8;           // LED pin
const int buzzerPin = 11;       // Buzzer pin
const int threshold = 300;      // Water detection threshold (adjust based on testing)

void setup() {
  pinMode(ledPin, OUTPUT);     // Set LED pin as output
  pinMode(buzzerPin, OUTPUT);  // Set Buzzer pin as output
  Serial.begin(9600);          // Initialize Serial Monitor
}

void loop() {
  int waterValue = analogRead(waterSensorPin);  // Read the water sensor value

  Serial.print("Water Sensor Value: ");
  Serial.println(waterValue);  // Print the sensor value for debugging

  if (waterValue > threshold) {     // If water is detected
    digitalWrite(ledPin, HIGH);     // Turn on LED
    digitalWrite(buzzerPin, HIGH);  // Turn on buzzer
    Serial.println("Water detected!");
  } else {
    digitalWrite(ledPin, LOW);     // Turn off LED
    digitalWrite(buzzerPin, LOW);  // Turn off buzzer
    Serial.println("No water detected.");
  }

  delay(500);  // Small delay for stability
}
Code explanation
const int waterSensorPin = A0;  // Water sensor output pin
const int ledPin = 8;           // LED pin
const int buzzerPin = 11;       // Buzzer pin
const int threshold = 300; // Water detection threshold (adjust based on testing)- waterSensorPin = A0 → The water sensor is connected to analog pin A0.
- ledPin = 8 → An LED is connected to digital pin 8.
- buzzerPin = 11 → A buzzer is connected to digital pin 11.
- threshold = 300 → If the sensor value exceeds 300, it is considered as water detected. This value can be adjusted based on real-time testing.
void setup() {
  pinMode(ledPin, OUTPUT);     // Set LED pin as output
  pinMode(buzzerPin, OUTPUT);  // Set Buzzer pin as output
  Serial.begin(9600);          // Initialize Serial Monitor
}- pinMode(ledPin, OUTPUT) → Configures the LED pin as an output.
- pinMode(buzzerPin, OUTPUT) → Configures the buzzer pin as an output.
- Serial.begin(9600) → Starts serial communication at 9600 baud for debugging.
void loop() {
int waterValue = analogRead(waterSensorPin); // Read the water sensor value- analogRead(waterSensorPin) → Reads the sensor’s analog value (range 0 to 1023).
  Serial.print("Water Sensor Value: ");
Serial.println(waterValue); // Print the sensor value for debugging- Prints the sensor’s raw value to the Serial Monitor.
  if (waterValue > threshold) {     // If water is detected
    digitalWrite(ledPin, HIGH);     // Turn on LED
    digitalWrite(buzzerPin, HIGH);  // Turn on buzzer
    Serial.println("Water detected!");
  } else {
    digitalWrite(ledPin, LOW);     // Turn off LED
    digitalWrite(buzzerPin, LOW);  // Turn off buzzer
    Serial.println("No water detected.");
  }
Prints “Water detected!” in the Serial Monitor.
- Turns on the LED (HIGH).
- Turns on the buzzer (HIGH).
- Prints “Water detected!” in the Serial Monitor.
Otherwise:
- Turns off the LED (LOW).
- Turns off the buzzer (LOW).
- Prints “No water detected.” in the Serial Monitor.
  delay(500);  // Small delay for stability
}- A 500ms delay prevents rapid fluctuations in the sensor readings.