Last updated on March 19th, 2024 at 05:04 pm
An ultrasonic sensor measures the distance of an object by emitting ultrasonic sound waves. The reflected waves from the object are received by the sensor and are converted to corresponding electrical signals.
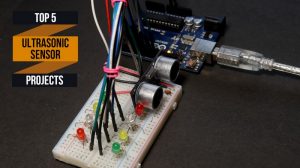
Numerous ultrasonic sensor projects are available on the internet. But here, we present the best five Arduino ultrasonic sensor projects.
Project list
Intruder alarm project using Arduino with ultrasonic sensor

Keeping your private things safe from intruders can be a challenging job. But with this Intruder Alarm project, it is easy to keep your accessories safe.
The circuit makes a sound via a buzzer when an object comes near the sensor. The distance to which the sensor will respond can be easily adjusted in the program.
Circuit diagram

Components list
- Ultrasonic Sensor
- LEDs x2
- Resistors (220 ohms) x2
- Buzzer
- Breadboard
- Arduino Uno Board
Code
// Created by The Electronic Guy
// www.youtube.com/theelectronicguy

  #define echo 2
  #define trig 3
  #define outA 8// Red LED
  #define outB 9// Green LED
  #define outC 10// Buzzer

  float  duration; // time taken by the pulse to return back
  float  distance; // oneway distance travelled by the pulse
  const int intruderDistance = 10;  // the minimum distance
                                                     //upto which the sensor is able
                                                    //to sense any object
  void setup() {

    pinMode(trig, OUTPUT);
    pinMode(echo, INPUT);

    pinMode(outA, OUTPUT);
    digitalWrite(outA, LOW);

    pinMode(outB, OUTPUT);
    digitalWrite(outB, LOW);
    pinMode(outC, OUTPUT);
    digitalWrite(outC, LOW);
    Serial.begin(9600);

  }

  void loop() {

    time_Measurement();
    distance = (float)duration * (0.0343) / 2;   // calculate the oneway distance travelled by the pulse
    Serial.println(distance);
    alarm_condition();

  }

  void time_Measurement()
  { // function to measure the time taken by the pulse to return back
    digitalWrite(trig, LOW);
    delayMicroseconds(2);

    digitalWrite(trig, HIGH);
    delayMicroseconds(10);
    digitalWrite(trig, LOW);

    duration = pulseIn(echo, HIGH);
  }
  void alarm_condition()
  { //function to execute the output commands based on the sensor input
    if(distance<=intruderDistance)
    { digitalWrite(outA,HIGH);
      digitalWrite(outB,LOW);
      analogWrite(outC,200);}
    else
    {  digitalWrite(outA,LOW);
       digitalWrite(outB,HIGH);
       analogWrite(outC,0);
       }
  }
Distance status using LEDs

A glowing LED always lights up your creative space. So, this project is a combined implementation of an ultrasonic sensor and LEDs. There are 8 LEDs.
The LEDs blink according to the distance of an object from the Ultrasonic Sensor. Thus indicating how far the object is from the sensor.
Circuit diagram


Components list
- Ultrasonic Sensor
- LEDs x8
- Resistors (220 ohms) x8
- Breadboard
- Arduino Uno board
Code
// Created by The Electronic Guy
// www.youtube.com/theelectronicguy
#define echo 2
#define trig 3
#define LED8 11
#define LED7 10
#define LED6 9
#define LED5 8
#define LED4 7
#define LED3 6
#define LED2 5
#define LED1 4
float   duration;
float  distance;
void setup() {
  pinMode(trig, OUTPUT);
  pinMode(echo, INPUT);
  for (int i = 4; i <= 11; i++)
    pinMode(i, OUTPUT);
  Serial.begin(9600);
}
void loop() {
  time_Measurement();
  distance = duration * (0.0343) / 2;
  Serial.println(distance);
  led_Check();
  delay(10);
  for (int i = LED1; i <= LED8; i++) {
    digitalWrite(i, LOW);
  }
}
void time_Measurement()
{
  digitalWrite(trig, LOW);
  delayMicroseconds(2);
  digitalWrite(trig, HIGH);
  delayMicroseconds(10);
  digitalWrite(trig, LOW);
  duration = pulseIn(echo, HIGH);
}
void led_Check() {

  if (11 < distance && distance <= 15)
    digitalWrite(LED8, HIGH);
  else if (10 < distance && distance <= 11)
    digitalWrite(LED7, HIGH);
  else if (9 < distance && distance <= 10)
    digitalWrite(LED6, HIGH);
  else if (8 < distance && distance <= 9)
    digitalWrite(LED5, HIGH);
  else if (7 < distance && distance <= 8)
    digitalWrite(LED4, HIGH);
  else if (6 < distance && distance <= 7)
    digitalWrite(LED3, HIGH);
  else if (5 < distance && distance <= 6)
    digitalWrite(LED2, HIGH);
  else if (1 < distance && distance <= 5)
    digitalWrite(LED1, HIGH);
  else {
    for (int i = LED1; i <= LED8; i++)
      digitalWrite(i, LOW);
  }
}
Distance measurement project

Sometimes it becomes necessary to get the precise distance of an object. And hence, this project measures the distance of an object placed in front of the ultrasonic sensor and displays it on an LCD screen.
Circuit diagram

Components list
- Ultrasonic sensor
- Arduino Uno board
- LCD Screen
- 10K Potentiometer
- Resistor (220 ohms)
- Breadboard
Code
// Created by The Electronic Guy
// www.youtube.com/theelectronicguy
 #include <LiquidCrystal.h> //LCD library

  #define echo 2
  #define trig 3

  float  duration; // time taken by the pulse to return back
  float  distance; // oneway distance travelled by the pulse

  LiquidCrystal lcd(13, 12, 11, 10, 9, 8);//lcd(RS,EN,D4,D5,D6,D7)
  void setup() {

    pinMode(trig, OUTPUT);
    pinMode(echo, INPUT);
    Serial.begin(9600);
    lcd.begin(16, 2);

  }

  void loop() {

    time_Measurement();
    distance = duration * (0.0343) / 2;// calculate the oneway distance travelled by the pulse
    display_distance();

  }

  void time_Measurement()
  { //function to measure the time taken by the pulse to return back
    digitalWrite(trig, LOW);
    delayMicroseconds(2);

    digitalWrite(trig, HIGH);
    delayMicroseconds(10);
    digitalWrite(trig, LOW);

    duration = pulseIn(echo, HIGH);
  }
  void display_distance()
  { //function to display the distance on LCD/Serial Monitor
    lcd.clear();
    lcd.setCursor(0, 0);
    Serial.print("Distance in Cm: ");
    Serial.print(distance);
    Serial.println();
    lcd.print("Distance in Cm: ");
    lcd.setCursor(5, 1);
    lcd.print(distance);
    delay(1000);
   }
Servo motor angle control with distance

A servo motor is also known for its rotation with great precision. And what would be better than giving that precise distance/rotation using an ultrasonic sensor? This project uses a servo motor and an LCD screen with an ultrasonic sensor.
The distance of the object from the sensor is mapped with the rotation of the motor between 0 and 180 degrees. So, when the object is at a distance of 30cm, the servo angle is 30 degrees and when the object is at a distance of 90 cm, the servo angle is 90 degrees, and so on.
Circuit diagram


Components required
- Ultrasonic sensor
- Arduino Uno board
- Servo motor
- LCD Screen
- 10K potentiometer
- Resistor (220 ohms)
- Breadboard
Program
// Created by The Electronic Guy
// www.youtube.com/theelectronicguy
  #include <LiquidCrystal.h> //LCD library
  #include<Servo.h> //Servo library

  #define echo   2
  #define trig   3

  float  duration; // time taken by the pulse to return back
  float  distance; // oneway distance travelled by the pulse
  Servo myservo ;

  LiquidCrystal lcd(13, 12, 11, 10, 9, 8);//lcd(RS,EN,D4,D5,D6,D7)
  void setup() {
    myservo.attach(6); // Servo is connected to Digital pin 6
    pinMode(trig, OUTPUT);
    pinMode(echo, INPUT);
    Serial.begin(9600);
    lcd.begin(16, 2);
  }

  void loop() {

    time_Measurement();
    distance = duration * (0.0343) / 2;
    display_distance();
    myservo.write(distance);// Move the servo at an angle equal to the distance
    delay(500);
    lcd.clear();

  }

  void time_Measurement()
  { //function to measure the time taken by the pulse to return back
    digitalWrite(trig, LOW);
    delayMicroseconds(2);

    digitalWrite(trig, HIGH);
    delayMicroseconds(10);
    digitalWrite(trig, LOW);

    duration = pulseIn(echo, HIGH);
  }
  void display_distance()
  { //function to display the distance & ServoAngle on LCD/Serial Monitor
    lcd.setCursor(0, 0);
    Serial.print("Distance in Cm: ");
    Serial.print(distance);
    Serial.println();
    lcd.print("Distance: ");
    lcd.print(distance);
    lcd.setCursor(0, 1);
    lcd.print("ServoAngle: ");
    int ServoAngle = constrain(distance,0,180);
    lcd.print(ServoAngle);

   }
Security system/ Area scanner using ultrasonic sensor

In this project, an ultrasonic sensor is tied to a servo motor. The servo motor rotates continuously between 0 and 180 degrees, performing the function of a radar.
When an object comes in the range of the sensor, the sensor tracks it and raises an alarm. The corresponding distance of the object from the sensor gets displayed on the LCD screen.
Circuit diagram


Components list
- Ultrasonic sensor
- Arduino Uno board
- LCD Screen
- 10K Potentiometer
- Servo motor
- Resistor (220 ohms)
- Breadboard
Program
// Created by The Electronic Guy
// www.youtube.com/theelectronicguy
#include <LiquidCrystal.h> //LCD library
#include<Servo.h> //Servo library
#define echo   2
#define trig   3
#define Buzzer 7
const int scan_Distance = 50;//distance upto which the sensor should scan
float  duration; // time taken by the pulse to return back
float distance;  // oneway distance travelled by the pulse
Servo myservo ;
LiquidCrystal lcd(13, 12, 11, 10, 9, 8);//lcd(RS,EN,D4,D5,D6,D7)
void setup() {
  myservo.attach(6); // Servo is connected to Digital pin 6
  pinMode(trig, OUTPUT);
  pinMode(echo, INPUT);
  pinMode(Buzzer,OUTPUT);
  Serial.begin(9600);
  lcd.begin(16, 2);
}
void loop() {
  for (int i = 0; i <= 180; i++) {
    myservo.write(i);
    time_Measurement();
    distance = duration * (0.0343) / 2;
    if (distance <= scan_Distance) {
      intruder_detected();
    }
    else {
      lcd.clear();
      lcd.print("Scanning...... ");
    }
    delay(100);
  }
  for (int i = 180; i >= 0; i--) {
    myservo.write(i);
    time_Measurement();
    distance = (float)duration * (0.0343) / 2;
    if (distance <= scan_Distance) {
      intruder_detected();
    }
    else {
      lcd.clear();
      lcd.print("Scanning...... ");
    }
    delay(100);
  }
}
void time_Measurement()
{
  digitalWrite(trig, LOW);
  delayMicroseconds(2);
  digitalWrite(trig, HIGH);
  delayMicroseconds(10);
  digitalWrite(trig, LOW);
  duration = pulseIn(echo, HIGH);
}
void intruder_detected()
{
  lcd.clear();
  lcd.setCursor(0, 0);
  lcd.print("  Intruder at ");
  lcd.setCursor(0, 1);
  lcd.print("    ");
  lcd.print(distance);
  lcd.print(" cm");
  digitalWrite(Buzzer, HIGH);
  delay(3000);
  digitalWrite(Buzzer, LOW);
}
Looks like you have the servo item in twice but have not included the system security item
Otherwise the projects look interesting and I look forward to trying them
Stephen Fox
Hi Stephen,
Can you explain what do you mean by “servo item in twice but have not included the system security item”