LED or light emitting diode is actually a type of diode. Testing an LED is simpler than testing a diode because we can visually see the LED glowing.
After setting the multimeter in the diode mode, touch the terminals of the LED with the red and black probe in any order. Then reverse the order. A good LED should glow in one of the cases. If the LED doesn’t glow or the multimeter displays ‘OL’ in both cases, it is faulty.
Steps to test an LED using a multimeter?
1) Identify the terminals
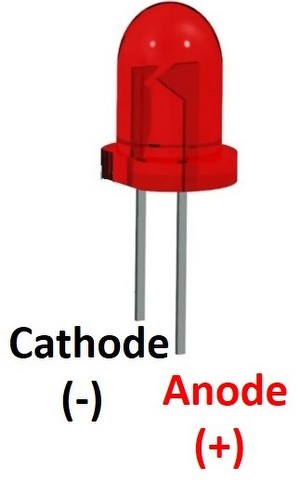
To identify the terminals of a through-hole LED, look at its legs. The longer leg is the Anode(+) and the shorter leg is the Cathode(-).

Note: You can skip this step if the LED is of an SMD type.
2) Prepare your multimeter
Insert the red probe into the mAVΩ port and the black probe into the COM port on your multimeter. Then using the rotary dial, set your multimeter in the diode test mode (denoted by a diode symbol).

Note: Some multimeters have diode mode included with one of the resistance ranges(mostly with 2K ohm range). Whereas some multimeters have diode and continuity modes together.
3) Perform the test
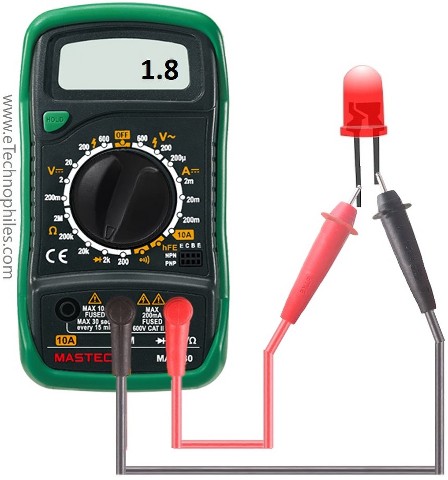
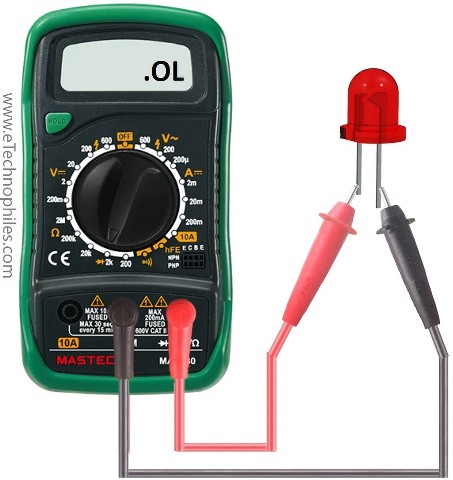
Touch the Anode of the LED with the end of the red probe and the Cathode with the black probe. The LED should glow, and the multimeter should display some finite voltage value. If you reverse the order in which the probes are touching the terminals of the LED, it will not glow and the multimeter will display ‘OL’.
If it is an SMD LED, just touch the probes in any order. Then reverse the order. If it glows in any of the two cases, the LED is working.


Note: Not every LED type will glow in this test. Some LEDs require a higher current to operate, while some have higher voltage drops, which a multimeter cannot provide. So make sure to check the current rating and voltage drop of the LED under test
How to test an RGB LED using a multimeter?
For an RGB LED or 4-terminal LED, the process is the same but must be repeated for every pair of terminals.
RGB LED can either have a common Cathode or a common Anode.
In common Anode, there is one positive terminal and three negative terminals. To glow each LED(Red, Blue and Green), the common Anode must be connected to +ve of the supply. Then, depending on which LED color you want to glow, their terminal(cathode) should be connected to the -ve of the supply.

In common Cathode, there is one negative terminal and three positive terminals. To glow each LED(Red, Blue and Green), the common Cathode must be connected to -ve of the supply. Then, depending on which LED color you want to glow, their terminal(Anode) should be connected to the +ve of the supply.

To test the RGB LED using a multimeter, follow these steps:
- The longer terminal is either a common Anode or Cathode. Touch it with the red probe.
- Keeping the red probe steady, touch one of the three terminals with the black probe. Repeat with the remaining two terminals. If it is a common anode type, the LED will glow in either R, G, or B color in all three positions. If it is a common cathode type, nothing will happen.
- Now touch the longer leg with the black probe and repeat the above step. If it is a common cathode type, the LED will glow in either R, G, or B color in all three positions. If it is a common anode type, nothing will happen.
- A good LED should glow in any one of the above two situations. If it doesn’t glow, it is faulty.
