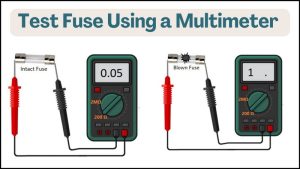
To test a fuse with a multimeter, you need to set the meter to measure continuity or resistance. Then, touch the probes of the multimeter to the two ends of the fuse and check the reading on the meter. If the fuse is intact, the multimeter will show a low resistance or beep to indicate continuity. If the fuse is blown, the multimeter shows high resistance or no continuity.
Table of Contents
What is a fuse? How does it work?
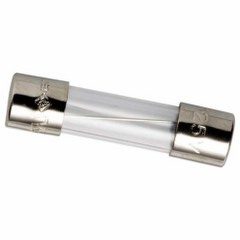
A fuse is a safety component that prevents the circuit from overcurrent. It has a thin metal wire or strip made of a material with a low melting point, such as tin or copper.
When the current exceeds a certain limit, this wire gets melted due to the heating effect. This causes the fuse to blow up, which creates an open circuit.
What exactly is the heating effect?
When current passes through a conductor(having some resistance), it offers some resistance to the current, generating heat. Electric energy is converted to heat energy—the more the current, the more the heat.
Traditional wire fuse work on the principle of power dissipation, denoted as P = I²R. When the current flowing through the fuse exceeds a certain level, the power dissipation increases, causing the fuse wire to heat up.
As the wire temperature rises, its resistance increases (as with most metals), resulting in even greater power dissipation. This process continues until the wire reaches its melting temperature, at which point it melts, and the fuse blows.
So how do you check if a fuse is blown?
To test a blown fuse, check the state of the wire inside the fuse. If the wire is broken or there is some dark material inside the glass, the fuse is blown. For accurate results, this continuity of the fuse material(wire) can also be checked using various methods, such as a continuity tester and digital multimeter.
Types of fuses you can check using a multimeter?
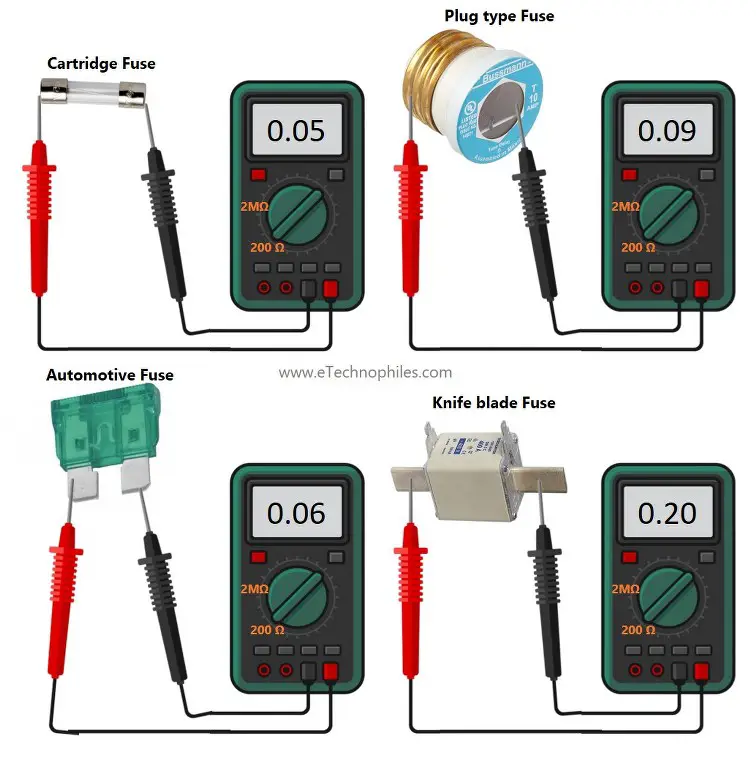
There are many types of fuses out there. You can check all of them as long as they have visible terminals. Some popular fuses you can check using a multimeter are:
- Automotive
- Plug type fuse
- Cartridge fuses
- Knife blade fuses
How to test a fuse with a multimeter?
To test a fuse with a multimeter, you can either select
a) Continuity mode
b) Resistance mode
Usually, the resistance mode is preferred due to fuse resistance data, but we recommend using both modes. Follow the steps given below:
Step 1: Turn off the supply
If the fuse under test is installed in a circuit, make sure to turn off the power supply to avoid any shock. In case of a detachable fuse, remove it from the holder and place it on a surface. Always double-check that the power is turned off before proceeding.
Note: Don’t place the fuse on a metal table directly. Use a paper sheet or a mat for insulation.
Step 2: Insert the probes
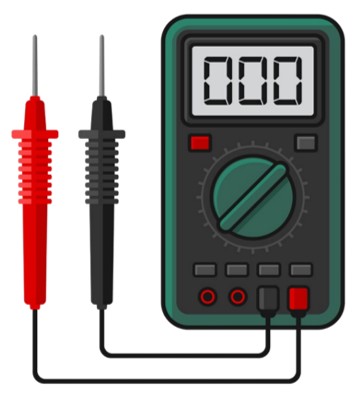
Insert the probes/leads into the appropriate sockets of the multimeter. A multimeter usually has three sockets/ports: COM(common or ground), mAVΩ(voltage or resistance), and 10A(current).
Insert the red probe into the mAVΩ socket and the black probe into the COM port, as shown below.
The red probe is inserted into the 10A port when the measured current value exceeds 250mA. This value may vary depending on the multimeter.
Step 3: Select the continuity function
Select the continuity function with a soundwave symbol on your multimeter. This function is used to check the conductivity of any component or circuit. The multimeter gives a beep sound and displays zero resistance if there is no break.
To ensure the multimeter is working as expected, touch the ends of the probes together. If the multimeter produces sound or displays zero, follow the next step.
Step 4: Touch the ends of the fuse with probes
Place the fuse on a table. Touch one end with the red probe and the other with the black one in any order.
The fuse is not faulty if the multimeter produces a sound or beeps. If there is no sound, the fuse is blown.
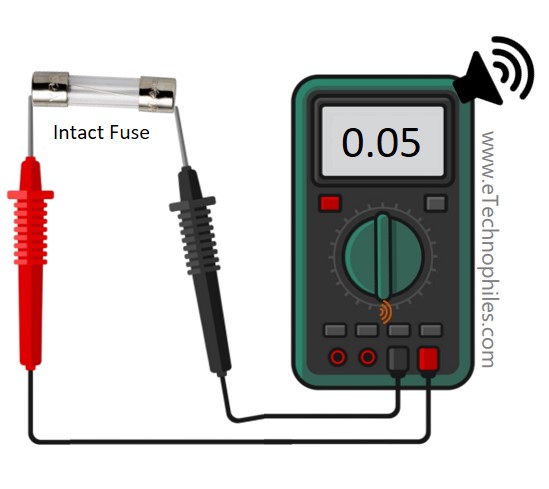
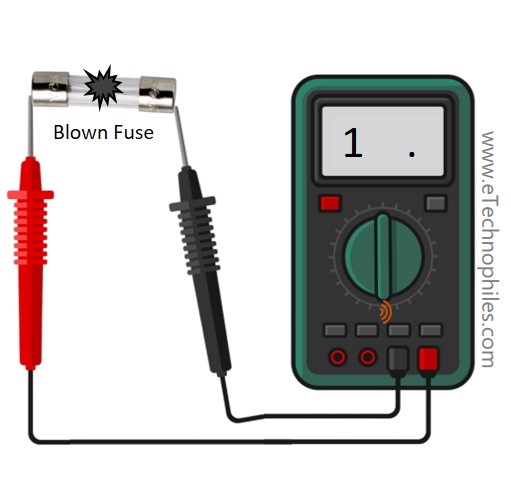
| Fuse condition | Fuse is good | Fuse is blown |
| Indication | Beep sound | No sound and displays “1” OR “OL” |
Sometimes fuse may be partially blown, meaning the blown wire is still continuous inside the fuse. If this is the case, the continuity does not give reliable data. That’s why you should always confirm the test with the resistance mode.
Step 5: Select the resistance mode
Select the resistance function with a resistor symbol on your multimeter. Ideally, the multimeter displays “1”. Touch the probes together. The multimeter should display “0” in this case.
There are different resistance ranges on a multimeter, usually 200Ω, 2kΩ, 20kΩ, 200kΩ and 2MΩ. You must select the lowest range for accurate results(200Ω in this case).
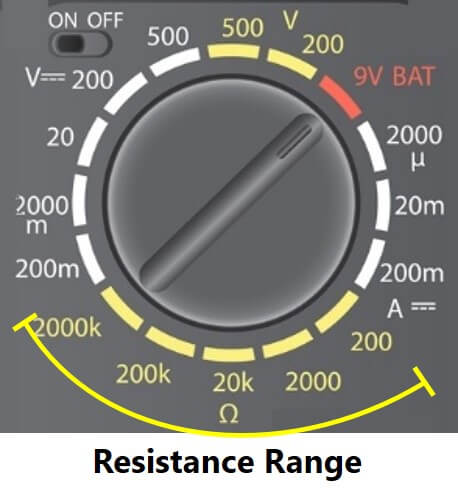
If the fuse is blown, it creates an open circuit. Hence infinite resistance. If partially blown, there might be some continuity left. Hence, resistance mode is the best way to test a fuse.
Step 6: Touch the ends of the fuse in resistance mode
Touch one end with the red probe and the other with the black one.
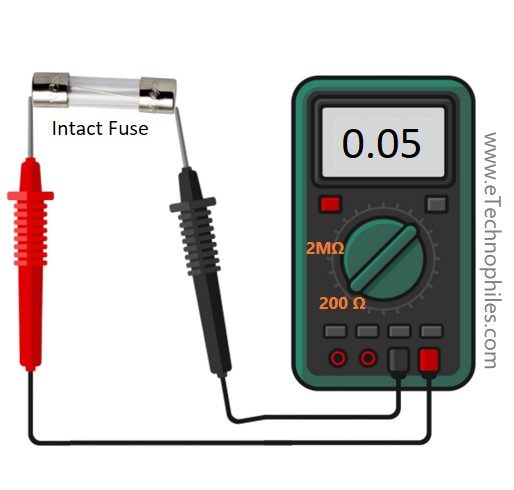
The fuse is good if the multimeter displays a value of less than 5Ω. A value of more than 5Ω means the multimeter is faulty. And if your multimeter displays “0L” or “1”, the fuse is blown, creating an open circuit.(Refer to this article)
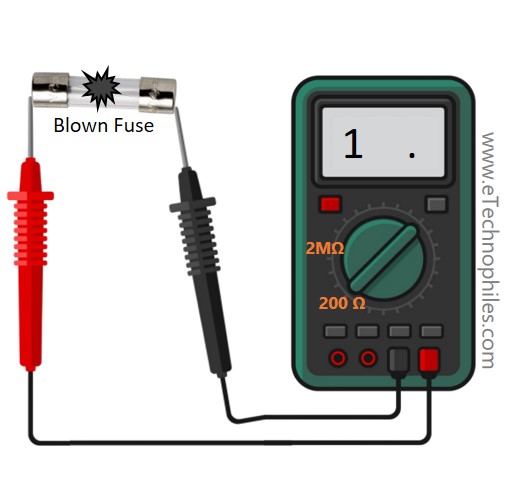
| Fuse condition | Fuse is good | Fuse is blown | Fuse is faulty |
| Indication | Resistance under 5Ω | Display shows “OL” or “1” | R > 5Ω |
If the fuse is blown, replace it with a new one. Ensure the voltage and current ratings of the new fuse are exactly the same as the blown one.
FAQs
What devices are used to test fuses?
Devices used to test fuses are Digital/Analog multimeters, Continuity testers, and Circuit testers.
How do you test a fuse without a fuse tester?
You can use a digital multimeter’s continuity or resistance mode to test a fuse without a fuse tester.
