Last updated on March 19th, 2024 at 05:34 pm
When it comes to breadboard wires, a variety of options are available. These wires are essential for connecting components on the breadboard and can make a big difference in the functionality, presentation, and complexity of the wiring of a project. Let’s take a closer look at the types of breadboard wires you can use.

The ideal thickness for a breadboard wire is AWG22 (0.64mm). Other sizes could also be used like AWG24, which is bigger than AWG22, but this might expand the metallic clips inside the solderless breadboard after regular use. Smaller gauge wire may not connect properly due to loose contact with metallic clips inside the breadboard.
Let’s start with jumper wires first.
Table of Contents
Jumper wires

These are by far the most popular and common solderless breadboard wire types. There are two types of jumper wires: male-to-male and male-to-female. Jumper wires have header pins attached to both ends, which makes them easy to insert into breadboard holes.
It’s easy to connect the pins of modules and boards like Arduino to external devices using jumper wires.
The term “jumper wire” comes from the fact that these wires create “jumps” or connections between two points in an electronic circuit.
How to use Jumper wires?

- Just take a jumper wire of the desired color and connect it by inserting it in the desired holes of the breadboard.
- If end-to-end connections are on the breadboard or between a breadboard and a female socket, use a male-to-male jumper wire.
- Use a male-to-female jumper wire if end-to-end connections are between the breadboard and a header pin.
Why choose Jumper wires
● Flexibility: Jumper wires are flexible and can be easily bent or routed to fit in tight spaces or around obstacles.
● Versatility: Jumper wires are available in various lengths, gauges, and colors.
● Easy to use.
● Cost-effective and can be used multiple times without changing its shape.
Drawbacks of Jumper wires
- Loose header connection: If used many times connection of wires inside with the header pin may get loose and create problems. To avoid this, before using jumper wires, check its electrical connectivity with a multimeter.
- Signal degradation: Jumper wires can cause signal degradation or interference if they are too long or if they are not properly shielded. This can lead to errors or reduced performance in the circuit.
- Aesthetics: The use of jumper wires can make a circuit look messy or cluttered, which can be undesirable in some applications.
- Limited current-carrying capacity: Jumper wires have a limited current-carrying capacity, which means that they may not be suitable for high-power applications.
Solid core wire
Solid core wires (also called Hook-up wire spools) are composed of a single, solid metal conductor, unlike stranded wires, which are made of multiple thin wires twisted together. The recommended size of solid core wire for breadboard applications is 22 AWG or 0.64mm.
There are two solid core wire options available for breadboard:
- Hook-up wire spool
- Pre-cut wires
Be Project ready with these breadboard kits. (Read now)

Breadboard hook-up wire spool
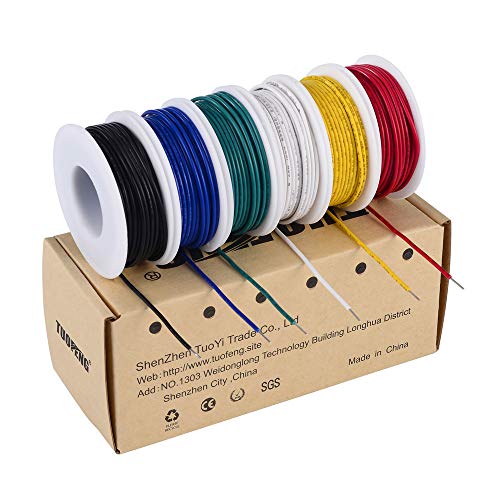
Breadboard Wire spools of 1 to 10 meters are the best option if you make breadboard projects daily. And they will also cost you less than the other breadboard wire types.
Typically recommended size of solid core wire for breadboard applications is 22 AWG or 0.64mm.
How to use a breadboard wire spool?

To cut a solid core wire for breadboard connections, follow these steps:
Step 1: Estimate the distance between the two breadboard holes that need to be connected together. Make sure to leave a little extra length which will go inside the hole of the breadboard.
Step 2: Take the length of the wire equal to what you measured before and cut it from the wire spool.
Step 3: Using a wire stripper, remove the insulation from both ends. Be careful, if you will apply too much pressure, you may chop off the whole end.
Step 4: Now bend the exposed end part of the wire and insert it into the respective holes.
Pre-cut breadboard wires

Pre-cut breadboard wires are best suited for those who care about the presentation of their wiring so that it doesn’t look messy. They come in different sizes and colors and are already available in specific lengths out of the box, so there is no need to cut them.
How to use pre-cut wire?

Step 1: Measure the distance between the two breadboard holes you want to connect together.
Step 2: Now, choose a wire of length equal to the distance you measured.
Step 3: If your wires are not bent, create a 90-degree bend on both ends(stripped part).
Step 4: Insert the wire into the holes.
Note: If the wires are not bent initially, choose a wire that is slightly longer than the distance between the holes.
As you can see in the above picture, the wiring on this breadboard looks very neat.
Why choose pre-cut wires?
- Various lengths: Assorted packs of different-length wires.
- Tinning: These wires have tinning on the ends, making them more durable than non-tinned wires.
- Box: These wires come in a box.
Drawbacks of pre-cut wires
- The cost/meter is way more than the wire spools.
- You can’t rely on just pre-cut wires as they are not available in every size.
Conclusion
We have explored the different options, including jumper wires, solid core wires, and pre-cut breadboard wires, along with their unique advantages and disadvantages. Jumper wires are versatile and flexible, making them suitable for prototyping and quick connections.
Pre-cut solid core wires, on the other hand, are ideal for those who prioritize neatness and presentation in their projects, while wire spools allow for more customization and can be an economical choice when working with various wire lengths.