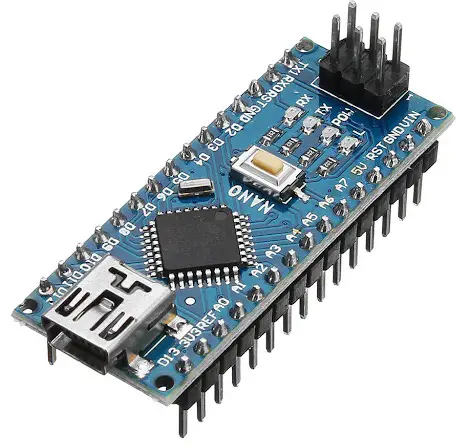
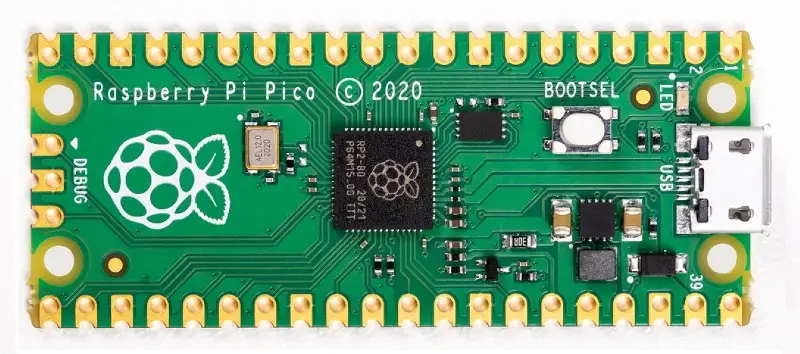
Arduino and Raspberry Pi Pico are both widely used microcontroller boards. Due to their versatility, ease of use, cost-effectiveness, and ease of learning, they are used in many projects.
Both boards are capable of interacting with various devices and have large communities with readily available libraries. In this article, we will compare the two microcontrollers so that you can decide which one is the best fit for your next project.
Note: We are comparing the Raspberry Pi Pico with the Arduino Nano because they are both similar in size, cost, and target audience. The Nano is one of the most compact and widely used boards in the Arduino lineup, making it a fair comparison with the Pico, which is also designed for small-scale projects.
Arduino Nano

Arduino is an open-source, easy-to-use hardware and software platform. The Arduino family includes a wide range of microcontrollers like the Arduino Uno, Nano, Mini, Pro Mini, and Mega. All these boards can be programmed using the same IDE but differ in size, shape, performance, and applications.
Common applications include IoT projects, home automation, security systems, robotic applications, and fun DIY projects.
Raspberry Pi Pico

Raspberry Pi Pico is a microcontroller board from the Raspberry Pi Foundation, well-known for its single-board computers. The Raspberry Pi Pico, launched in 2021, features the powerful RP2040 microcontroller.
It can be programmed in languages such as C, C++, MicroPython, and CircuitPython. This microcontroller has a steeper learning curve compared to Arduino, which may be overwhelming for absolute beginners.
RPi Pico VS Arduino Nano

The key differences between Pico and Nano are given below:
| Feature | Arduino Nano | Raspberry Pi Pico |
|---|---|---|
| Microcontroller | ATmega328P (8-bit) | RP2040 (32-bit, Dual ARM Cortex-M0+ cores) |
| Clock Speed | 16 MHz | 133 MHz |
| RAM | 2 KB SRAM | 264 KB SRAM |
| Flash Memory | 32 KB | 2 MB |
| EEPROM | 1 KB | None (Flash can be used for storage) |
| GPIO Pins | 14 Digital, 6 Analog | 26 GPIO pins (3 ADC pins) |
| PWM Pins | 6 | All GPIO pins support PWM |
| Operating Voltage | 5V Logic Level | 3.3V Logic Level |
| Programming Languages | C/C++ (Arduino IDE) | C/C++, MicroPython, CircuitPython |
| USB Interface | Mini USB | Micro USB |
| I/O Protocols | I2C, SPI, UART | I2C, SPI, UART (configurable on any 2 pairs) |
| Built-in Debugging | None | 3 dedicated debug pins |
| Community Support | Large and well-established | Growing, but newer and smaller than Arduino |
| Ease of Use | Very beginner-friendly | Slightly steeper learning curve |
| Price (Original Boards) | ~ $20 (~₹1500) | ~ $4 (~₹300) |
| Development Tools | Arduino IDE, VS Code (via plugins) | Thonny, VS Code, Arduino IDE (for RP2040) |
1. Performance
In terms of raw performance, the Raspberry Pi Pico is clearly more powerful than the Arduino Nano. The Pico is equipped with a dual-core ARM Cortex-M0+ processor running at 133MHz, making it ideal for handling performance-intensive tasks and complex applications that demand higher customizability.
On the other hand, Arduino boards are generally less powerful. They are based on various microcontrollers, some of which run at clock speeds as low as 8 MHz, making them suitable for simple tasks requiring low computation power.
The clock speed of the Arduino Nano (with the ATmega328) is 16 MHz, almost 8 times less than that of Pico.
Note: There are some high-performance Arduino boards with 32-bit ARM Cortex-M3 processors running at 80MHz, but they are often categorized as industrial boards, so we’ll exclude them from this comparison.
2. Ease of use
While performance is essential, ease of use is equally important.
Arduino is known for being beginner-friendly, featuring a simple architecture and user-friendly documentation that even beginners can understand. The Arduino community is vast, making debugging hardware and code easier, with many free guides available online.
The Arduino IDE is intuitive and can be downloaded for Windows, Linux, and macOS. It includes an internal code editor, compiler, and serial monitor, making it highly versatile.
Raspberry Pi Pico is also well-documented, with resources available on the Raspberry Pi website. However, it has a steeper learning curve compared to Arduino, which might be challenging for beginners.
Unlike Arduino, Pico can be programmed using a text editor and command-line interface, or through integrated development environments like Visual Studio Code or Thonny. Since the Pico is relatively new, its community support is not as vast as Arduino’s.
3. Applications
Arduino offers a wide range of boards, making it flexible for different applications. It is compatible with almost all sensors, making it ideal for projects such as remote-controlled cars, basic home security, and smart home automation. Arduino boards feature a 5V logic level, which allows for compatibility with many sensors and devices.
The extensive library support simplifies sensor integration.
The Raspberry Pi Pico is better suited for projects that require higher processing speeds, such as DIY oscilloscopes, drones, or multitasking projects. However, its 3.3V logic level can make it challenging to connect to 5V sensors (e.g., the HC-05 Bluetooth module), though this issue can be addressed using a ‘logic level converter’.
4. Technical specifications
PWM and GPIO Configuration:
The Pi Pico has 40 pins, 3 ADC pins, 23 digital I/O pins, and 3 additional debug pins for programming. It also uses a UF2 file for booting and programming.
All GPIO pins on the Raspberry Pi Pico can be used for PWM generation, and any pin pairs can be configured for I2C, SPI, or UART communication.
This flexibility is unmatched by the Nano, which has fixed pins for communication protocols and only 6 PWM pins (D3, D5, D6, D9, D10, D11). The Pico’s PWM resolution of 16-bit (0–65535) also surpasses the Nano’s 8-bit resolution (0–255).
Clock Speed and Architecture:
The Raspberry Pi Pico runs on a dual-core 32-bit ARM Cortex-M0+ processor at 133 MHz, while the Arduino Nano runs on a single-core 8-bit ATmega328 microcontroller at 16 MHz. This difference makes the Pico more powerful and capable of multitasking and handling complex operations.
Memory Comparison:
Raspberry Pi Pico: 264 KB of SRAM, 2 MB of flash storage.
Arduino Nano: 2 KB of SRAM, 1 KB of EEPROM, 32 KB of flash storage.
The Pico’s memory capabilities far exceed those of the Nano, making it suitable for more resource-intensive applications.
5. Price comparison
The original Arduino board starts at around $20 (1500 INR), whereas the Raspberry Pi Pico is priced as low as $4 (300 INR). While you can find Arduino clones for as low as 500 INR, the Pico’s original board is still significantly cheaper. However, price alone should not be the deciding factor between these two boards.


6. Getting started
Getting started with the Arduino Nano is straightforward. Simply download the Arduino IDE from the official website, connect your Nano to your computer via USB, and start coding.
The Raspberry Pi Pico requires a bit more setup. You’ll need to download and boot the board with the necessary firmware (UF2 file) from the Raspberry Pi website. From there, you can program the Pico using editors like VS Code (for C/C++) or Thonny (for MicroPython), which may require some additional setup and installation of libraries.
Conclusion
Both the Arduino and Raspberry Pi Pico are versatile and suitable for a wide range of projects. Arduino is more beginner-friendly, while the Raspberry Pi Pico offers higher performance, making it ideal for projects requiring more computational power.
Your choice should depend on the requirements of your project: for simple tasks like controlling sensors, Arduino is a great choice. For more complex projects requiring multitasking and higher processing power, go for the Raspberry Pi Pico.
