Last updated on March 11th, 2024 at 10:38 am
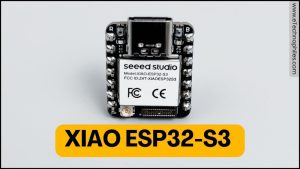
The XIAO ESP32S3 Sense is the smallest ESP32 dev board with an onboard camera. It supports WiFi and BLE 5.0 communication up to 100 meters with a U.FL antenna and can be programmed with Arduino IDE or MicroPython.
Plus, it has efficient power management for longer battery life, including a low-power deep sleep mode with power consumption as low as 14 µA and lithium battery charging management.
You can get this ‘XIAO ESP32-S3 Sense‘ board for $14, which includes the XIAO ESP32S3 board, an OV2640 camera sensor module that has a built-in microphone with SD card support, and an Antenna. Whereas its basic version, ‘XIAO ESP32S3‘, does not support the camera module and is priced at $8.
Table of Contents
What do you get inside the box?
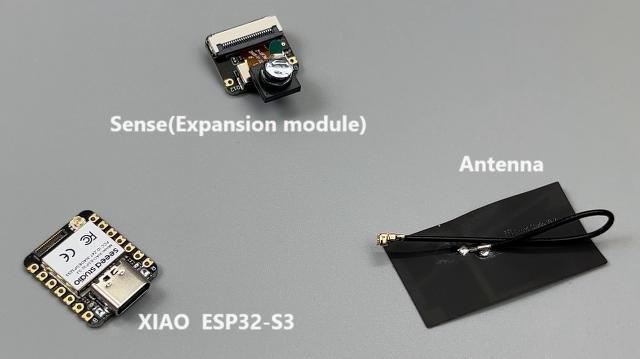
- XIAO ESP32S3 Board
- OV2640 Camera Sensor Module: This is a camera sensor module which includes
- OV2640 Image Sensor
- Built-in microphone
- SD card Slot
- Antenna
XIAO ESP32S3 hardware overview
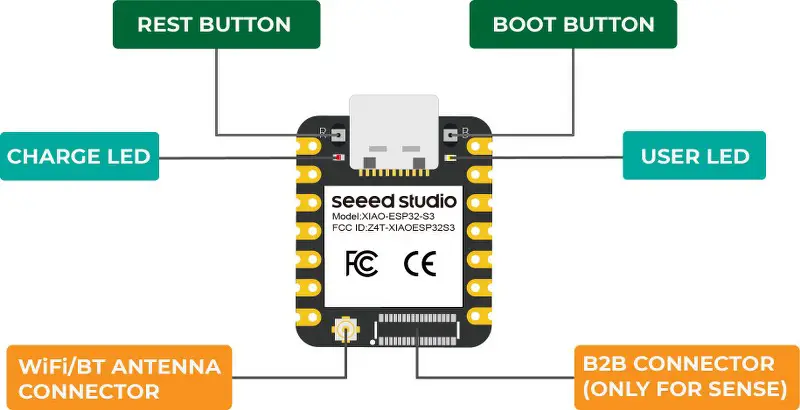
At the center of this board is the main ESP32S3 chip, USB C port for programming and power supply, and B2B connector for the camera module- the OV2640 module is connected here. On the left of the B2B connector is the Antenna connector.
Just like any other ESP32 board, this XIAO board also has 2 push buttons: Reset and Boot. And two LEDs: power LED and programmable or user LED.
To power this board using a standalone Lithium battery(3.7 V), you can connect its terminals at the back side of the board as shown below.
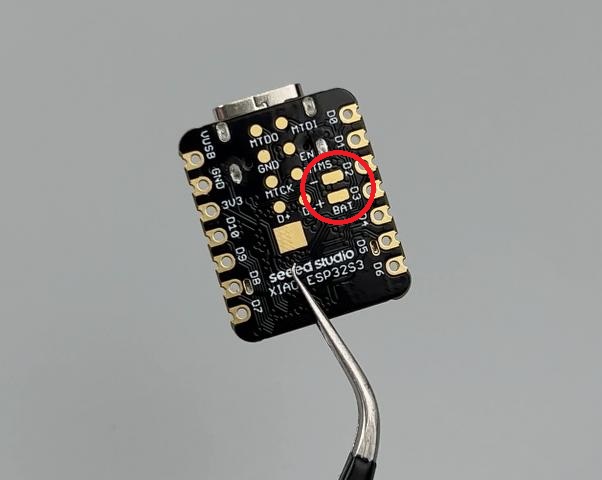
If the battery runs out of energy, there is no need to take it out and charge it separately. Just connect the USB-C cable to the board itself, and it will start charging your battery. There is a built-in charging circuit that takes care of this.
It has a 240 MHz Xtensa 32-bit LX7 dual-core processor, 8MB of PSRAM, and 8MB of Flash memory, enabling WiFi and Bluetooth 5.0 wireless connectivities, deep sleep mode with power consumption as low as 14 A, and lithium battery charging management.
It is the best choice for robotics, smart homes, wireless wearable technology, and the Internet of Things. The XIAO ESP32S3 is created to perform complex multitasking tasks effortlessly.
Specifications
XIAO ESP32S3 Sense has a 32-bit dual-core processor running at up to 240MHz, 8 MB of external PSRAM, and 8MB of Flash with built-in WiFi and Bluetooth.
| Parameter | Description |
|---|---|
| MCU | ESP32-S3R8: Xtensa 32-bit LX7 dual-core processor |
| Flash Memory | 8MB |
| PSRAM(external) | 8MB |
| Clock Frequency | 240 MHz |
| Wireless module | 2.4GHz WiFi BLE: Bluetooth 5.0 |
| GPIO pins | 11 |
| Analog pins | 9 |
| Digital I/O pins | 11 |
| PWM Pins | 11 |
| UART | 1 |
| I2C Peripherals | 1 |
| IIS Peripheral | 1 |
| SPI Peripherals | 1 |
| Operating Voltage | Input voltage (Type-C): 5V Input voltage (BAT): 4.2V |
| Working Temperature | – 40°C ~ 65°C |
| Low Power Consumption Model (Supply Power: 3.8V) | Modem-sleep Model: ~ 25 mA Light-sleep Model: ~ 2mA Deep Sleep Model: ~ 14 μA |
| Wi-Fi Enabled Power Consumption | Active Model: ~ 100 mA |
| BLE Enabled Power Consumption | Active Model: ~ 85 mA |
| Dimensions | 21 mm x 17.5mm |
XIAO ESP32-S3 Pinout
Given below is the pinout of XIAO ESP32-S3.
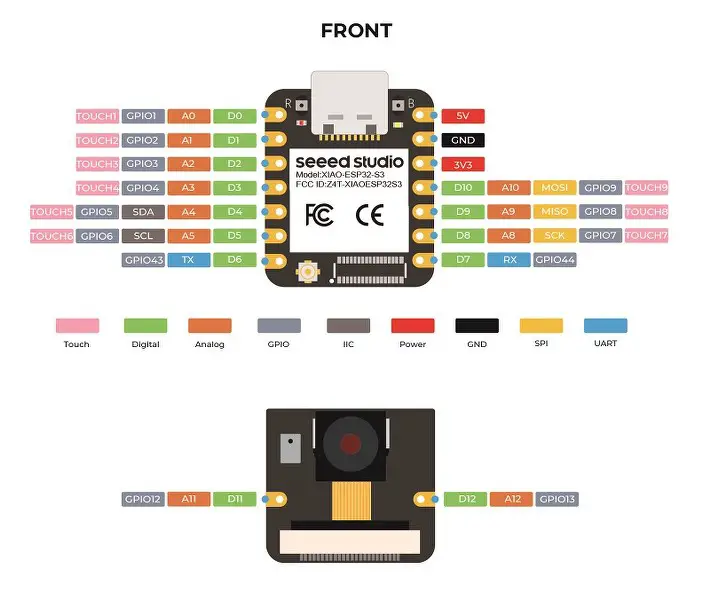
There are a total of 14 pins, out of which 11 are GPIOs and ground, 5V and 3.3V pins- one each.
The board has 11 digital pins(D0-D10) and 9 analog pins(A0-A5 & A8-A10).
| Pin name | Pin number | Description |
|---|---|---|
| Digital Input-Output pins | D0-D10 | 11 digital I/O. |
| Analog Pins | A0-A5, A8-A10 | 9 analog pins. |
| Pulse Width Modulation Pins(PWM) | D0-D10 | All digital pins support Pulse-width Modulation. |
| Serial Communication ( UART) | D6-TX D7-RX | One Serial port is available |
| SPI | A8-SCK A9-MISO A10-MOSI | 1 SPI Peripheral is available |
| I2C | A4-SDA A5-SCL | 1 I2C channel is available |
Getting started/setup
The board does not come with the header pins. So you have to purchase those separately and solder them onto the board. Since all XIAO boards from Seed Studio are breadboard-friendly, this makes circuit prototyping a lot easier.
Software Preparation
Step 1: Download and Install the stable version of Arduino IDE from here.
Step 2: Launch the Arduino IDE.
Step 3: Add the ESP32 board package to your Arduino IDE.
Go to file→ preferences and paste this link inside the additional boards’ manager URL section:
https://raw.githubusercontent.com/espressif/arduino-esp32/gh-pages/package_esp32_index.jsonNavigate to Tools → Boards → Boards Manager, and then type the keyword esp32 in the search box. Select the latest version of esp32 and install it. If you have already installed the ESP32 board library, then just update it to the latest version.
Step 4: Select your board and port.
Connect the XIAO board to your system using a USB-C cable.
Go to Tools → Boards→ ESP32, and look for the XIAO ESP32-S3. Select it and the COM port to which ESP32 is connected.
Blinking LED project
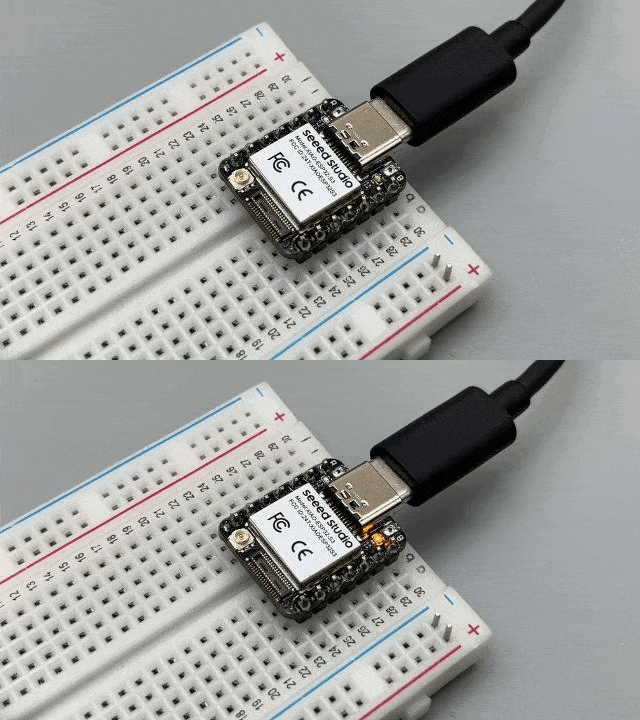
Upload this simple blinking project to your XIAO board.
Please note that the user LED is connected to pin 21 internally, which is unavailable on the header.
If everything goes right, the LED will blink with a 1-second delay.
Troubleshooting the uploading errors
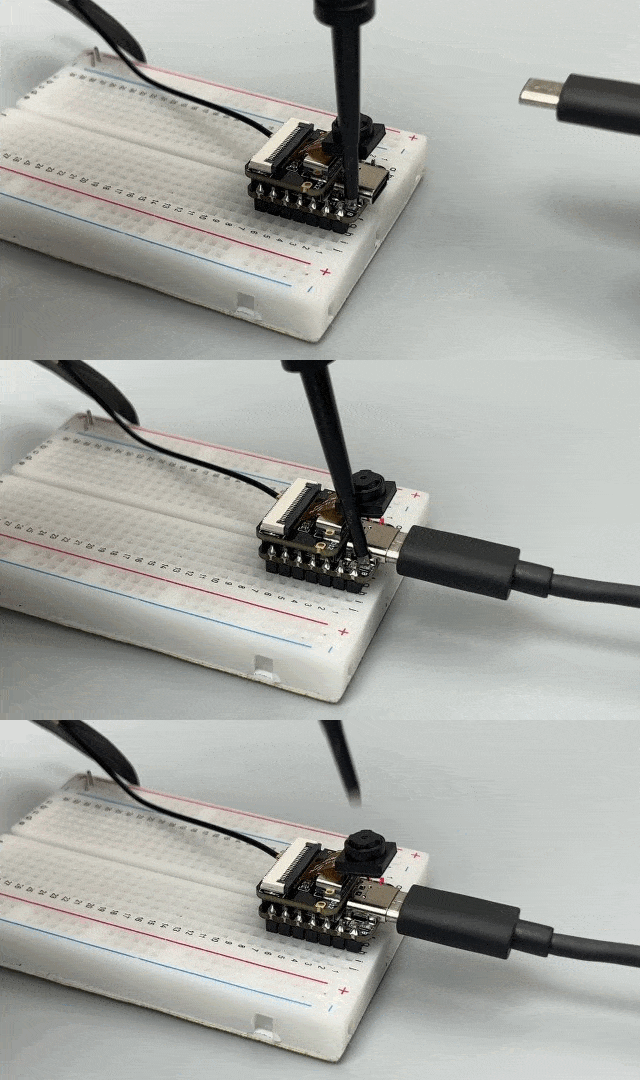
A lot of users are facing this issue while uploading the program. The uploading screen either freezes or displays the upload error. I tried several solutions: pressed both buttons several times, removed the camera, uploaded different programs, etc., with no success.
So, after searching for a while, I got the fix.
Before connecting the cable to the board, press the boot button and release it only when the board is connected to your laptop. This will resolve most of your uploading errors.
Streaming live video test
There is a built-in program for streaming a live video on a web server.
Step 1: Start by connecting the Antenna to the board.
It’s a must, as ESP32 does not connect to WiFi without the Antenna. I uploaded a simple WiFI server sketch and placed it very close to the router. Even then, it didn’t connect. So make sure you have that Antenna connected.
Step 2: Connect the camera module or Sense to the board.
Step 3: In Arduino IDE, go to Files→examples→ESP32→Camera and open the “camera web server” sketch. This sketch requires a couple of changes to work.
- First, select the camera by uncommenting the defined Macro, ‘XAIO ESP32 Camera model‘.
- Then, type the credentials of your WiFi that you want to connect to.
- This example sketch requires a lot of memory, so we have to use the external PSRAM available. To enable PSRAM, go to Tools→ PSRAM. Then select OPI PSRAM. And that’s it. Now click on the upload button and wait for it to finish.
Step 4: After the successful upload, open your serial monitor. Copy the printed IP address on the serial monitor and paste it into your browser.
ESP32 will deliver the camera server page as shown below.
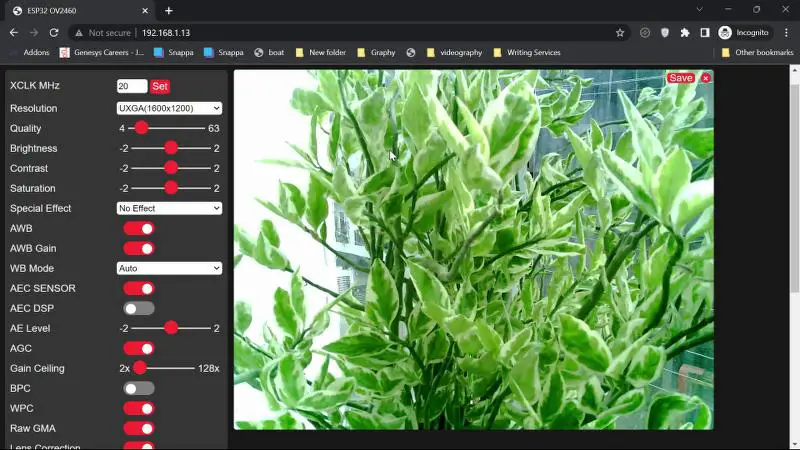
On streaming, the camera works fine. But with the increase in resolution, the frame rate is decreases. I think it gives the best result in HVGA mode.
You can play with other settings as well, such as quality, brightness, and effects. As far as the Face recognition feature is concerned, whenever I tried to use it, the screen froze.
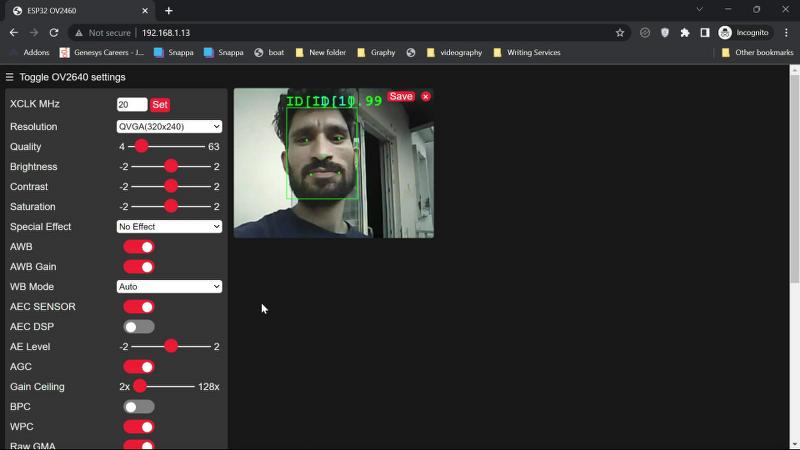
One important thing to note is that the board heats up quickly and reaches a very high temperature. So, streaming a video for a longer period of time can damage the board.
Capturing photos and videos
The OV2640 camera module supports SD cards up to 32GB. But to use it, format it to the FAT32 file system first. Then, insert the SD card into the camera module. You can find the example sketch here:
There’s no use of the Antenna in this project, so you can remove it if you want. Below are the images captured by the board:


The quality of the images and video is not that good, but considering the price and size of this thing, it gets the job done. The maximum resolution it supports is 1600 X 1200.
Recording audio
We can use the built-in microphone on the Sense to record audio and save it on the SD card. Download the example sketch from here.
This program starts recording once the serial monitor is turned ON, records the audio for 20 seconds, and saves it on the SD card. We can change this time inside the code: the maximum limit is 240 seconds or 4 minutes. PSRAM should be enabled for this project as well.
The audio given below is recorded using the board. You can click below to hear it.
Conclusion
The XIAO ESP32S3 is a great option for projects where cost and available space are key considerations. It is capable of handling a variety of applications because of its small size and powerful processing power. However, it lacks internal sensors and may require extra modules for sensing tasks.
What we like about XIAO ESP32-S3
- Compact Design: With dimensions of about 21 x 17.5mm, the XIAO ESP32S3 is the perfect choice for applications with limited space.
- Powerful Processor: It has a dual-core ESP32-S3R8 processor with an Xtensa LX7 CPU that operates at up to 240 MHz, providing a good amount of processing power.
- Memory Capacity: With on-chip 8MB PSRAM and 8MB Flash memory, it provides ample storage space for applications and data.
- Versatile Interfaces: It provides several interfaces, such as UART, IIC, IIS, SPI, GPIOs, ADC, and others, to increase its interoperability with different sensors and peripherals.
- Deep Sleep Mode: It has power-saving settings with incredibly low power requirements, making it appropriate for battery-powered and energy-efficient applications.
What we didn’t like
- Heating Issue during the live stream
- Limited GPIOs
