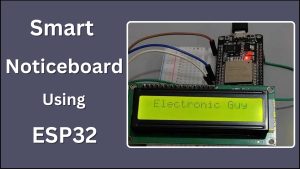
This is a Smart Notice Board built using an ESP32 microcontroller board. It allows users to enter messages into a web interface, which is then displayed on an LCD screen. This combination of hardware and web connectivity enables remote messages to be updated on the LCD.
This project involves creating a digital notice board using an ESP32 microcontroller, which connects to the internet via Wi-Fi. Users can access a dedicated web page to enter the messages they want to display. The ESP32 receives these messages and displays them on a scrolling LCD screen. This idea provides an effective approach to displaying messages digitally, reducing the need for traditional paper notices.
Components Required
- ESP32 Microcontroller Board
- 16×2 LCD With I2C Module

Circuit Diagram
This is a circuit diagram of ‘Smart Noticeboard‘ using ESP32.

| LCD16x2 I2C Pin | ESP32 Pin |
| VCC | 3V3 Pin |
| GND | GND of ESP32 |
| SDA | GPIO21 |
| SCL | GPIO22 |
Physical Connections
This is a physical connection diagram. We used a breadboard to connect the LCD 16×2 I2C with ESP32.

Program for Smart noticeboard
#include <WiFi.h>
#include <Wire.h>
#include <AsyncTCP.h>
#include <ESPAsyncWebServer.h>
#include <LiquidCrystal_I2C.h>
LiquidCrystal_I2C lcd(0x27,16,2);

AsyncWebServer server(80);

const char* ssid = "SSID";  //wifi ssid
const char* password = "PASSWORD";   //wifi password

const char* PARAM_INPUT_1 = "input1";

const char index_html[] PROGMEM = R"rawliteral(
<!DOCTYPE HTML><html><head>
  <title>Smart Notice Board</title>
  <meta name="viewport" content="width=device-width, initial-scale=5">
<p> <font size="9" face="sans-serif"> <marquee> Smart Notice Board </marquee> </font> </p>
  </head><body><center>
  <form action="/get">
    Enter Text to Display: <input type="text" name="input1">
    <input type="submit" value="Send">
  </form><br>

</center></body></html>)rawliteral";

void notFound(AsyncWebServerRequest *request) {
  request->send(404, "text/plain", "Not found");
}

void setup() {
  Serial.begin(115200);
  lcd.init();
  lcd.clear();
  lcd.backlight();
   lcd.setCursor(0, 0);
   lcd.print("Smart Notice Board");
  WiFi.mode(WIFI_STA);
  WiFi.begin(ssid, password);
  if (WiFi.waitForConnectResult() != WL_CONNECTED) {
    Serial.println("WiFi Failed!");
    return;
  }
  Serial.println();
  Serial.print("IP Address: ");
  Serial.println(WiFi.localIP());

  server.on("/", HTTP_GET, [](AsyncWebServerRequest *request){
    request->send_P(200, "text/html", index_html);
  });

  server.on("/get", HTTP_GET, [] (AsyncWebServerRequest *request) {
    String message;
    String inputParam;
    if (request->hasParam(PARAM_INPUT_1)) {
      message = request->getParam(PARAM_INPUT_1)->value();
      inputParam = PARAM_INPUT_1;
       lcd.clear();
       lcd.setCursor(0,0);

      lcd.print(message);
    }
    else {
      message = "No message sent";
      inputParam = "none";
    }
    Serial.println(message);

  request->send(200, "text/html", index_html);
  });
  server.onNotFound(notFound);
  server.begin();
}

void loop() {
    for (int positionCounter = 0; positionCounter < 29; positionCounter++) {
    lcd.scrollDisplayLeft();
    delay(500);
  }
}
Program Explanation
Library and Display Setup:
#include <WiFi.h>
#include <Wire.h>
#include <AsyncTCP.h>
#include <ESPAsyncWebServer.h>
#include <LiquidCrystal_I2C.h>
These lines include necessary libraries for Wi-Fi, communication, networking, and controlling the LCD display.
LiquidCrystal_I2C lcd(0x27,16,2);This initializes an LiquidCrystal_I2C object named lcd. It specifies the I2C address (0x27) and the LCD’s dimensions (16×2).
Server and Wi-Fi Configuration:
AsyncWebServer server(80);
const char* ssid = "SSID";  // Wi-Fi SSID
const char* password = "PASSWORD";  // Wi-Fi password
Here, an AsyncWebServer object named server is created to handle web server functionality on port 80. The ssid and password variables store the Wi-Fi network credentials.
const char* PARAM_INPUT_1 = "input1";This creates a constant variable PARAM_INPUT_1 that will be used later.
HTML Template:
const char index_html[] PROGMEM = R"rawliteral(
<!DOCTYPE HTML>
<html>
<head>
  <title>Smart Notice Board</title>
  <meta name="viewport" content="width=device-width, initial-scale=5">
</head>
<body>
  <p>
    <font size="9" face="sans-serif">
      <marquee>Smart Notice Board</marquee>
    </font>
  </p>
  <center>
    <form action="/get">
      Enter Text to Display: <input type="text" name="input1">
      <input type="submit" value="Send">
    </form><br>
  </center>
</body>
</html>
)rawliteral";
This defines an HTML template named index_html. It creates a web page with a form where users can enter text to display on the notice board. The page includes a title and some basic styling.
Error Handling:
void notFound(AsyncWebServerRequest *request) {
  request->send(404, "text/plain", "Not found");
}
The notFound function is used to handle 404 (Not Found) errors that occur when the server is unable to locate a requested resource.
Setup Function:
void setup() {
  Serial.begin(115200); // Start serial communication for debugging
  lcd.init(); // Initialize the LCD
  lcd.clear(); // Clear the LCD
  lcd.backlight(); // Turn on the LCD backlight
  lcd.setCursor(0, 0); // Set the LCD cursor position
  lcd.print("Smart Notice Board"); // Display "Smart Notice Board" on the LCD
  WiFi.mode(WIFI_STA); // Set Wi-Fi mode to station (client)
  WiFi.begin(ssid, password); // Connect to the specified Wi-Fi network

  // Check if Wi-Fi connection was successful
  if (WiFi.waitForConnectResult() != WL_CONNECTED) {
    Serial.println("WiFi Failed!");
    return;
  }
  Serial.println();
  Serial.print("IP Address: ");
  Serial.println(WiFi.localIP()); // Print the ESP32's IP address

  // Configure server routes for handling web requests
  server.on("/", HTTP_GET, [](AsyncWebServerRequest *request){
    request->send_P(200, "text/html", index_html);
  });

  server.on("/get", HTTP_GET, [] (AsyncWebServerRequest *request) {
    // Handle user input and update the LCD
    String message;
    String inputParam;
    if (request->hasParam(PARAM_INPUT_1)) {
      message = request->getParam(PARAM_INPUT_1)->value();
      inputParam = PARAM_INPUT_1;
      lcd.clear();
      lcd.setCursor(0,0);
      lcd.print(message);
    }
    else {
      message = "No message sent";
      inputParam = "none";
    }
    Serial.println(message);

    // Send a response back to the user
    request->send(200, "text/html", index_html);
  });

  server.onNotFound(notFound); // Handle 404 errors
  server.begin(); // Start the server
}
The setup function is where the program’s basic initialization occurs:
- Serial communication is started for debugging purposes.
- The LCD is reset, cleared, and the backlight is activated. On the LCD, the statement “Smart Notice Board” is shown.
- The ESP32 is set up to connect to the selected Wi-Fi network. If the connection fails, the message “WiFi Failed!” is printed.
- Server routes are defined to handle different web requests:
- The root (“/”) route serves the index_html template when users visit the root URL (“/”).
- The “/get” route handles user input and updates the LCD display accordingly.
- The notFound function is configured to handle 404 errors when requested resources are not found.
- The server is started with server.begin().
Loop Function:
void loop() {
  for (int positionCounter = 0; positionCounter < 29; positionCounter++) {
    lcd.scrollDisplayLeft(); // Scroll the text on the LCD to the left
    delay(500); // Delay for half a second between scrolls
  }
}
In the loop function, the code continuously scrolls the text on the LCD to the left for visibility. It shifts the displayed text to one position left and then introduces a delay of 500 milliseconds between scrolls.
Conclusion
In summary, the Smart Notice Board project makes use of the ESP32 microcontroller to enable remote message display on a scrolling LCD display. It gives a modern and effective alternative for sharing information without the need for traditional notice boards.