Last updated on March 23rd, 2024 at 01:32 pm
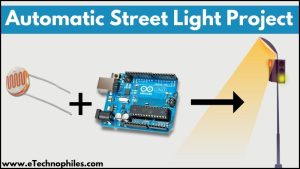
In this project, we will build an automatic Street light that remains OFF in daylight but turns ON during the night. This automatic street light controller project uses an LDR(Light Dependent Resistor) with Arduino.
Watch the video tutorial below:
Table of Contents
What is an Automatic Street light?
You must have seen these self-controlled lights on the side of a road. We do not have to manually turn the street lights on and off as they turn on and off all by themselves according to the intensity of the surrounding light.
So this project is all about building a small version of such an Automatic street light project using LDR and Arduino.
Components list
- LDR
- Arduino UNO
- SPDT Relay 12volt
- Bulb
- BC547 Transistor
- 1o Kohm potentiometer
- Connecting wires
Circuit diagram

Arduino code
int x;  //corresponding digital value at LDR's terminal connected to pin10
void setup() {

  pinMode(10, INPUT);  // LDR is connected to this pin
  pinMode(8, OUTPUT);  // Base of the transistor is connected to this pin through a 1k ohm resistor
  Serial.begin(9600);
}

void loop() {

  x = digitalRead(10);
  Serial.println(x);
  delay(1000);

  if (x == 0) {
    digitalWrite(8, HIGH);  // if digital value is 0 i.e, Dark, Bulb turns ON
  } else {
    digitalWrite(8, LOW);  //if digital value is 1 i.e, Daylight, Bulb turns OFF
  }
}
**Explanation of the code is in the comments itself.
Working
Case 1: When the light intensity is low

1. When the intensity of light that falls on the LDR is less, the resistance of the LDR is high, and this causes more voltage to drop across the LDR. This implies that less voltage drop is obtained across the potentiometer’s terminal connected to input pin 10 and Ground. Hence 0 is obtained on the Serial Monitor in this case.
2. As written in the program, when this happens i.e. x==0, Digital pin 8 should be high or 1.
3. Since this pin is connected to the base of the BC547 transistor through a 1k ohm resistor, it is turned on.
4. As soon as this happens, current starts flowing through the Vin pin of Arduino to the actuating coil of the Relay to the collector and then the emitter of the transistor to the Gnd finally.
5. Due to this flow of current through a relay, Normally open contact becomes closed, and current starts flowing through the Bulb.
Case 2: When the light intensity is high

1. When the intensity of light that falls on the LDR is higher, the Resistance of the LDR is less and this causes less voltage drop across the LDR. This implies that more voltage drop is obtained across the potentiometer’s terminal connected to input pin 10 and Ground. Hence 1 is obtained on Serial Monitor in this case.
2. As written in the program, when this happens i.e, x==1, Digital pin 8 should be LOW or 0.
3. Since this pin is connected to the base of the BC547 transistor through a 1k ohm resistor, it remains off.
4. As soon as this happens, current stops flowing through the Vin pin of Arduino to the Gnd finally.
5. Due to this, Normally open contact remains as it is and current does not flow through the Bulb.
Hii my grp want to customise a project including this project with solar street light control.
Please how much it will cost