Last updated on March 23rd, 2024 at 12:37 pm
ESP8266 is a low-cost SOC (system-on-chip) developed by Espressif microsystems. The unique feature of ESP8266 is that it lets you connect to a 2.4GHz Wi-Fi network, using IEEE 802.11 b/g/n.
Due to this feature, it finds applications in numerous IoT devices. Although it’s been a while since the ESP8266 made its debut, it is still popular among project makers. This article presents some new ESP8266 project ideas for those enthusiasts.
Table of Contents
3D printed Nanoleaf project

This project is a homemade version of the Nanoleaf light panels. It uses 12V WS2811 LEDs housed in triangular Acrylic sheets to give a stylish glow to your walls. To control the brightness and saturation of each lit panel, you can opt either/both ways:
- Amazon Alexa voice assistant
- Philip’s Hue Smart lighting system
You can also integrate it into other services like IFTT’s routines.
**To know more about the project, follow this link:
Magnetic smart door lock
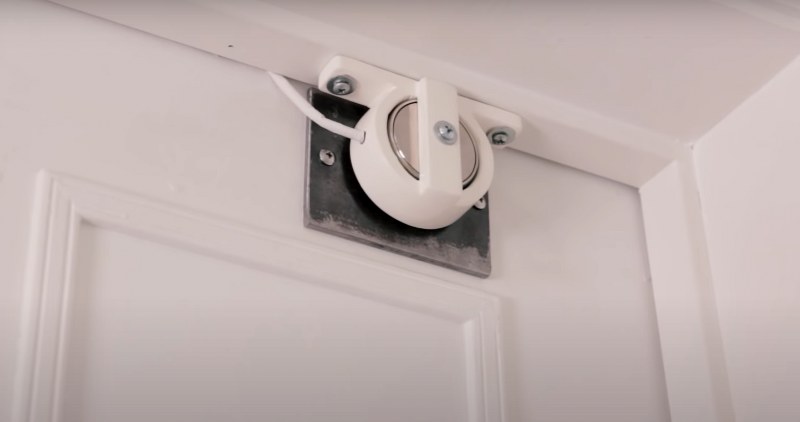
This ESP8266 project idea guides you to make a smart lock for your room or office. There are three ways to open this door:
- Using an IR sensor
- Using a Web app
- Using a Secret knock on the door
The piezo transducer detects the vibrations on the door. As any person knocks on the door in the same manner as stored in the secret code, the door opens, else it remains closed.
**To know more about the project, follow this link:
Humanoid robot
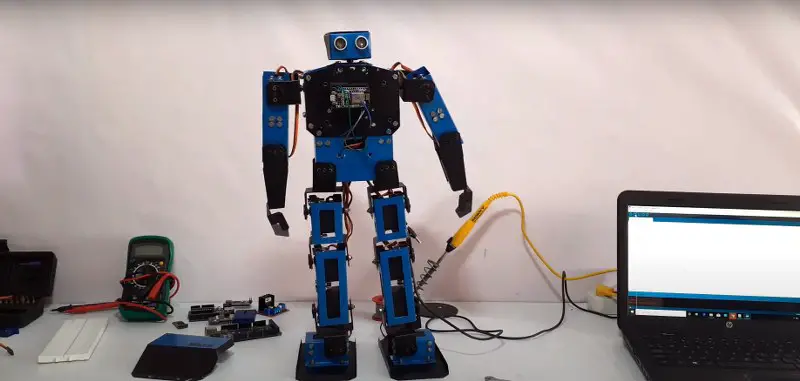
A humanoid robot resembles the shape of a human body and is used in research, education, healthcare, entertainment, and more.
The humanoid robot made in this project will provide you with a deep insight into the robotics field. The robot performs some advanced movements like saying hi, shaking hands, doing a bow, etc., in addition to walking and sitting.
**To know more about the project, follow this link:
Modding Wireless Doorbell

When someone rings the doorbell, sometimes we are too far away from our door to reach there. Or, we are busy doing some regular household work. In that case, wouldn’t it be easy that somehow we could notify the person with a message without actually going there?
This project can solve the above problem for you. As the doorbell rings, the ESP8266 gets triggered and sends a message to the HyperPixel display attached to the main door.
**To know more about the project, follow this link:
Home Automation
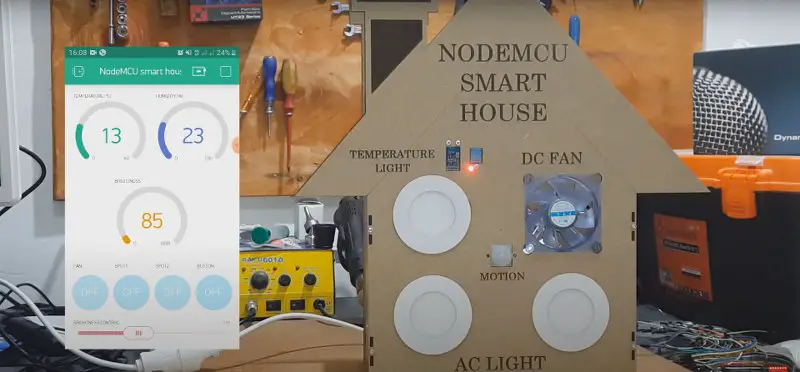
As the name suggests, this ESP8266 project lets you smartly manage your home appliances. With the Blynk app, you can remotely turn a light, fan, or other electrical devices ON/OFF. Even you can also adjust the speed of the fan using a slider in the app.
The temperature sensor regularly monitors the ambient temperature and controls the status of the fan/AC. The PIR sensor check for any movements and alerts if an intruder tries to enter the house.
**To know more about the project, follow this link:
Smartphone-controlled model railroad

If you are obsessed with remote control toys, then you must give this project a try. It is a smartphone-controlled railway model that uses an ESP8266. The Web interface lets you control the basic movements of the locomotive:
- Speed: Using this slider, you can accelerate/decelerate the locomotive’s speed.
- Direction: Two buttons, i.e., forward and reverse, are used to alter how the locomotive is heading.
You can even select/switch between the multiple tracks for the locomotive.
**To know more about the project, follow this link:
Smartphone controlled railroad
Weather Station

It is one of the simplest ESP8266 project ideas present in our ESP8266 projects list. All you need is an ESP8266 dev board and an OLED screen. Once you set the location in the code, the ESP regularly checks and updates the weather, temperature, and humidity and updates the info on the OLED screen.
The weather station takes only a tiny portion of your office/study table. It omits the requirement of the phone for the weather update. Thus, you can focus on your work.
**To know more about the project, follow this link:
Voice-controlled robot

This project uses Google Assistant, Adafruit IO, and the IFTTT platform to control the robot via voice. The work of this project may seem complex, but it is simple.
After saying one of the configured commands in the Google Voice Assistant app, these commands are translated into a message and transmitted to Adafruit IO. The robot then receives these commands and follows the particular instructions.
**To know more about the project, follow this link:
Deauther Watch
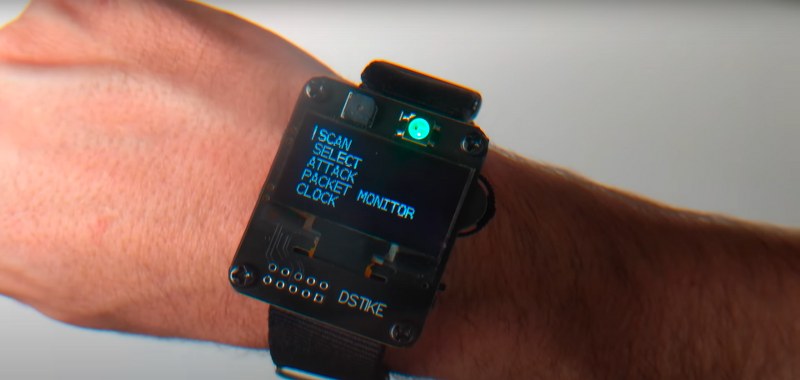
A Deauther watch is a smartwatch with more advanced and cool functions. The purpose of this project is to add educational value among the creators. It should/must not be used to intrude/access unknown networks. Using this watch, you can select two types of attack:
- Deauth
In a nutshell, a deauth attack closes the access to your Wi-Fi. To start a Deauth attack, first, you have to select an APN station. After selecting, launch the attack, and boom. You can now no longer connect to that Wi-Fi network.
- Beacon
A beacon attack creates new access points. As you launch this attack, you will notice some newly created Wi-Fi access points. You can easily modify the names under network SSIDs.
**To know more about the project, follow this link:
Wi-Fi controlled robot
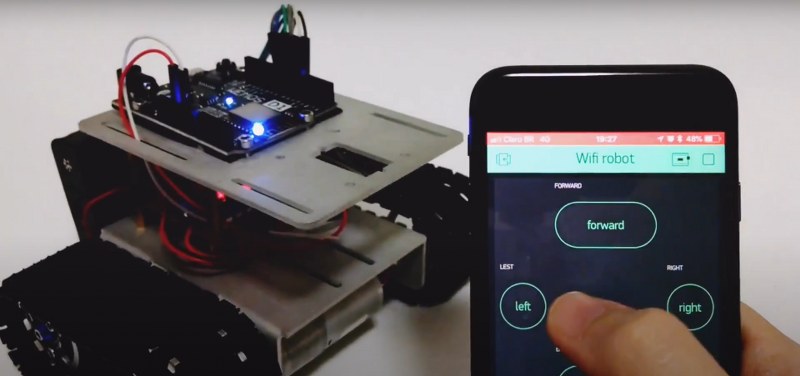
It is easy and creative among the above ESP8266 project ideas. There are four ways to control this robot using the same Blynk app:
- Using Button control: This interface consists of four buttons to control the robot. Forward, backward, left, and right.
- Using Slider control: It consists of two sliders. Each slider controls the movement of two motors. The left slider powers only the motors present on the left side. The right slider powers the motors on the right.
- Using the accelerometer: In this method, the robot moves according to the phone’s orientation. The acceleration/deceleration in a particular direction varies as per the degree of tilting.
- Using the joystick: It is the most common way to control a robot. The joystick moves freely in any direction, thus moving the robot.
**To know more about the project, follow this link:
Stepper motor control
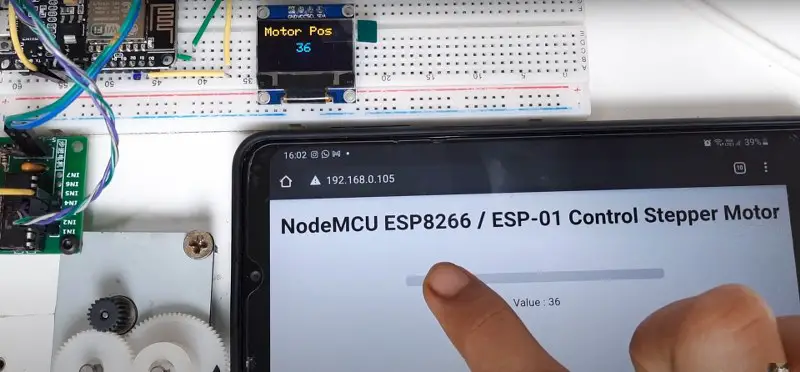
A stepper motor always finds its application in precise positioning-related applications. Although these motors can’t run at high speed, they have a high holding torque.
On starting up the setup, an OLED screen on the breadboard displays the IP address of the connected ESP module. A slider on the Web interface lets you give a precise positioning of the stepper motor.
So, if you are a beginner and looking for an easy project in this ESP8266 project ideas list, then this one is for you.
**To know more about the project, follow this link:
Smartphone controlled tank

This tank is a bit different from the above-discussed tanks. Instead of a metal or plastic chassis, it uses a chassis made of cardboard and ice-cream sticks.
But wait, before you judge this tank on its appearance, we must tell you that this tank is equipped with a shooting mechanism.
One DC motor controls the shooting mechanism, while two separate DC motors control the tank movement. Using the ESP8266, you can control the tank on a Web interface on your smartphone.
**To know more about the project, follow this link:
The alternate version of the model

The alternate version of this project uses homemade steering to control the tank movement. This feature gives you a better experience in driving the tank. Also, this version of the tank shoots fireballs instead of the regular shells. Sounds interesting, right?
**To know more about the project, follow this link:
So, we hope you liked our selected ESP8266 project ideas. The projects were a mixture of beginner, intermediate and advanced ideas. If this blog helped in picking the perfect project for you, drop a comment below in the comment section.

