Last updated on March 22nd, 2024 at 05:59 pm
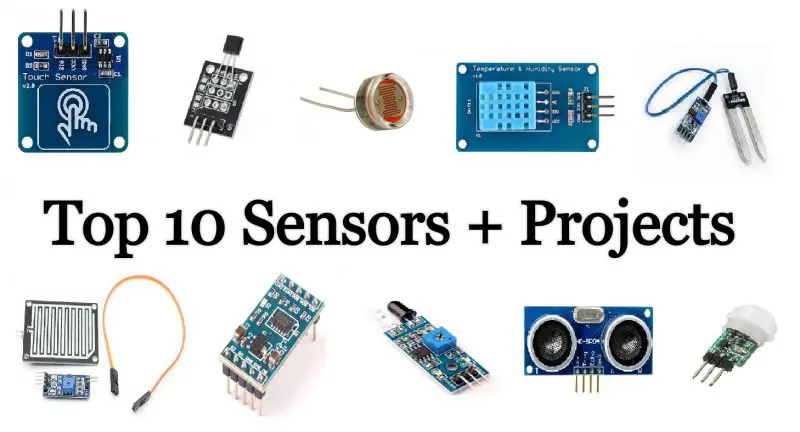
Are you a beginner and want to work on different sensors, but don’t know how to start? Here is the list of 15 Arduino Sensors with Projects for you to get started.
In this post, we have listed the most popular and widely used sensors plus one or more projects based on each sensor. Before you go through the post, I want you to know that the projects listed below are selected very carefully by keeping in mind every aspect.
Sensors list
NOTE: Please keep in mind that each Arduino-Sensor project listed below is selected based on creativity and application. And not merely based on the complexity involved. So when you go through these projects, just try to grasp the idea behind these sensor applications and write down how you can use them in your project.
The link to each project is given below the respective project’s summary.
Just try out these sensors to unleash that creative engineer within you!
LM393 speed sensor

LM393 is a speed sensor module used for measuring the speed of the motor, pulse count, etc.
Project: 5V geared motor speed measurement

Our goal here is to regulate the speed of a 5V geared motor. This is an innovative project that allows you to make a speed regulator at home using an Arduino Uno and a speed sensor.
The speed sensor detects the change in the value of the 10K pot and varies the speed accordingly. Now you don’t need to worry about the low speed of the fan interrupting your NETFLIX experience.
Components list
- Arduino Uno
- LM393 Speed Sensor Module
- 5V geared motor with encoder wheel
- PCB and breadboard
- Cables and connectors
- 16×2 LCD
- 10K POT
The link to the project is given below-
Touch Sensor

About Touch Sensor: Unlike pushbuttons, a touch sensor is activated due to physical contact. It is highly sensitive and can sense different touch modes i.e. single tapping, long touch, and swipe, etc.
Project: Touch Dimmer circuit using Arduino

Objective: In this project, the brightness of a small bulb is controlled using a touch sensor. The longer the touch time, the brighter the bulb glows. So the brightness of the bulb is adjusted per the touch time.
Components Used:
- Arduino Board x 1
- Touch Sensor
- 2N2222 NPN Transistor
- 1 Kohm Resistor
- Small Bulb
- Power Supply
- Breadboard for connections
- Connecting Wires
The link to the project site is given below:
TCS-3200 Color Sensor

The TCS3200 Color Sensor Module has a high-quality light sensor that allows the sensor to sense any color through a combination of Red, Green, and Blue.
Project: Color detection using TCS-3200 and LCD

This project allows you to detect the color of something without even looking at it. When we place a colored sheet in front of the sensor, it detects the color and flashes it on the 16×2 LCD.
This project can come in handy for blind or color-blind people or save your relationship when she asks you to pick up the perfect shade of Lipstick.
The project link is given below-
Color detection using TCS-3200
MQ-2 Gas Sensor

MQ-2 Gas sensor or detector senses the concentration of gases such as LPG, hydrogen, alcohol, propane, methane, smoke, and carbon monoxide in the air.
Project: Alcohol detector using MQ-2 with Arduino and LCD

With this project you can make your handy alcohol detector at home and save yourself when your drunk friend insists on driving, claiming that he is not drunk.
An alcohol detector detects the presence of alcohol present in its surrounding atmosphere and sends a signal to flash a warning message on the 16×2 LCD and set out the alarming buzzer. Congratulations! Now you are a traffic cop (almost)!
The project link is given below-
Temperature Sensor LM35

About LM35 temperature sensor: LM35 is one of the popular temperature ICs. It is used to measure the surrounding temperature in the form of the analog voltage.
Project: Temperature measurement using LM35

Objective: To measure and display the temperature of surroundings using an LM35 temperature sensor and display the readings on the LCD.
LM35 measures the temperature and sends this in the form of analog voltage to Arduino. This temperature value is then displayed on the LCD.
Components used:
- 1 x Arduino UNO (can be any Arduino board)
- 1 x 16×2 LCD
- 1 x LM35 Temperature Sensor
- 1 x Breadboard
- 1 x USB Cable
- 1 x 10k Potentiometer
- 1 x 220-ohm resistor
- 1 x 9V Battery and clip (optional, for more portability)
Link to the project site is given below:
Light-dependent resistor(LDR)

About LDR: LDR or Light Dependent Resistor changes its resistance according to the intensity of light that falls on it. The resistance value is inversely proportional to the intensity of light.
Project 1: Using LDR to control the ON/OFF status of a bulb.

Objective: To control the state of a bulb using LDR and Relay with Arduino.
As soon as the intensity of light decreases below a certain value, the status of the bulb changes from OFF to ON.
Components you need for this project are:
- Arduino Uno
- LDR
- SPDT Relay
- Connecting Wires
Link to the project site is given below:
Project 2: Suntracker using 4 LDR with Arduino

Objective: To build an Arduino Servo-controlled mechanism that follows the sun as it moves in the horizon.
Solar Panels can be attached to the front so that maximum sunlight gets absorbed by them at any instant. Since Arduino-Sunflower acts like a real Sunflower in the presence of sunlight, it is called an electronic Sundancer!
This project was posted by Elecrow on Instructables.com
Components you need for this project are:
- Arduino Board
- LDR(Light dependent resistors) X 4
- Connecting Wires
- Linear Potentiometer X 4
- Base Shield For Arduino
- Cardboard
- Foamboard
- Stick
- Servo Motor
Link to the project site is given below:
Humidity plus Temperature Sensor Module

About this sensor: This sensor module measures the humidity and temperature of the surroundings.
Project: Humidity and Temperature measurement

Objective: To measure the humidity and temperature of surroundings using a Humidity sensor with Arduino and then print the value on an LCD.
Components used:
- Arduino Uno
- DHT11 Humidity and Temperature Sensor Module
- 16×2 LCD
- 10k Ohm potentiometer
- 5kohm resistor
- Power supply
- Breadboard for connection
- Connecting Wires
Link to the project site is given below:
Water Flow Sensor

Water flow sensors are used in pipes to measure the rate of flow of water and to calculate the volume of water flowing through the pipe.
Project: Water flow and volume measurement

This project demonstrates a smart way to monitor the flow of water. The water flow sensor detects the rate of flow of water and keeps track of the total amount of water that has flowed through it. You can check the values on the LCD screen.
The project link is given below-
Moisture Sensor

About Moisture sensor: Moisture sensor detects the level of moisture present in surroundings and hence commonly used in plant Irrigation type projects.
Project: Sensing Soil Moisture amount

Objective: To measure the soil moisture content and print it on the Serial Monitor of Arduino IDE.
Components you need for this project are:
- Arduino Uno
- Moisture Sensor
- Breadboard for connections
- Connecting wires
Link to the project page is given below:
Water / Rain / Liquid Sensor Module

About: Rain Sensor senses the droplets of water on its detector plate.
Project: Arduino Rain Water Alarm
Objective: To detect the water droplets by Blinking an LED and a buzzer.
Components you need for this project are:
- Arduino Uno
- Rain Sensor
- Buzzer
- LED
Link to the project site is given below:
Accelerometer Sensor

About the accelerometer sensor: The Accelerometer measures the acceleration in one to three axis and thus can be used to sense tilt movements.
Project: Accelerometer-based gesture-controlled Robot using Arduino.
Objective: To build an accelerometer-based gesture-controlled robot using Arduino.
Components you need for this project are:
- Arduino UNO
- Accelerometer
- DC Motors
- HT12D
- HT12E
- L293d Motor Driver
- RF Module
- 9v Battery
- Robot Chasis
- Connecting Wires
Link to the project site is given below:
IR Infrared Obstacle Avoidance Sensor Module

About IR Sensor: IR or Infrared Sensor uses infrared waves to detect the presence of an object or white/black surface.
PROJECT 1: IR Sensor-based Line Follower

Objective: To build a Line Follower Robot using two IR sensors with Arduino.
Components you need for this project are:
- Arduino UNO
- Motor Driver L293D
- Geared DC Motors
- IR Sensor Module x 2
- Power Supply
- Connecting Wires
Link to the project site is given below:
PROJECT 2: IR Sensor-based Motion Sensing-Alarm
Objective: To build a motion-sensing alarm with Arduino and IR sensors.
Components you need for this project are:
- Arduino Board
- Buzzer
- 470 Ohm Resistor
- IR Sensor Module x 2
- Power Supply
- NPN transistor
- Pushbutton
- Connecting Wires
Link to the project site is given below:
IR Sensor-based Motion Sensor Alarm
Ultrasonic Sensor (HC-SR04)

About: HC-SR04 Ultrasonic Sensor is a simple ultrasonic sensor that can measure distance up to 400 cm. The sensor has 4 onboard pins that connect to a microcontroller like Arduino.d Waves.
PROJECT 1: Door Alarm using Ultrasonic Sensor
Objective: To build a Door Alarm using an Ultrasonic Sensor with Arduino.
Components you need for this project are:
- Arduino Board
- Buzzer
- HC-SR04 Ultrasonic Sensor
- Breadboard for connection
- Connecting Wires
Link to the video source is given below:
PROJECT 2: Distance Measurement using Ultrasonic Sensor and Arduino.
Objective: To measure the distance of nearby objects using an ultrasonic sensor and Arduino.
Components you need for this project are:
- Arduino Board
- LCD Display
- HC-SR04 Ultrasonic Sensor
- Breadboard for connection
- Connecting Wires
The link to the video source is given below:
Measuring Distance using HC-SR04 Sensor
PROJECT 3: Arduino-Based Smart Blind Stick
Objective: To make a circuit using an Ultrasonic sensor and Arduino which indicates the object in front by producing a beep sound.
This circuit can act as a smart blind stick if fitted onto a stick. The frequency of the beep sound increases as the stick comes closer and closer to the obstacle. Also, the Circuit has an LDR to sense the light intensity and an RF remote to locate the Stick remotely.
The ultrasonic sensor is the heart of this Arduino-based Alarm stick. It senses the distance from the obstacle and sends this data to Arduino. Arduino further processes this data and thus determines the frequency with which the buzzer produces sound.
Components you need for this project are:
- Arduino Board
- Ultrasonic Sensor HC-SR04
- Buzzer and LED
- Voltage Regulator L7805
- LDR
- 433 MHz transmitter and receiver
- Perf Board
- Push button
- Battery(9 Volt)
Link to the project site is given below:
HC-SR501 Pyroelectric Infrared Sensor Module

About: Pyroelectric Infrared Sensor or PIR Sensor senses the heat energy emitted by a human body in the form of Infrared Radiation.
PROJECT: Using a PIR sensor with Arduino to Control home appliances.
Objective: To interface a PIR Sensor with Arduino and then control(ON/OFF) home appliances
Components you need for this project are:
- Arduino Board
- HC-SR501
- 2 Channel Relay Module
- A.C Appliance
Link to the project Site is given below: